Weeknight Grilling: Charcoal Grilled Skirt Steak

This past weekend, we had the pleasure of celebrating a wonderful housewarming party given by two of my favorite folks! Congrats MrC and TammyC, we had a great time. While doing some serious munching TammyC asked me, "how come it seems like you don't cook much anymore?" I had to laugh, and I explained that I've just been doing a lot of the same stir fry, and have made a few dishes that we had in China, but am waiting until after I do my post on China before publishing them. Anyway, I thought I'd do a post on what we had for dinner tonight. The Missus wanted skirt steak, AKA "harami" or "arrachera". You'd be hard pressed to beat the wonderful flavor of grilled skirt steak. You really don't need to do much to it……. and it's pretty quick. Even grilling on charcoal (a combo of hardwood & mesquite), along with a couple of ears of corn, some eggplant, zucchini,sliced onions and green bell peppers, and making a chipotle-tomatillo salsa took only a shade more than an hour total.

GrilledSkirtSteak01 
This is not a recipe…. I mean, can I call meat plus four ingredients a recipe????

GrilledSkirtSteak02
Anyhow, I used  Rick Bayless's recipe from his book Authentic Mexican as my source, only adding some Mexican Oregano.

There are just a couple of key points. After grilling, remember to let the meat rest a few minutes to let the juices redistribute. Shirt steak will be a tough cut, unless you slice it across the grain in 1/4" to 1/3" slices. Don't do that, and you might as well eat shoe leather. Skirt steaks are pretty thin so it's over direct heat all the way…..

GrilledSkirtSteak03
So what's the recipe???

Not much really. 1 1/2 lb shirt steak, seasoned with sea salt, pepper, and a pinch of crumbled Mexican Oregano. Grilled 'til medium rare.

Really…… that's it!

GrilledSkirtSteak04
GrilledSkirtSteak05

I'm figuring this'll be good in tortillas, maybe as fajitas, in a sandwich perhaps….. or on top of rice.

And now it gives me no excuse for not grilling on a weeknight. Heck, if I had a gas grill, it would be even quicker…..

Stir Fried Bittermelon first with Lily Bulb (Baihe), then with Ginko Nuts (Bai Guo)

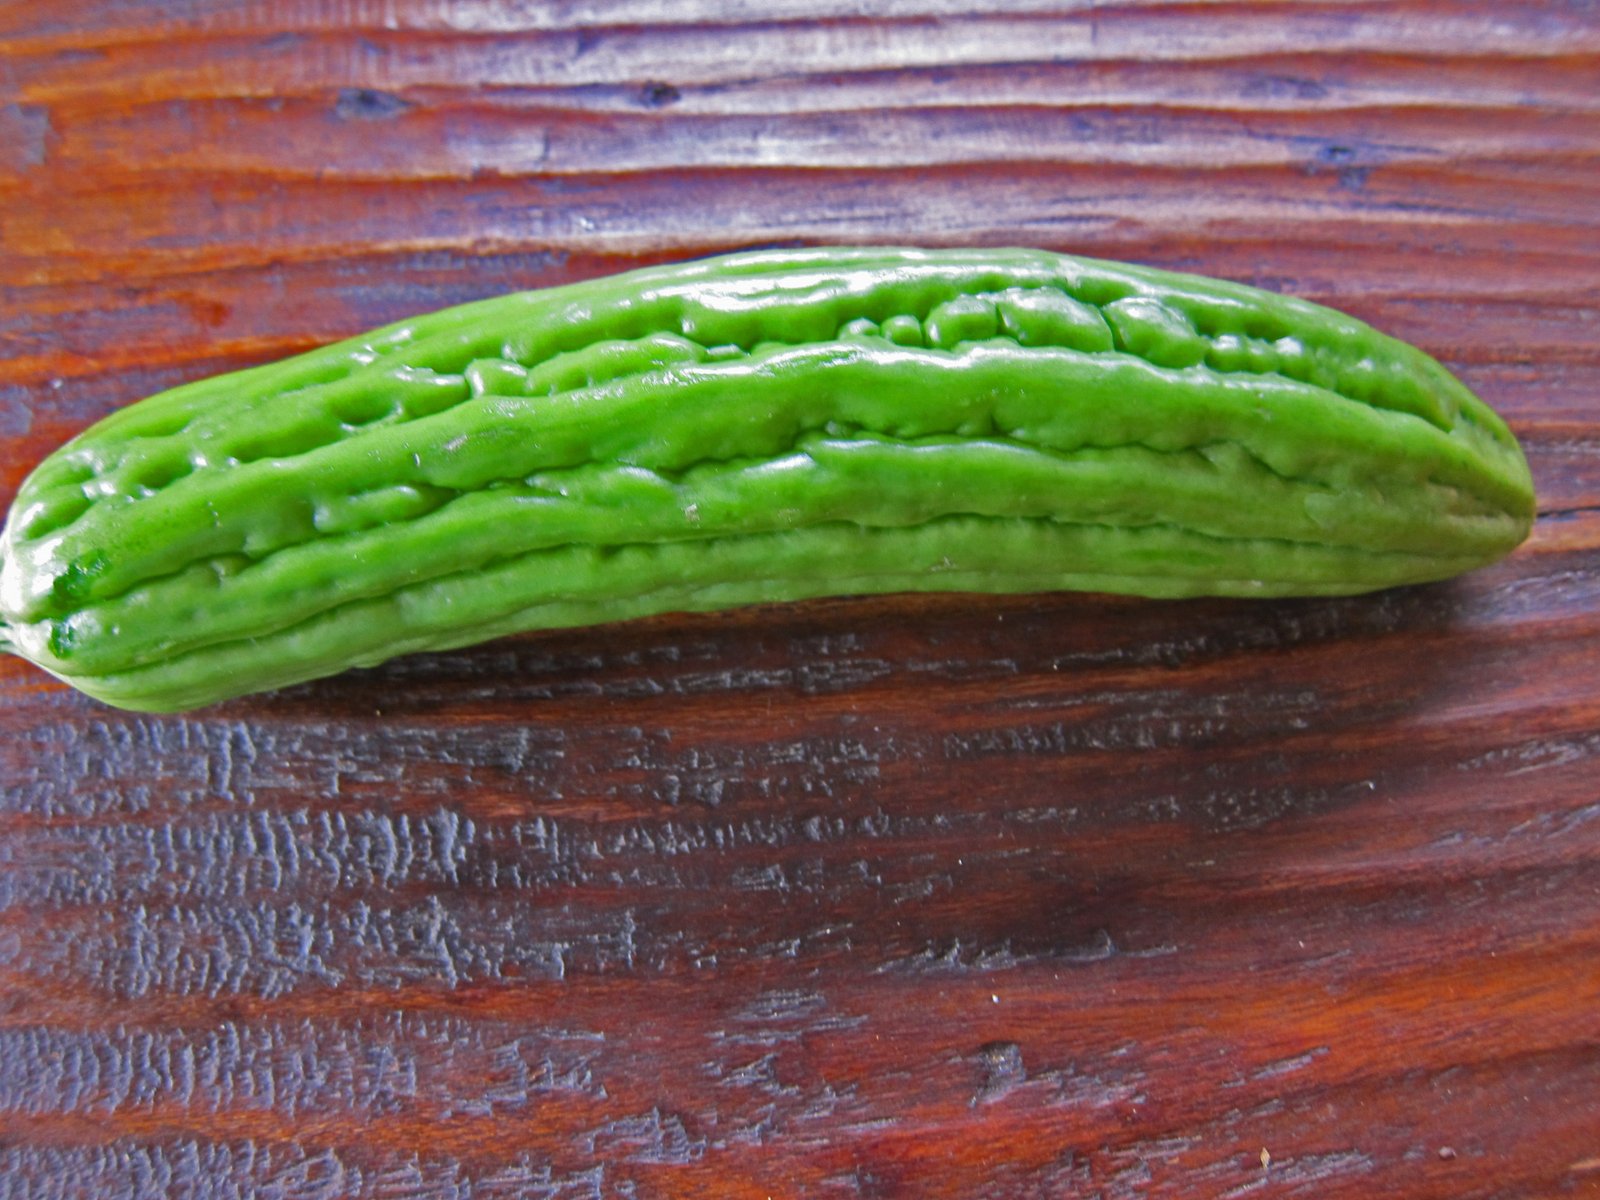
I've never been a big fan of bittermelon. Our neighbors growing up were Okinawan, so every so often there would be Goya Chanpuru, basically an egg – tofu – bittermelon, and pork (and sometimes Spam) stir fry of sorts. I still had never developed a taste for it. Same with the Missus……

But a funny thing happened on this trip, we had bittermelon several times, and kind of enjoyed it. I'll pass on dipping it in honey, though. So naturally, after arriving back home, we've been cooking with it.

StirFriedBittermelon01
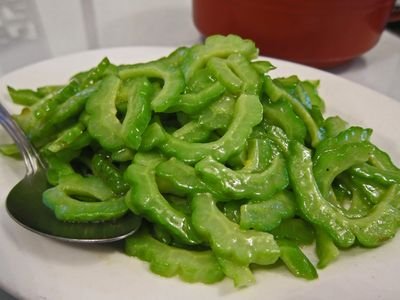
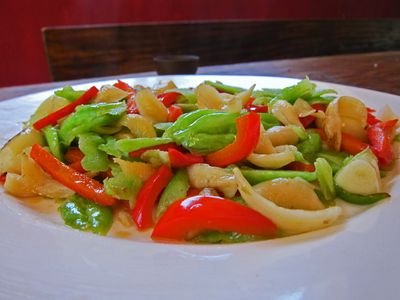
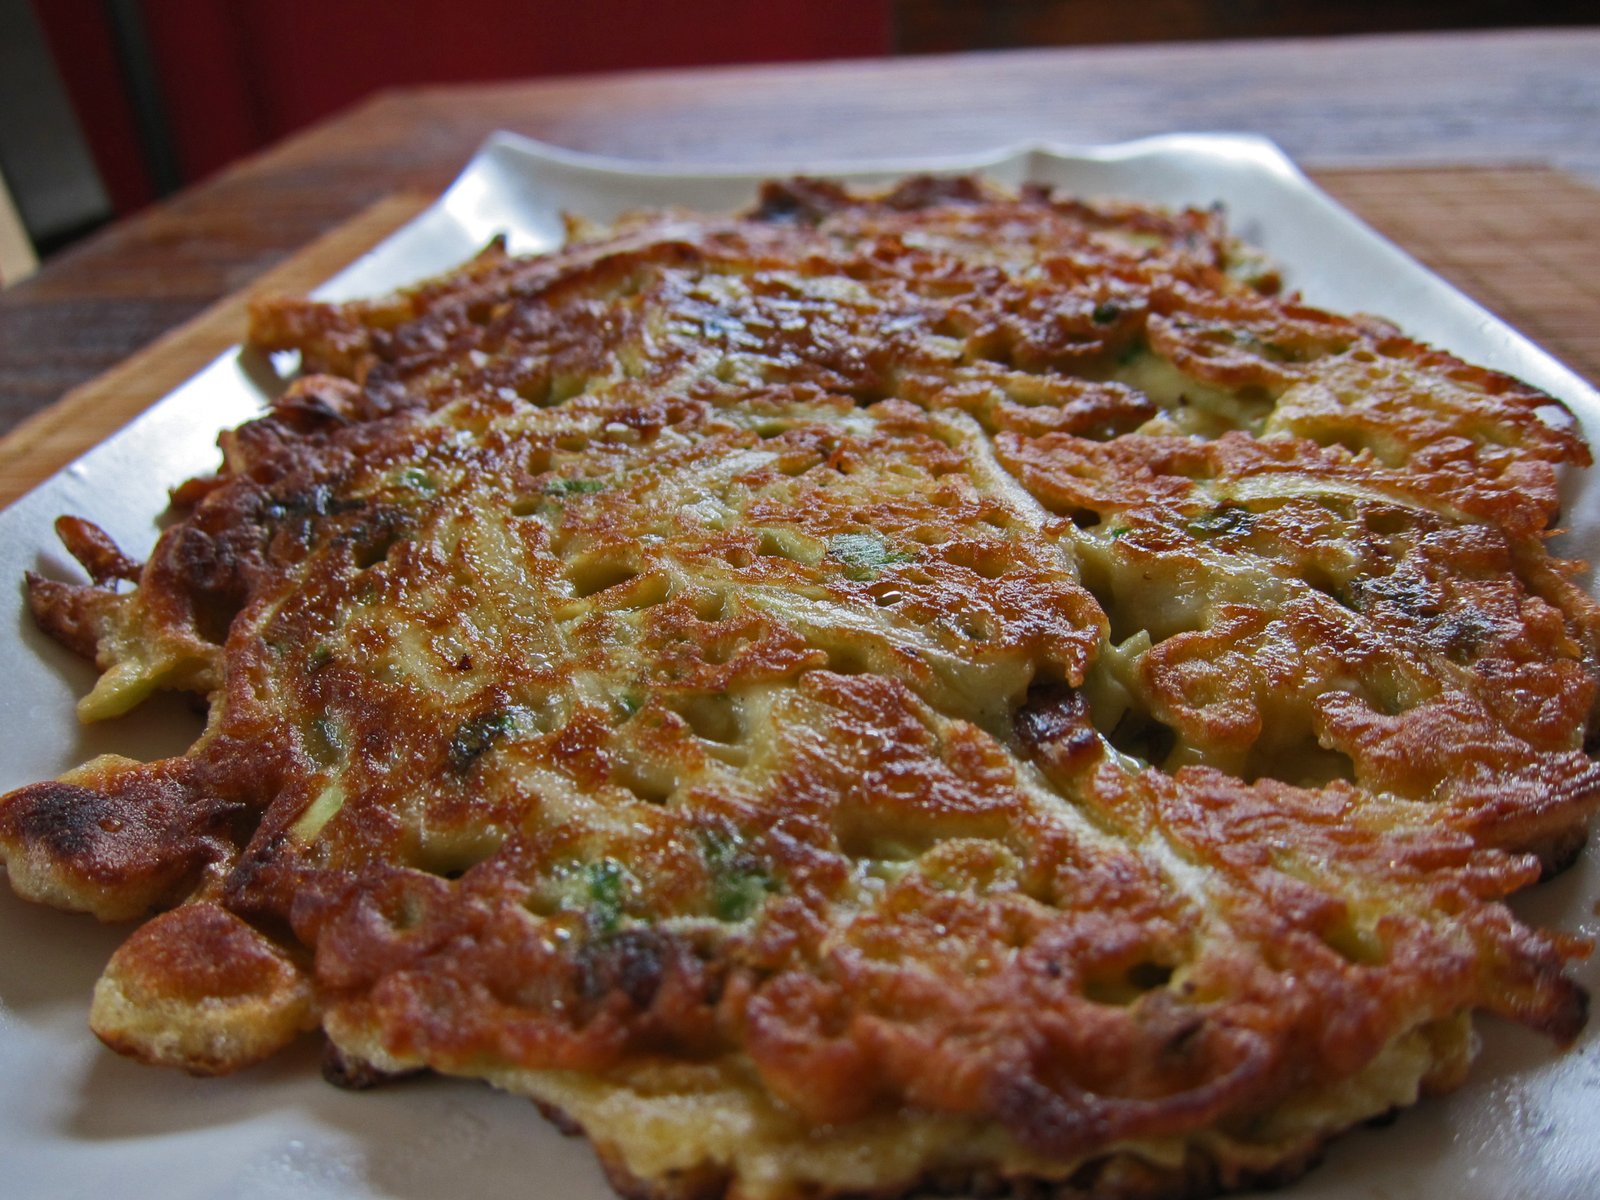
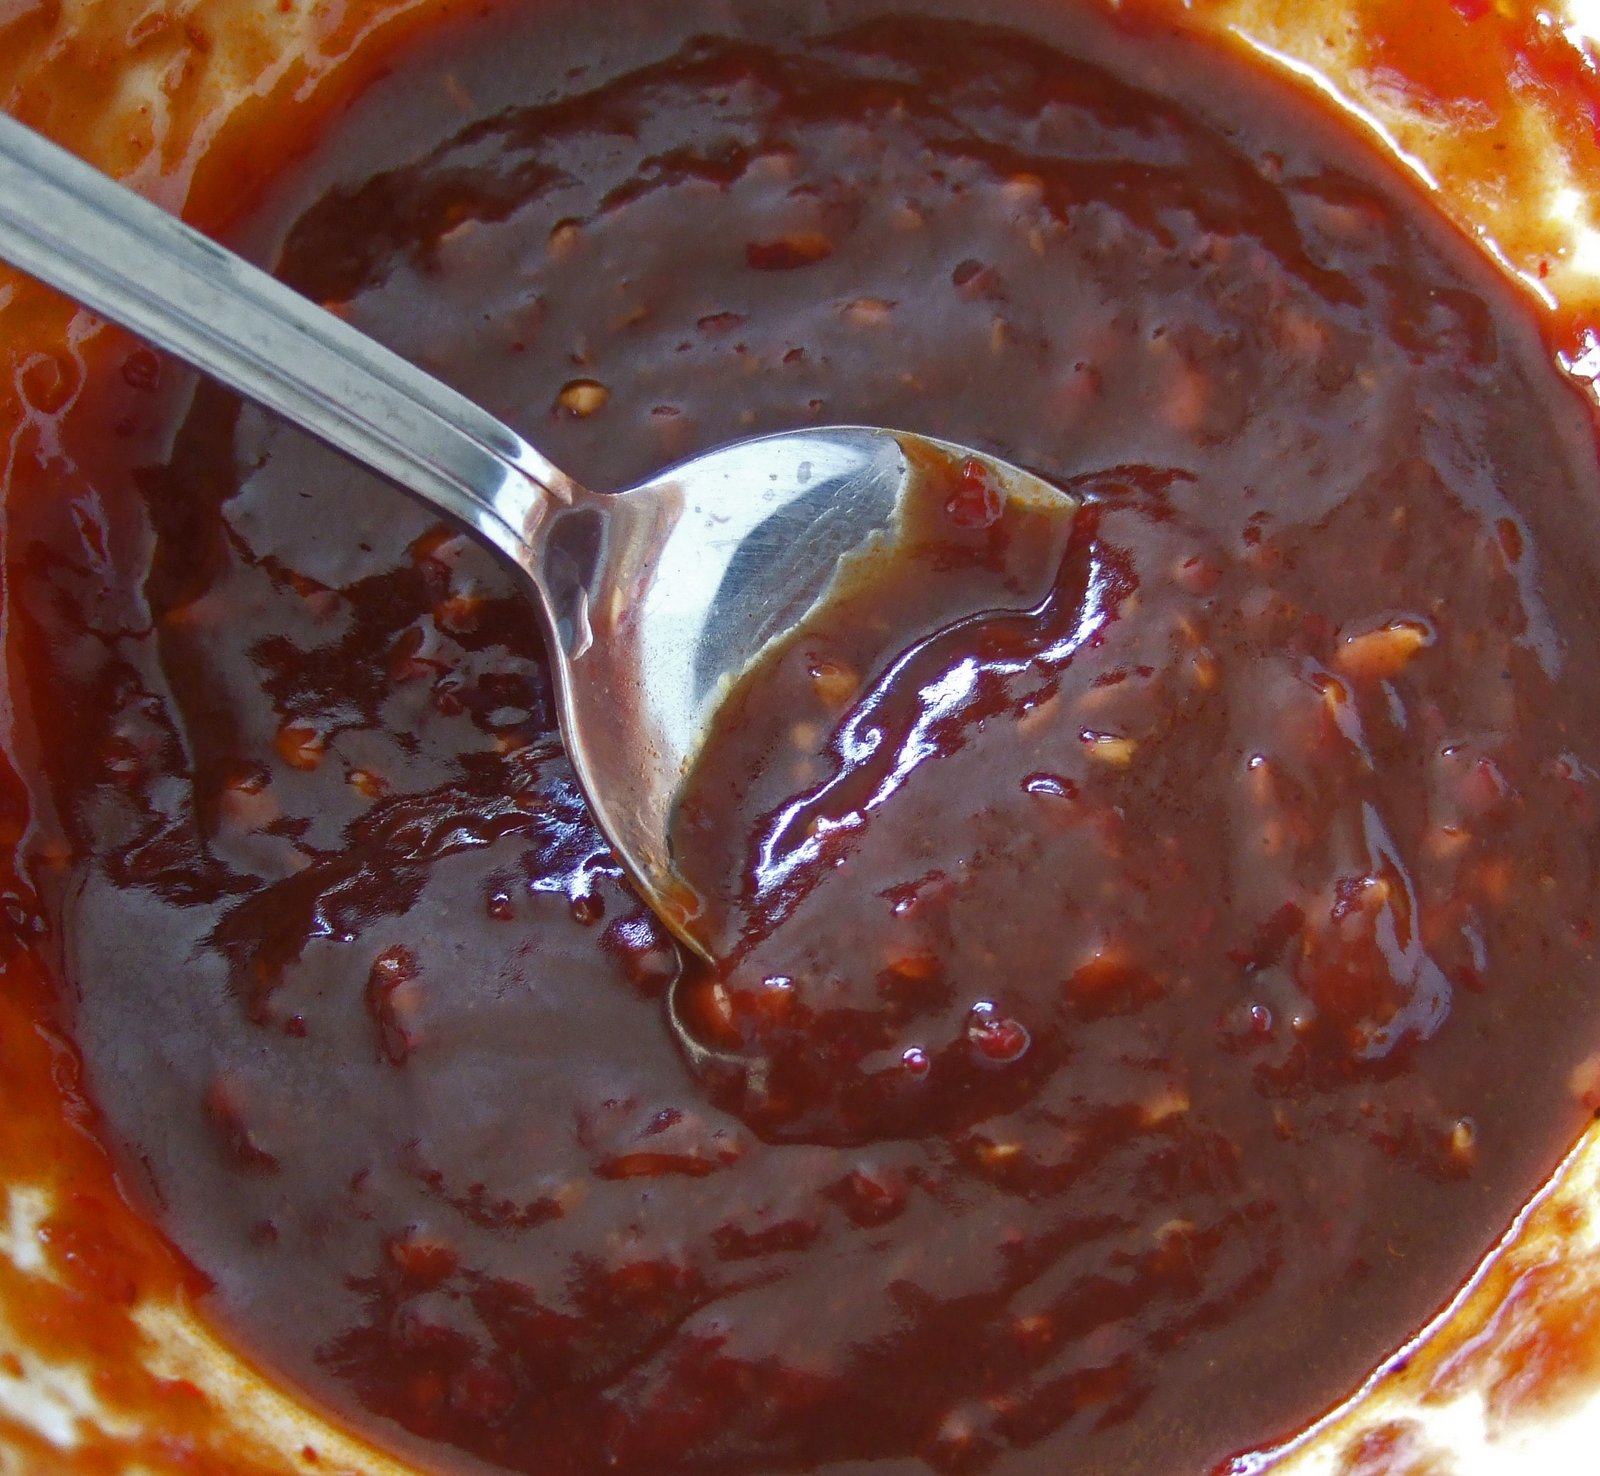
This post is more about my bittermelon education, rather than a bunch of recipes. As you see in the photo above, in my first few attempts, I did the usual cross slicing of the bittermelon, and using a spoon removed the pith, where most of the bitterness is retained. I used to two different tricks to remove excess bitterness….. the first was salting the bittermelon, then letting it sit for 20 minutes or so before rinsing and stir-frying. The second was the blanch method, which is what Ba Ren uses, as you can tell by this photo of their stir-fried bittermelon (which is pretty good, BTW).

StirFriedBittermelon02
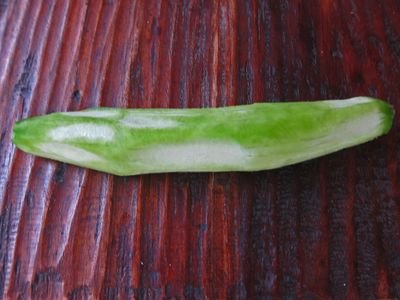
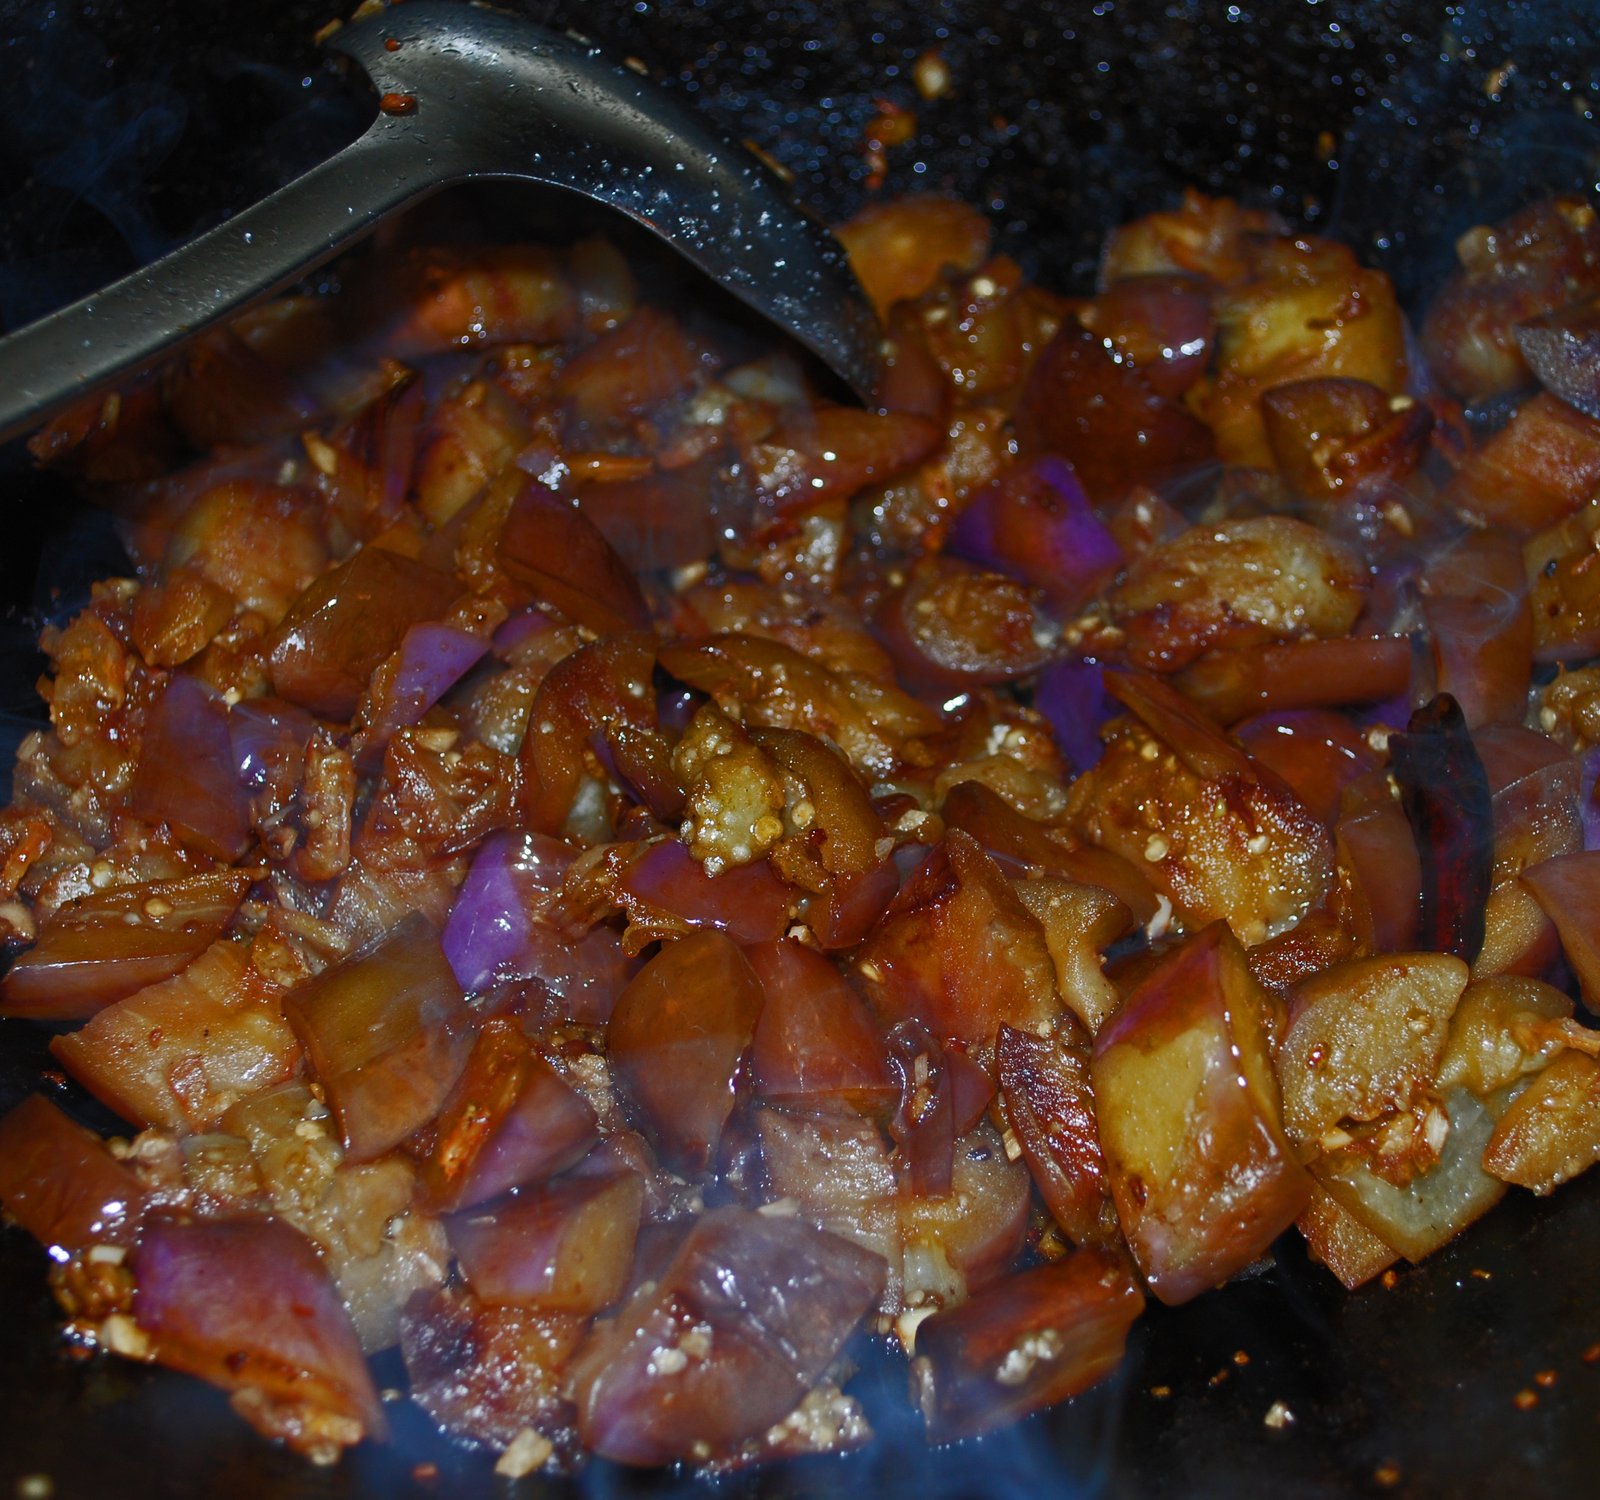
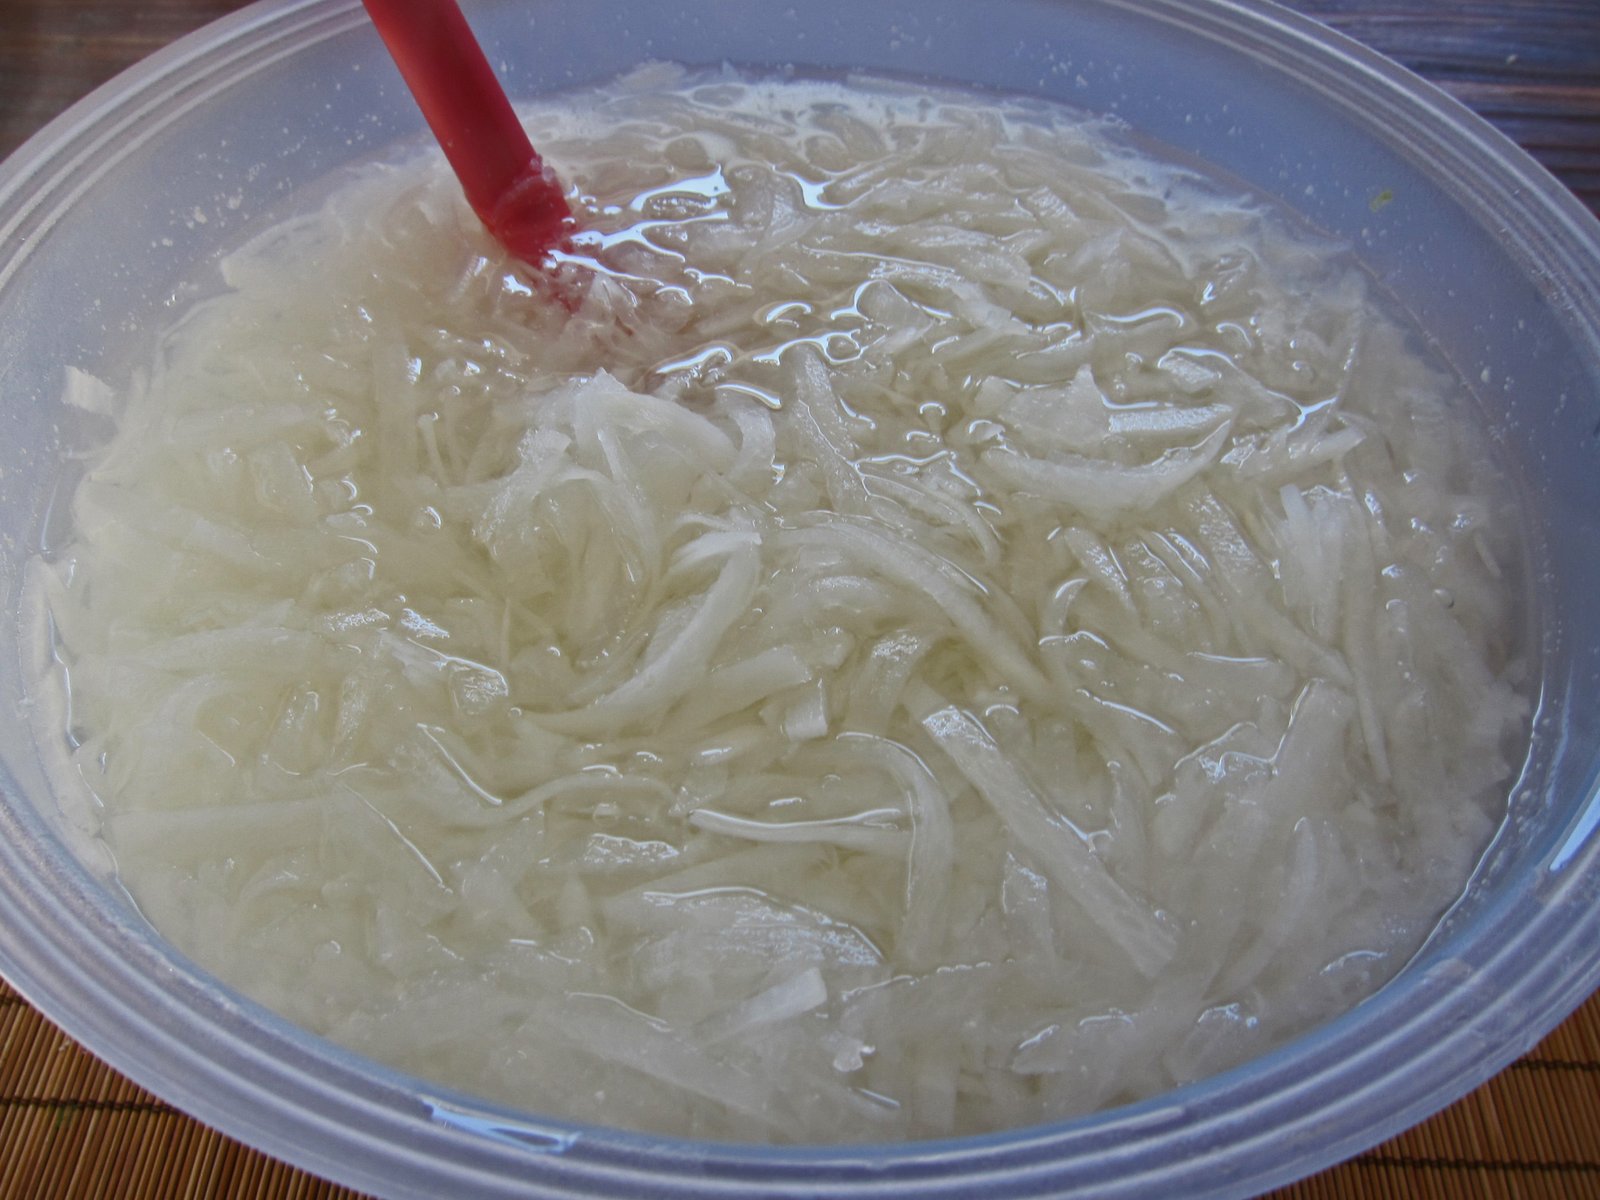
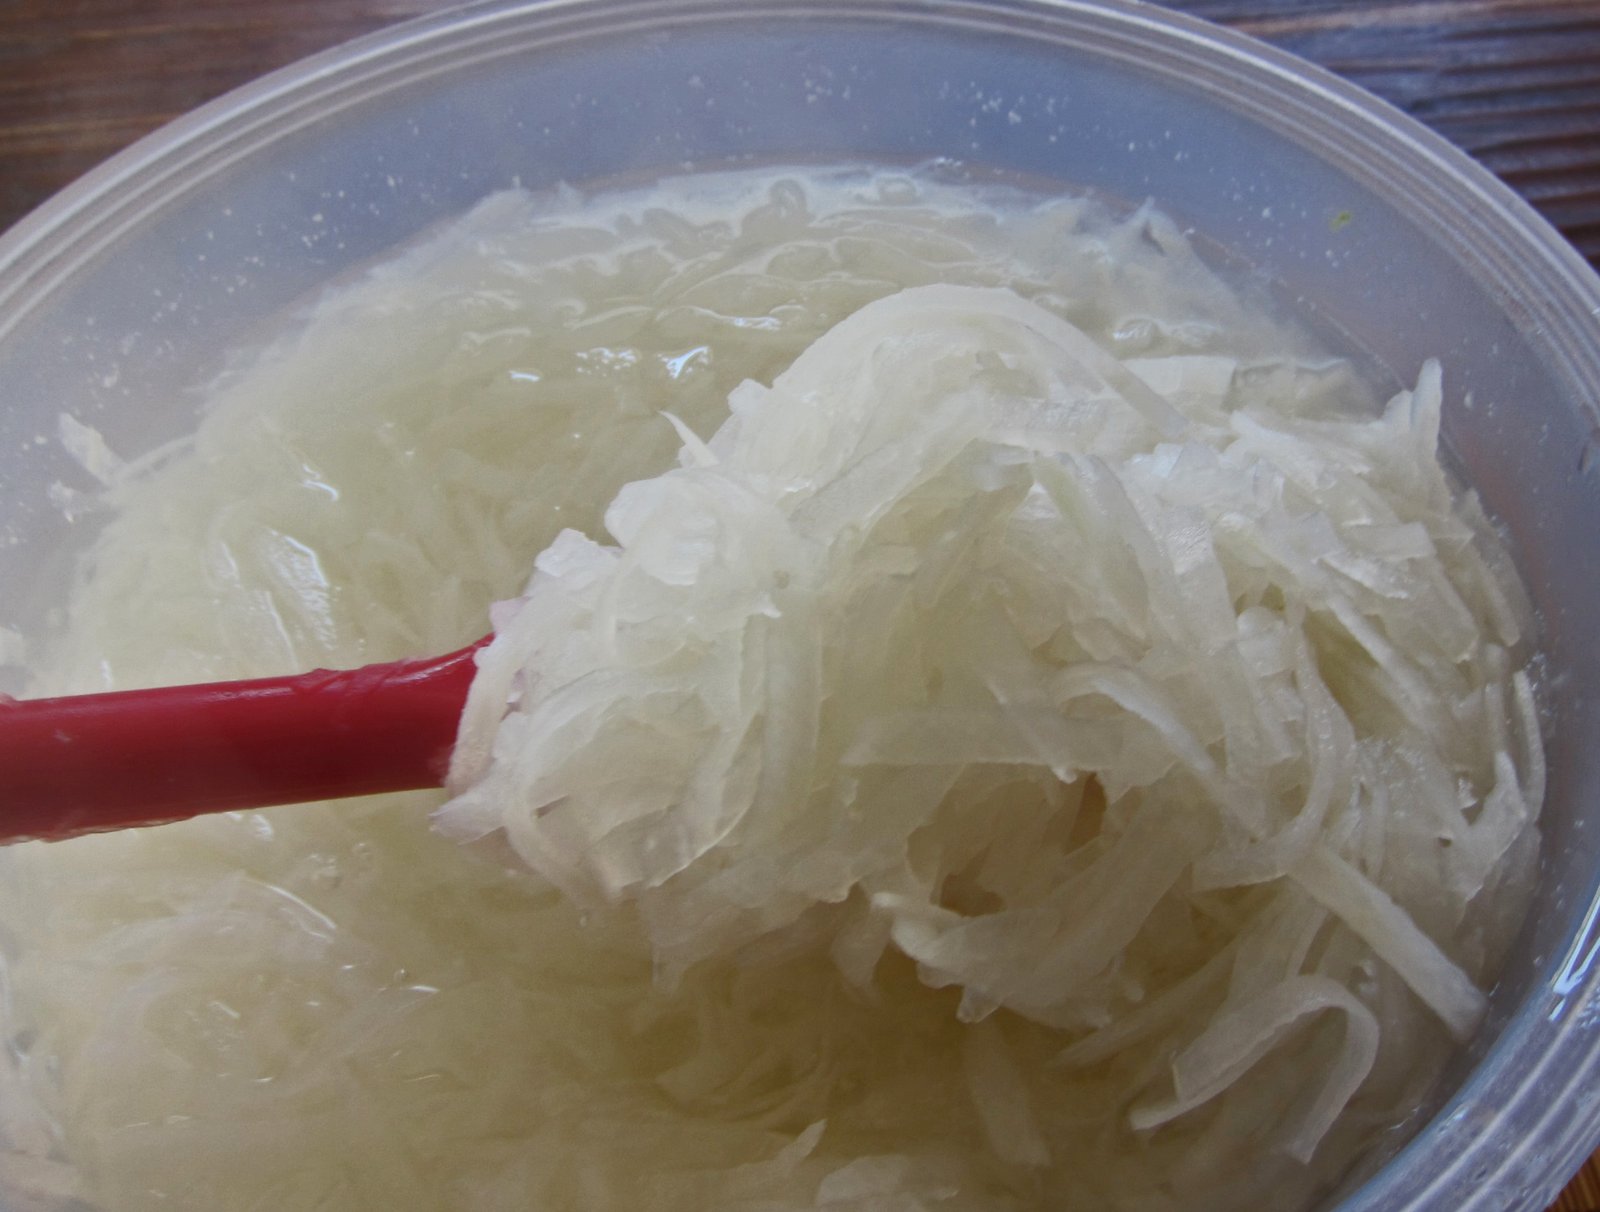
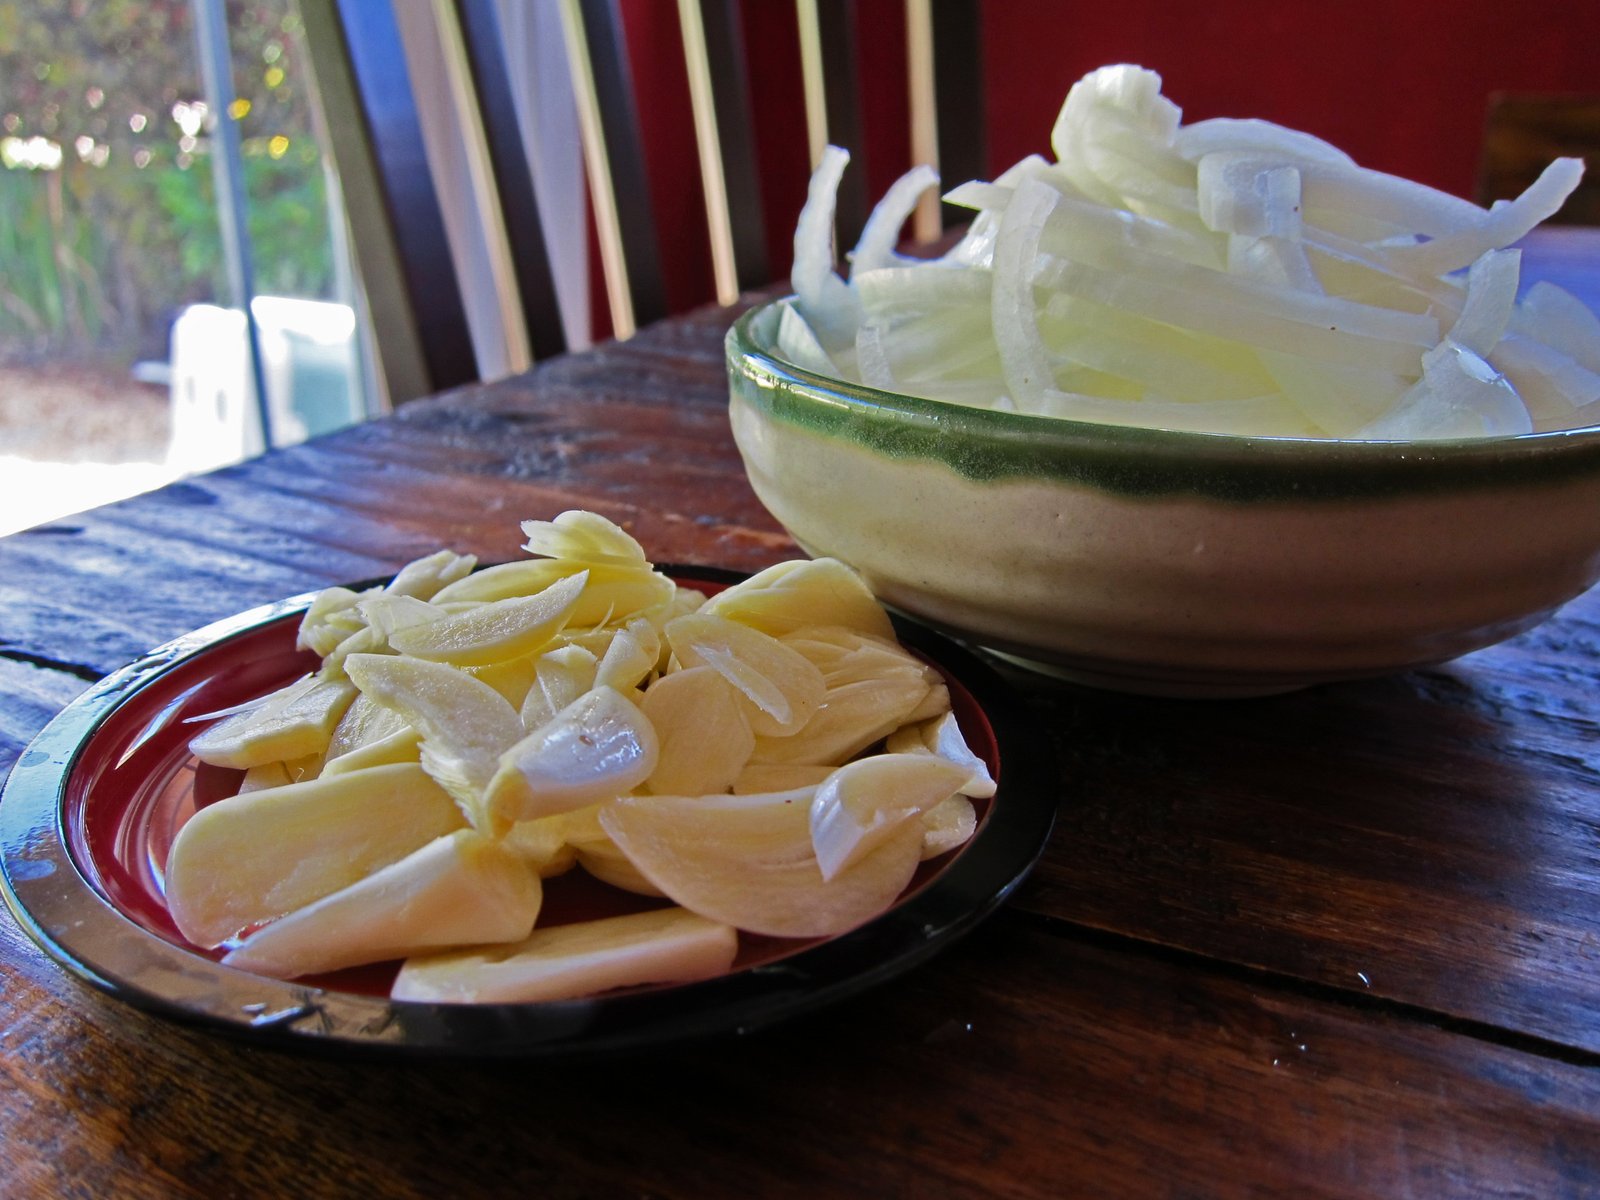
It was still a bit too bitter for us, however. That's when the Missus decided that we should "shave" the bittermelon. Doing so would minimize the amount of pith and for our tastes, gave us the right amount of bitterness.

StirFriedBittermelon05
StirFriedBittermelon06
StirFriedBittermelon07 
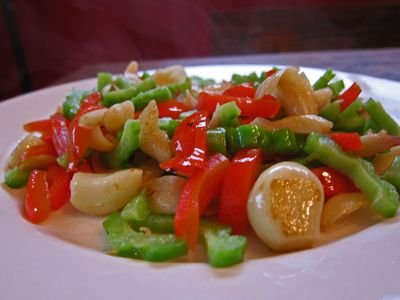
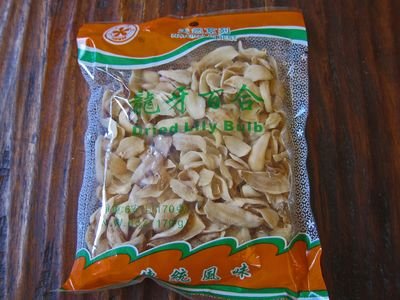
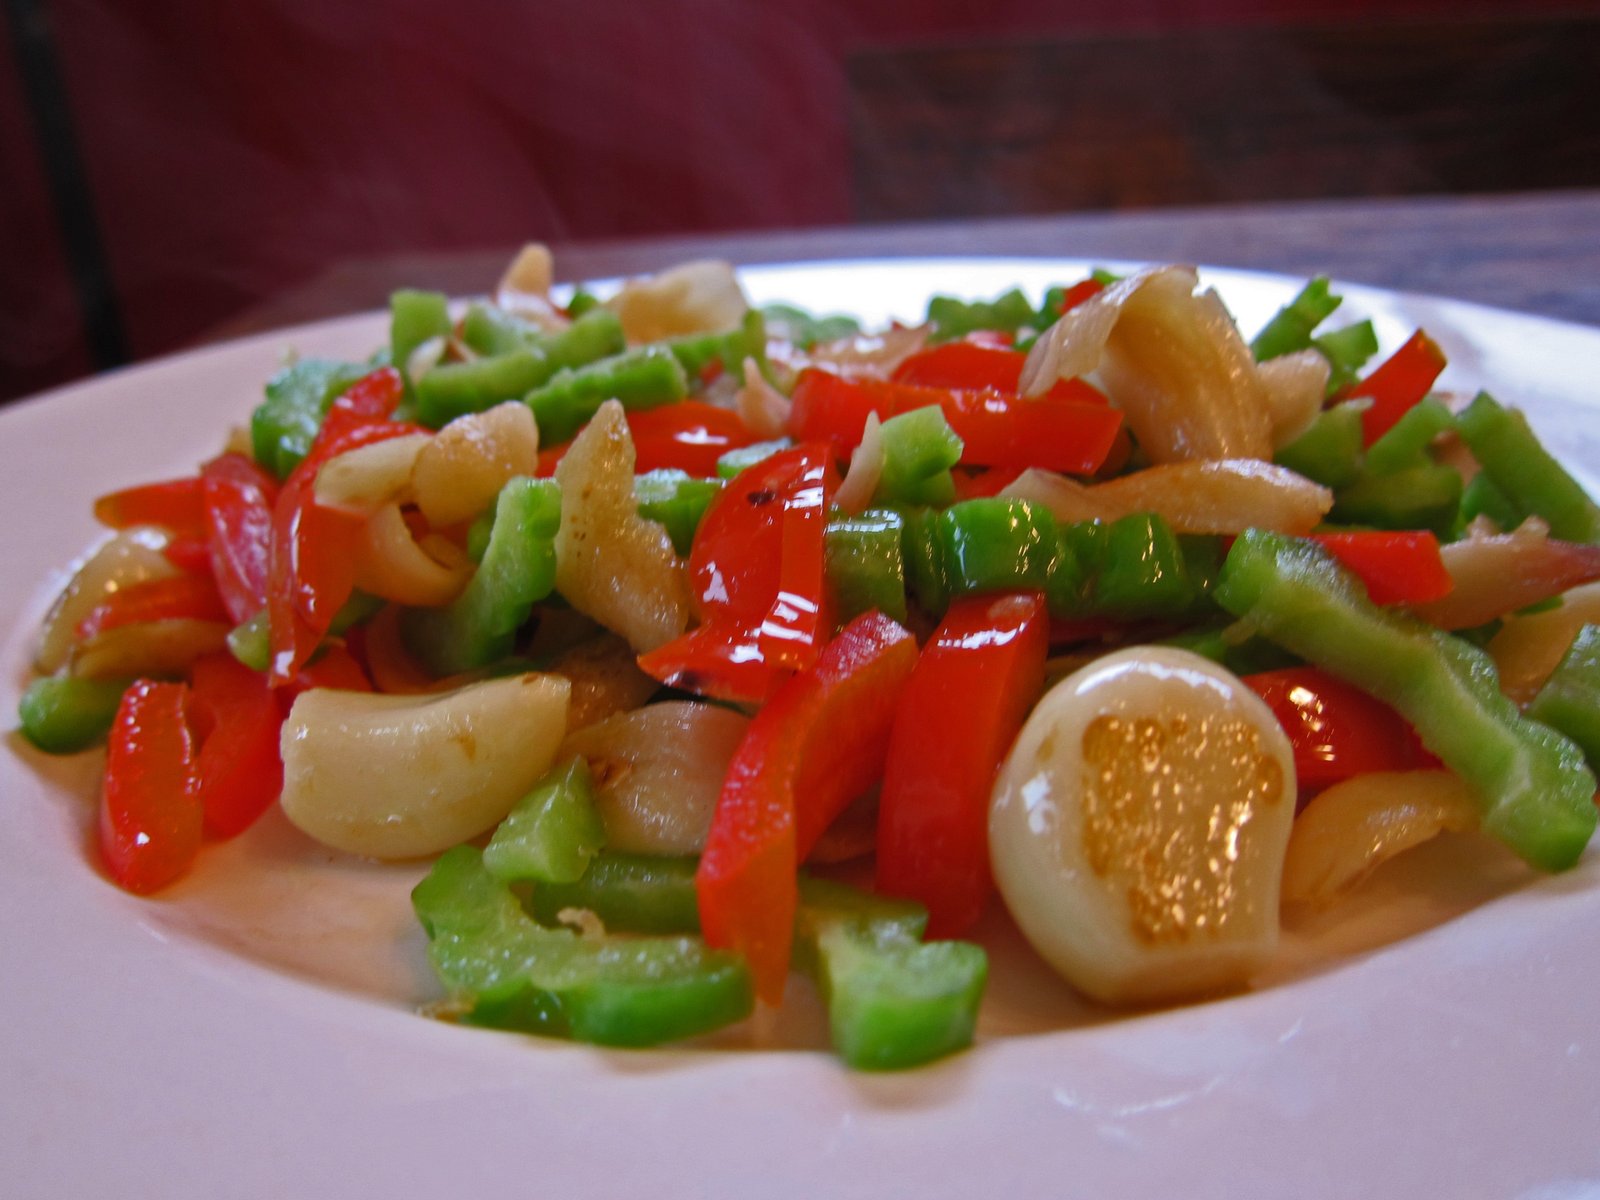
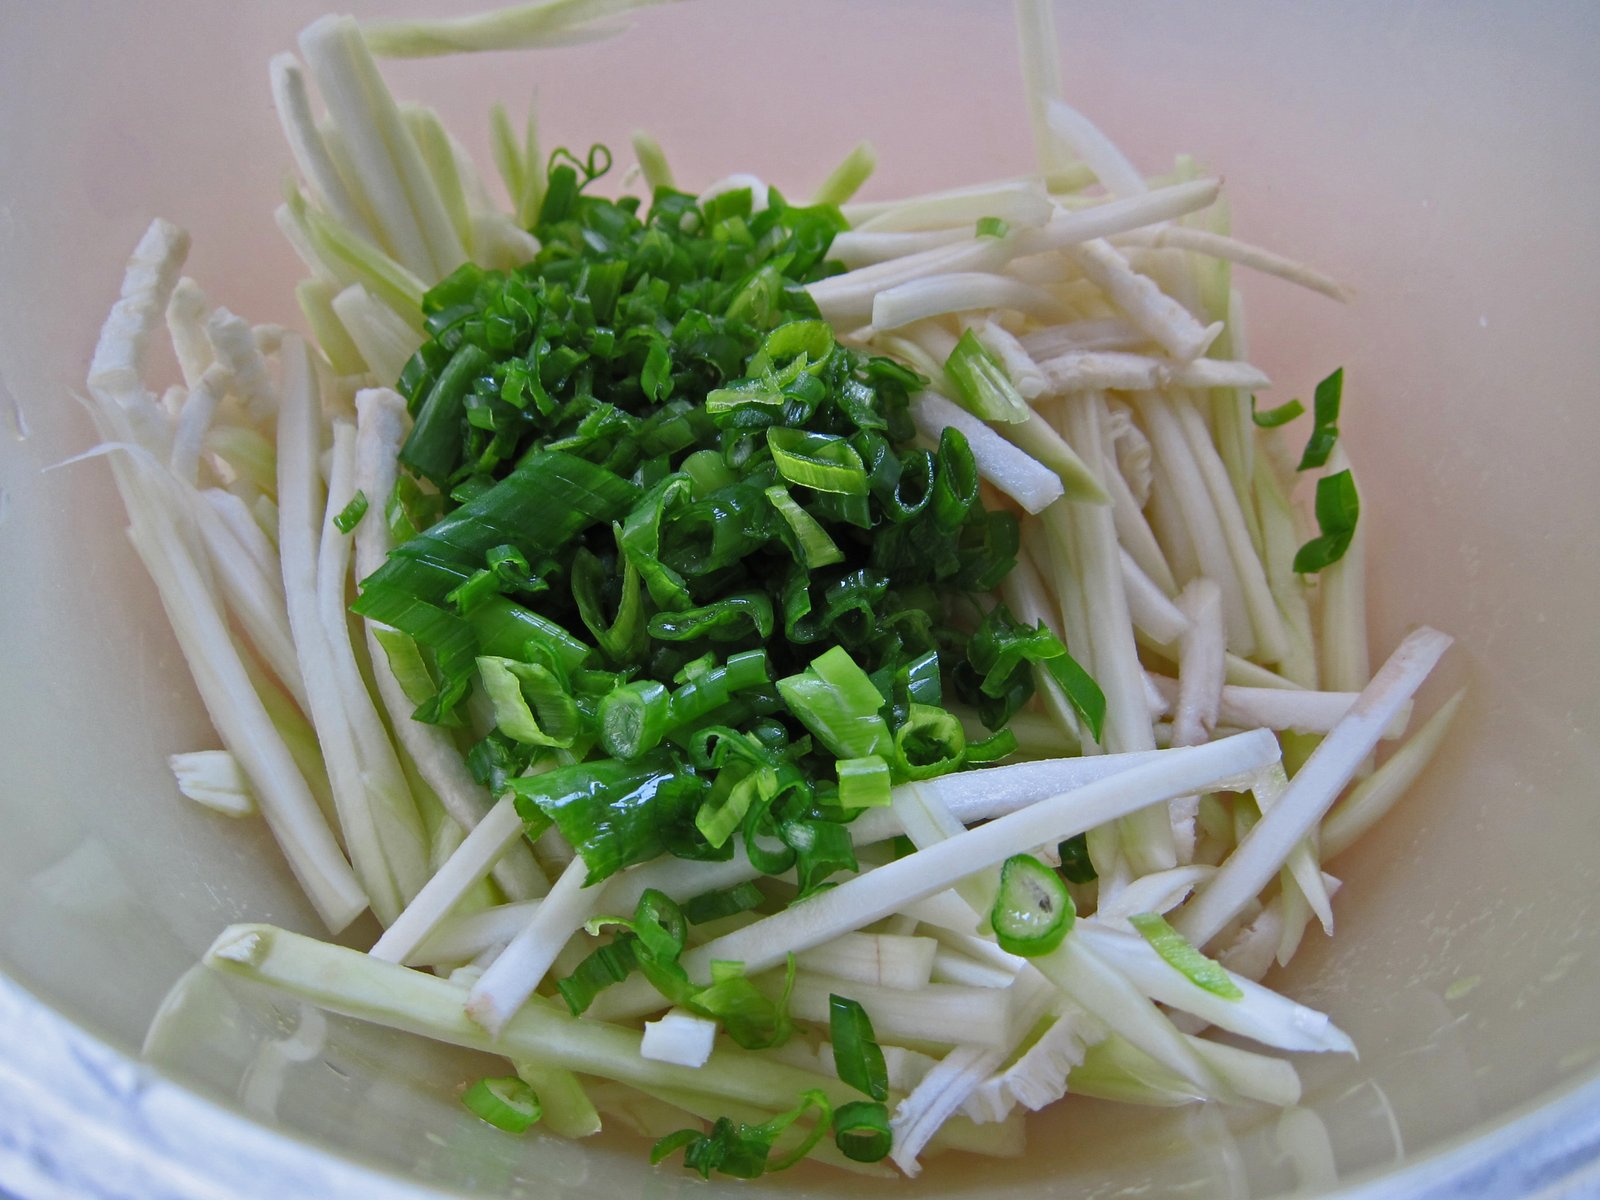
I found that you really didn't need to salt the bittermelon for very long when shaving. Just ten minutes or so, enough time for me to prep my other ingredients (save one). Not to delve too deeply into the "Qi" of food, but bittermelon is considered cooling, thus folks are advised to eat it during the summer. I thought I'd balance things out a bit by adding a few "warm" and "hot" ingredients to the dish. Namely Red Bell Peppers, onion, and blanched garlic. For me this was a natural combination, the sweetness of the red bell peppers and blanched garlic offset the bitterness. There were a couple of items we had in China that seemed to complement bittermelon for our tastes. One of them was Baihe – Lily Bulb. After tasting the sweet-oniony-mildly starchy flavor of fresh Baihe, we ordered it whenever we saw it on the menu. I also loved the onion like flavor that finished with a good bit of starchiness…… onion flavored potatoes…. talk about my dream vegetable.

StirFriedBittermelon04

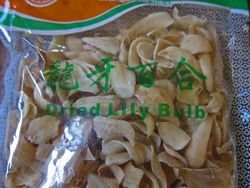
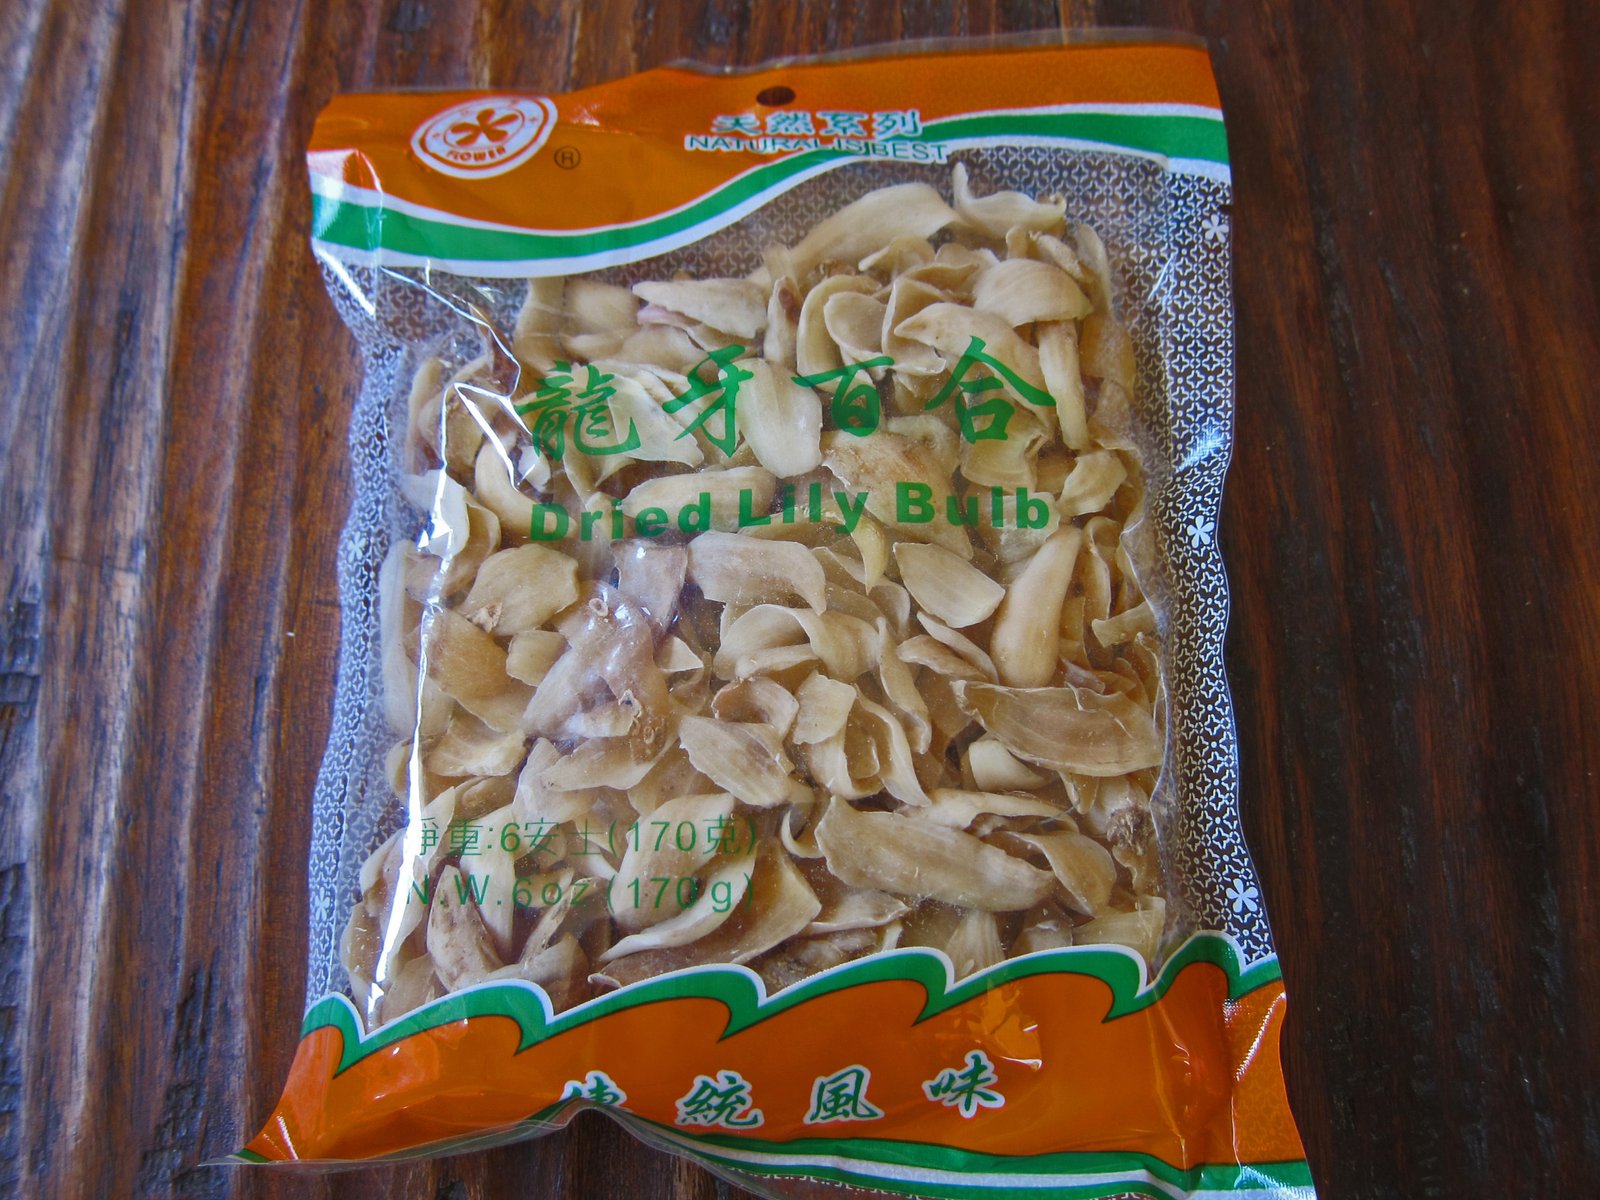
Unfortunately, fresh lily bulb is hard to come by in these parts. I did find dried lily bulbs (i.e. dragon teeth), which I've had in soups, and wondered how these would fare in a stir-fry.

StirFriedBittermelon03
I made sure to rinse these well, three or four times, I then poured mildly boiling water over the bulbs and covered with a plate for about 10-15 minutes until the bulbs had softened. Getting back to the Qi of food, Lily Bulbs are also considered a major "Yin" food. It is also often used to clear up dry cough, sore throat, insomnia, and restlessness.

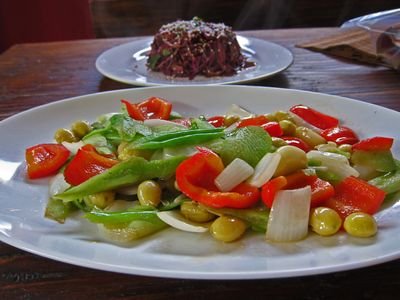
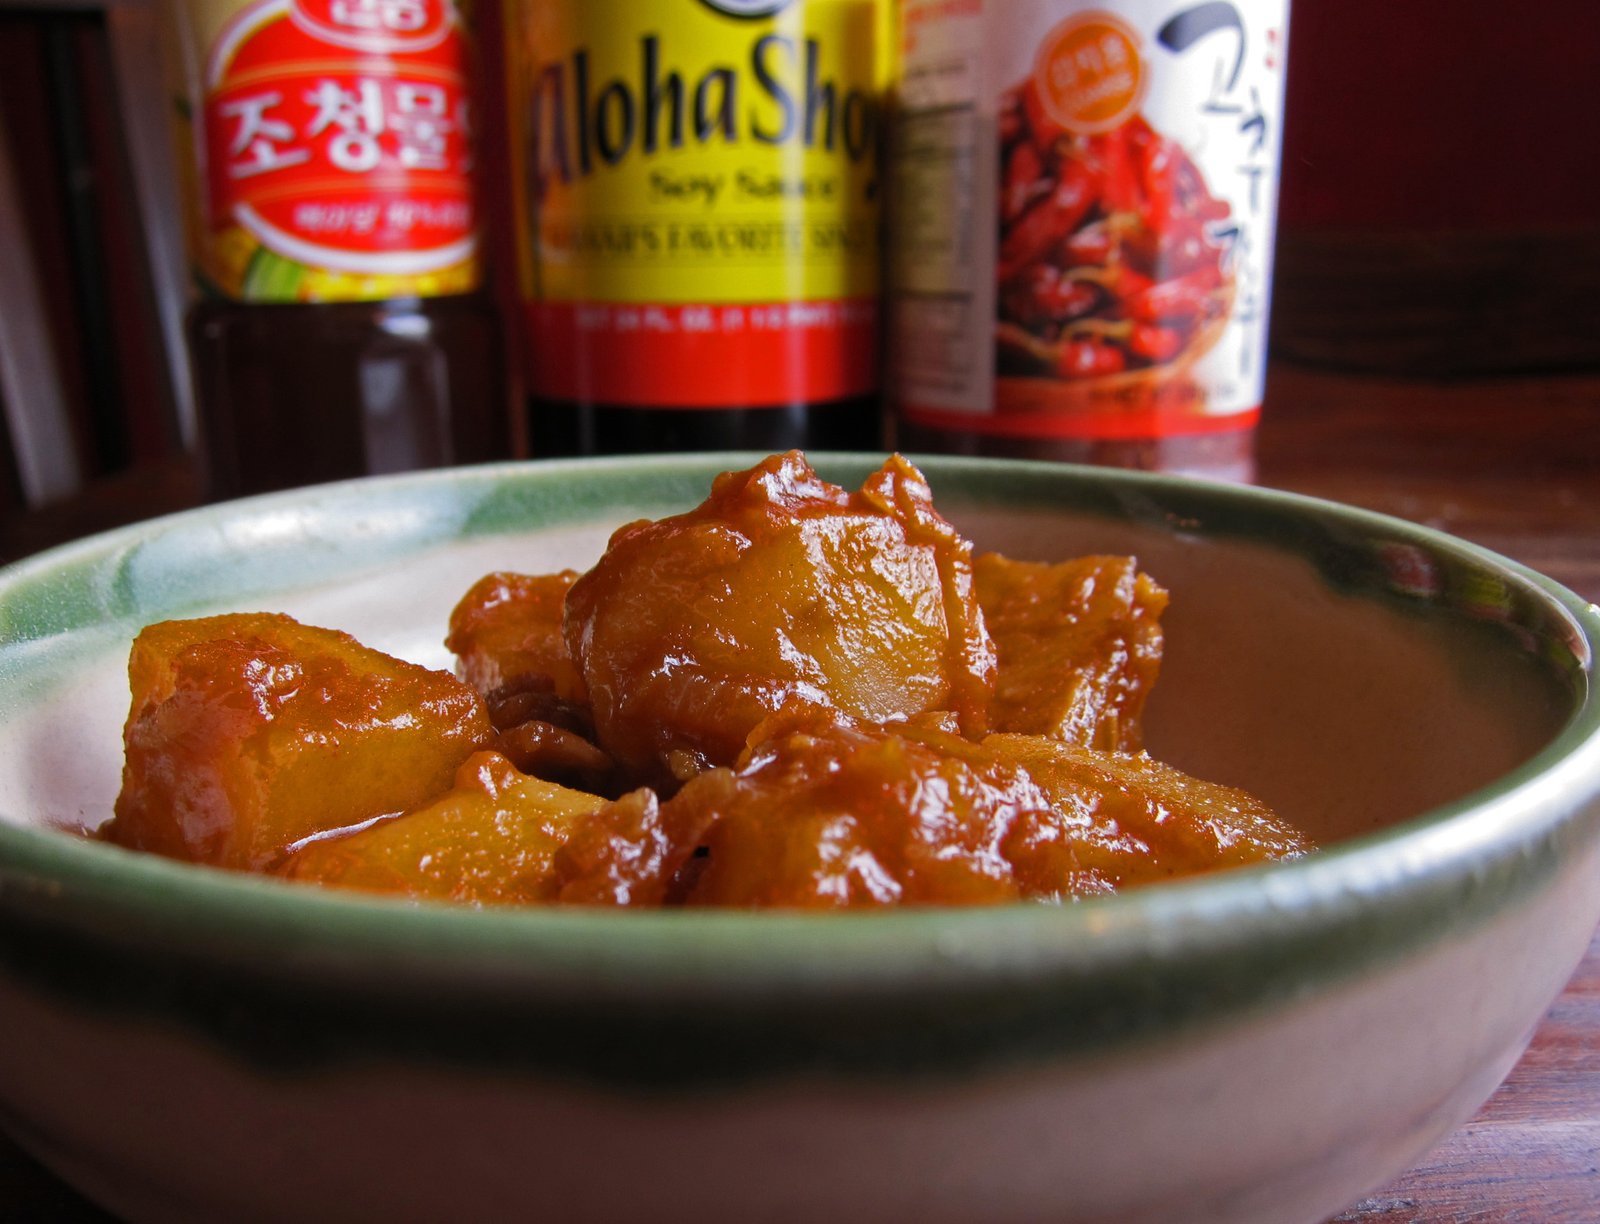
A quick stir-fry in the Big Kahuna, with a simple seasoning of good quality sea salt resulted in this:

StirFriedBittermelon08
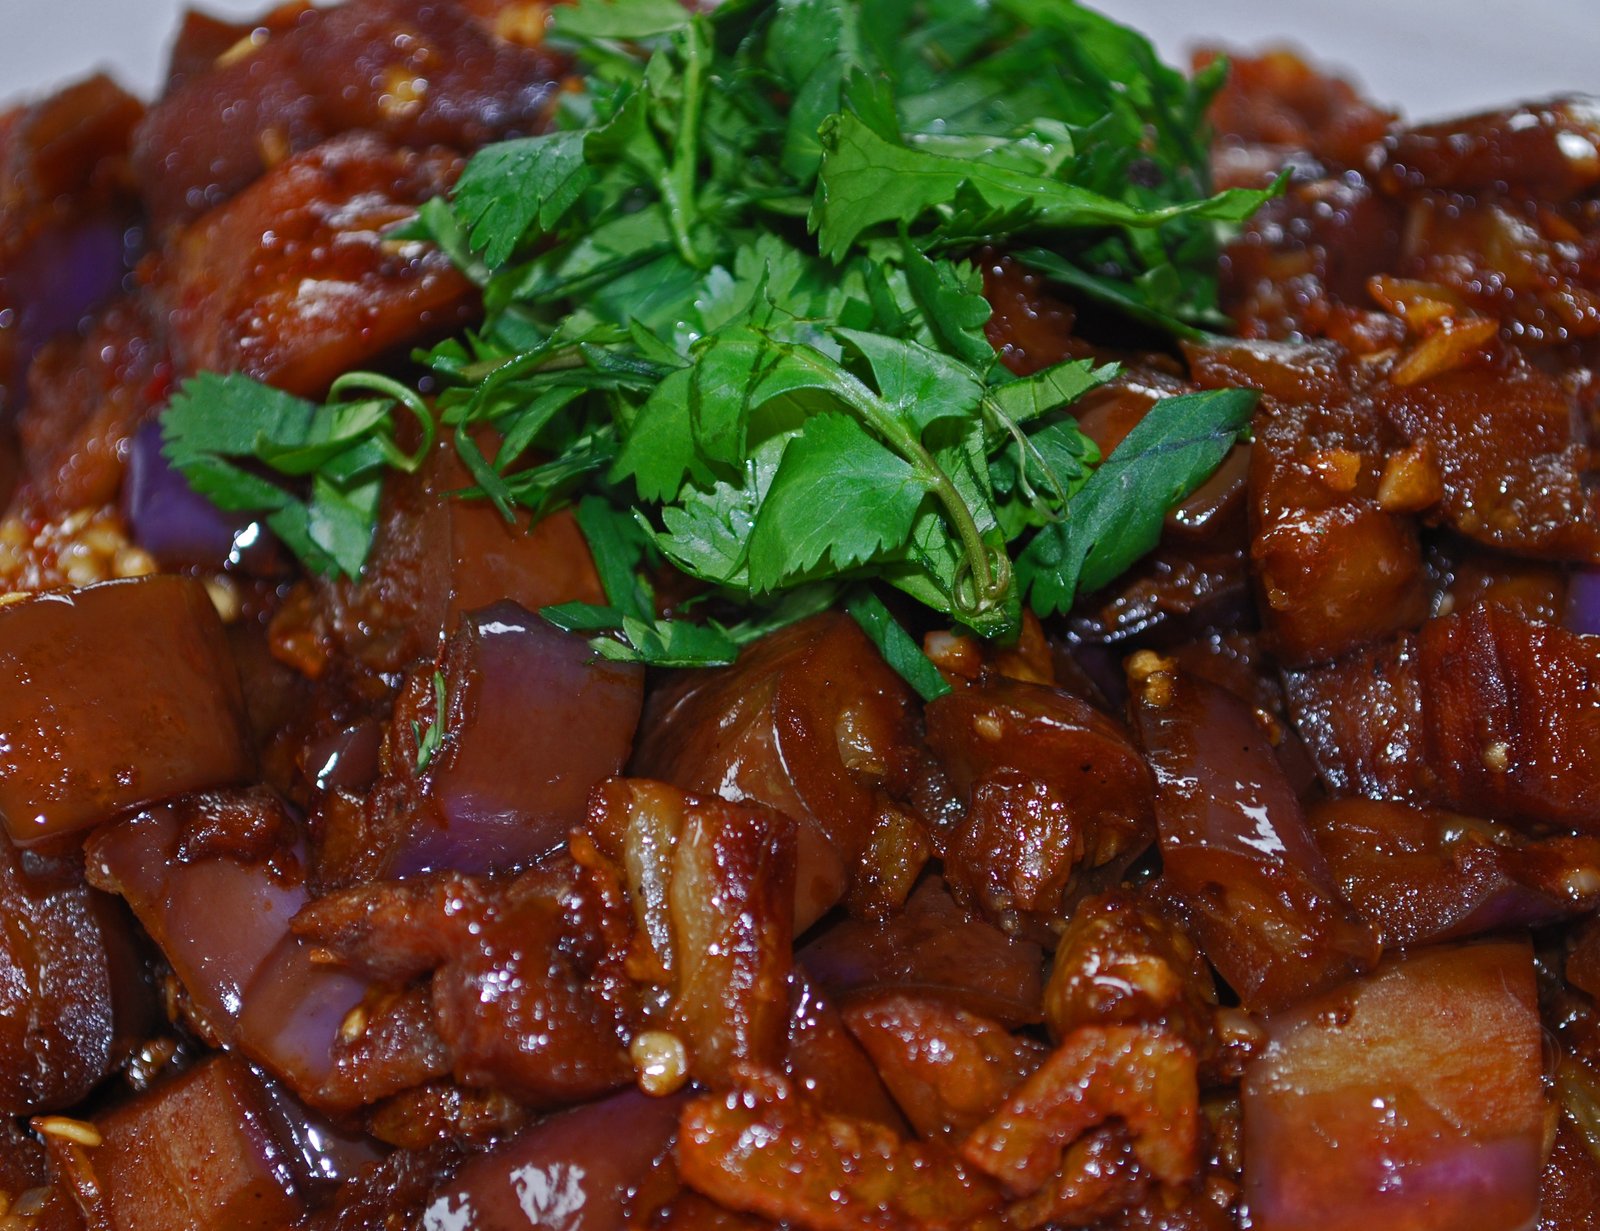
The bittermelon combined with red bell pepper and blanched garlic was fabulous. It's too bad that the dried lily bulb just didn't work out too well. It is not nearly as full-flavored as the fresh stuff, and the texture is too starchy, lacking that bit of onion-like crunch.

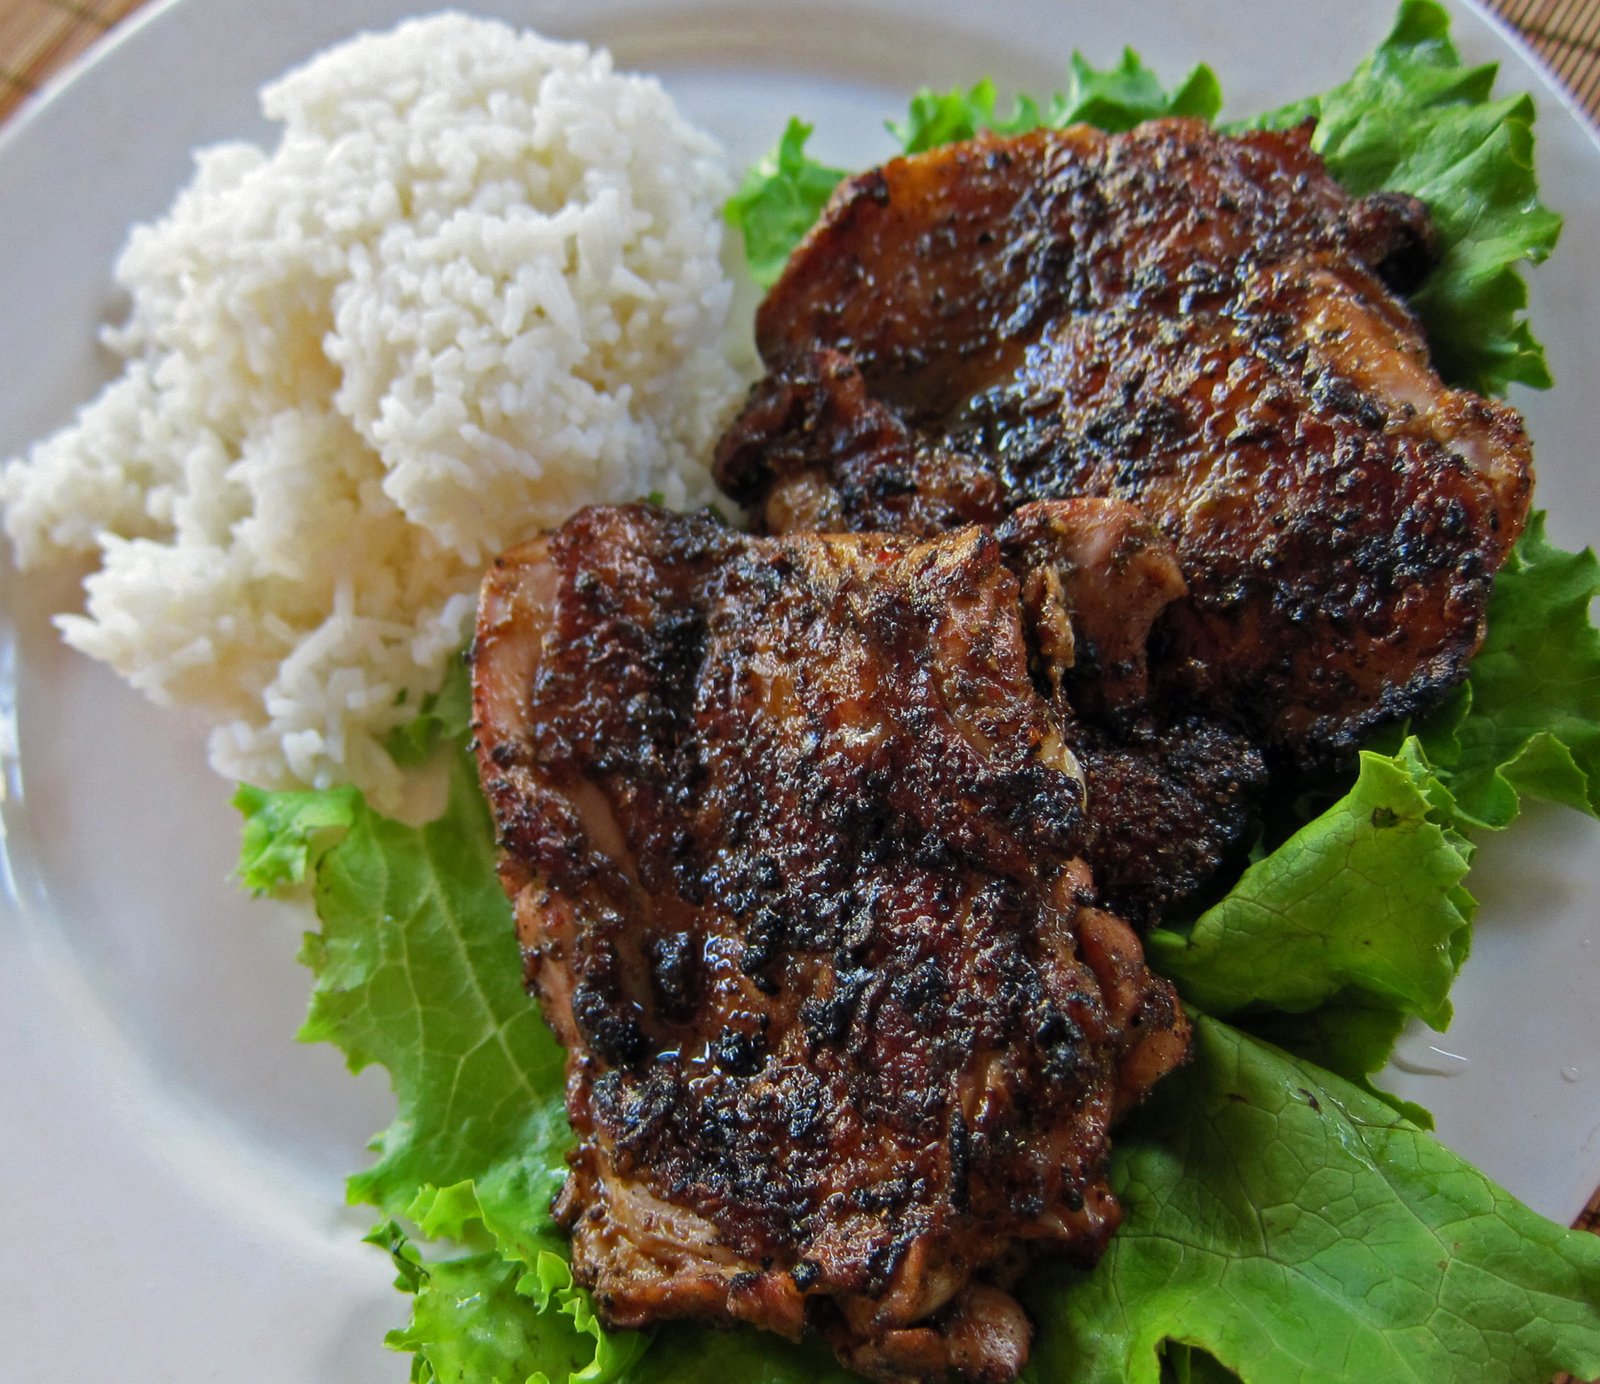
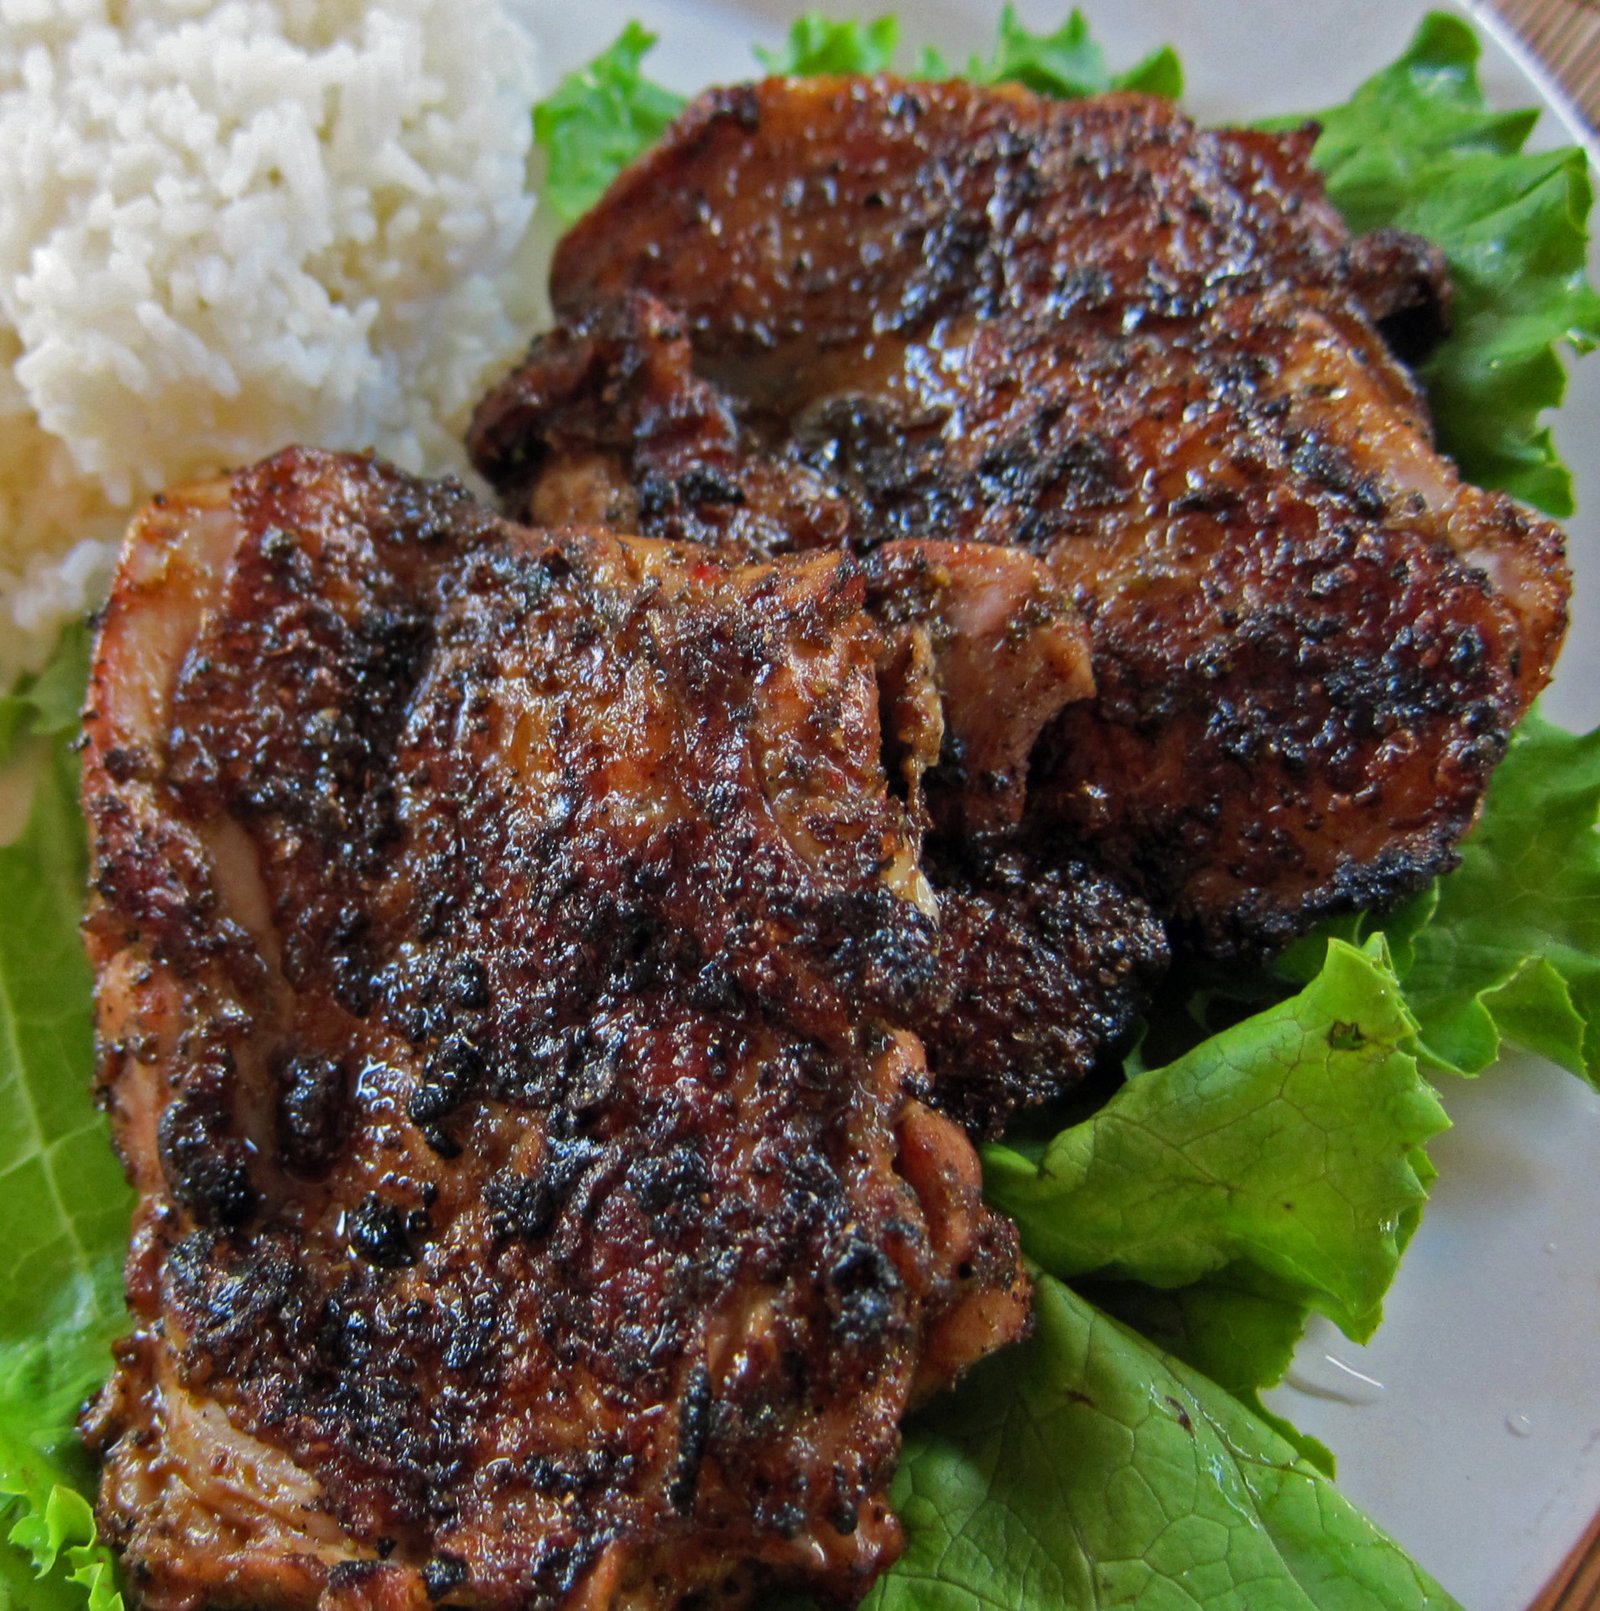
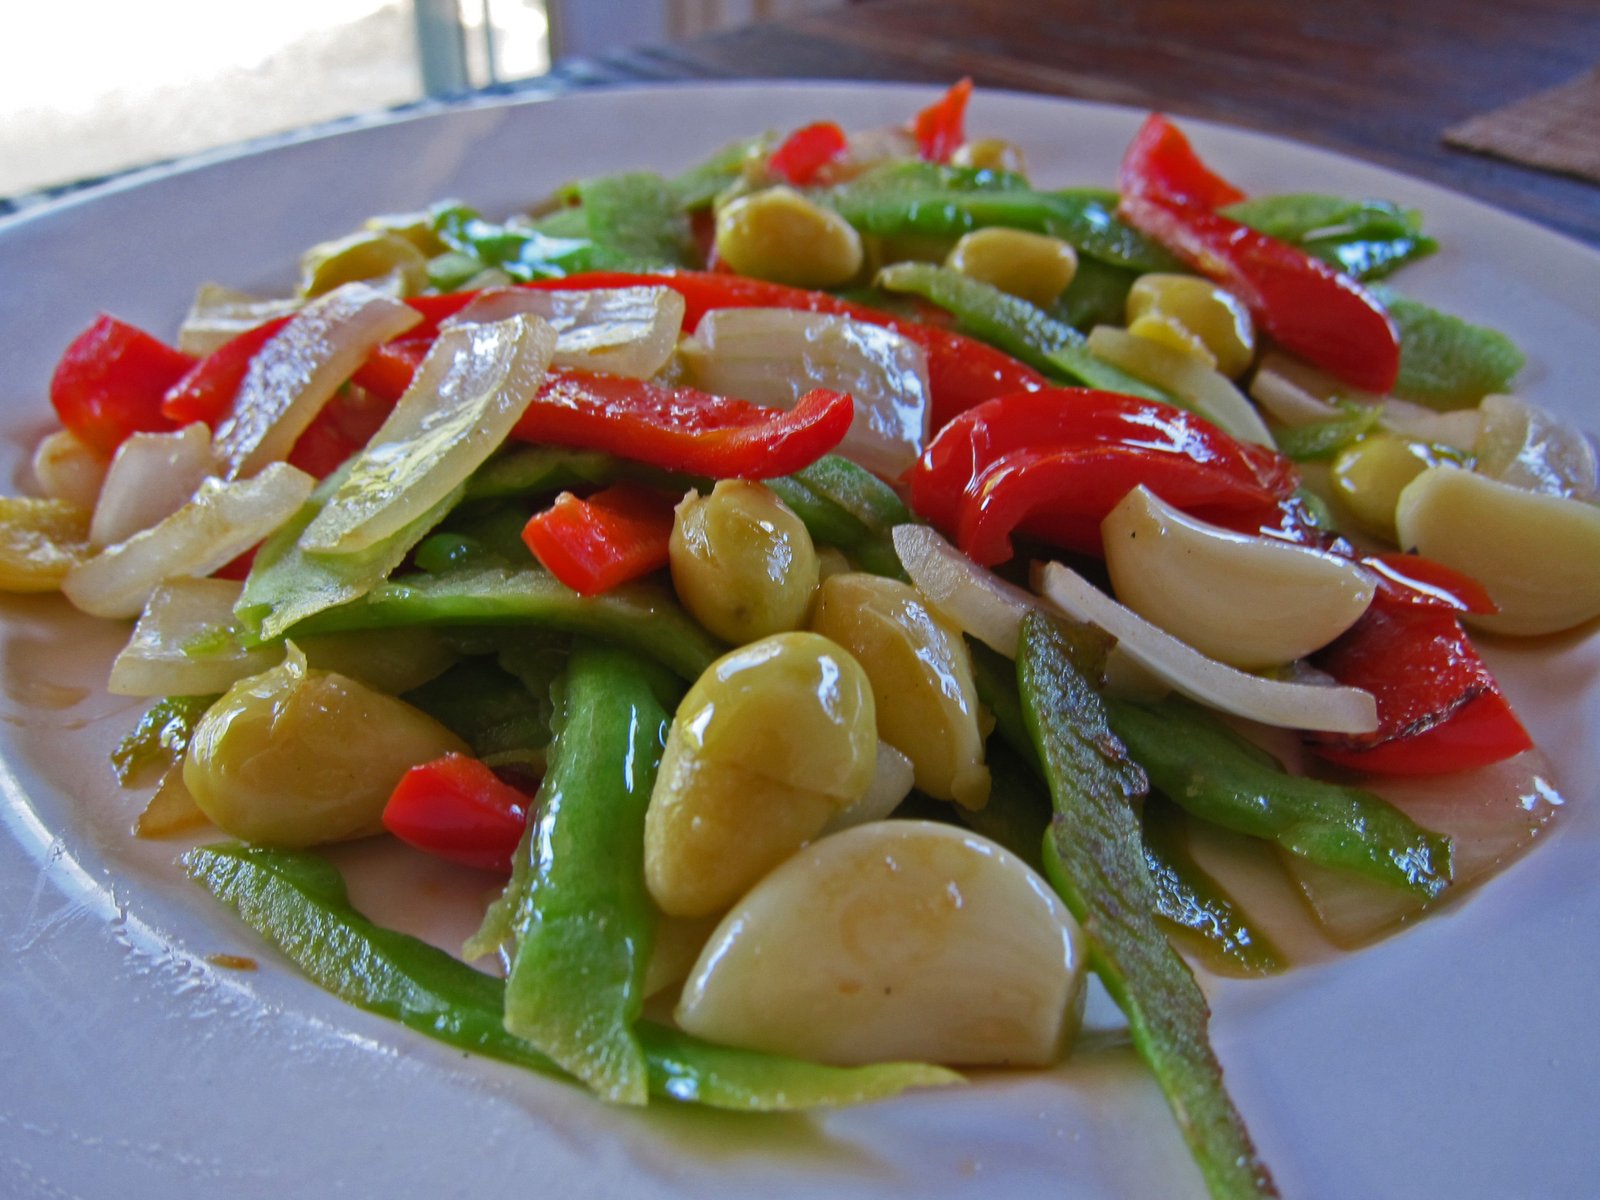
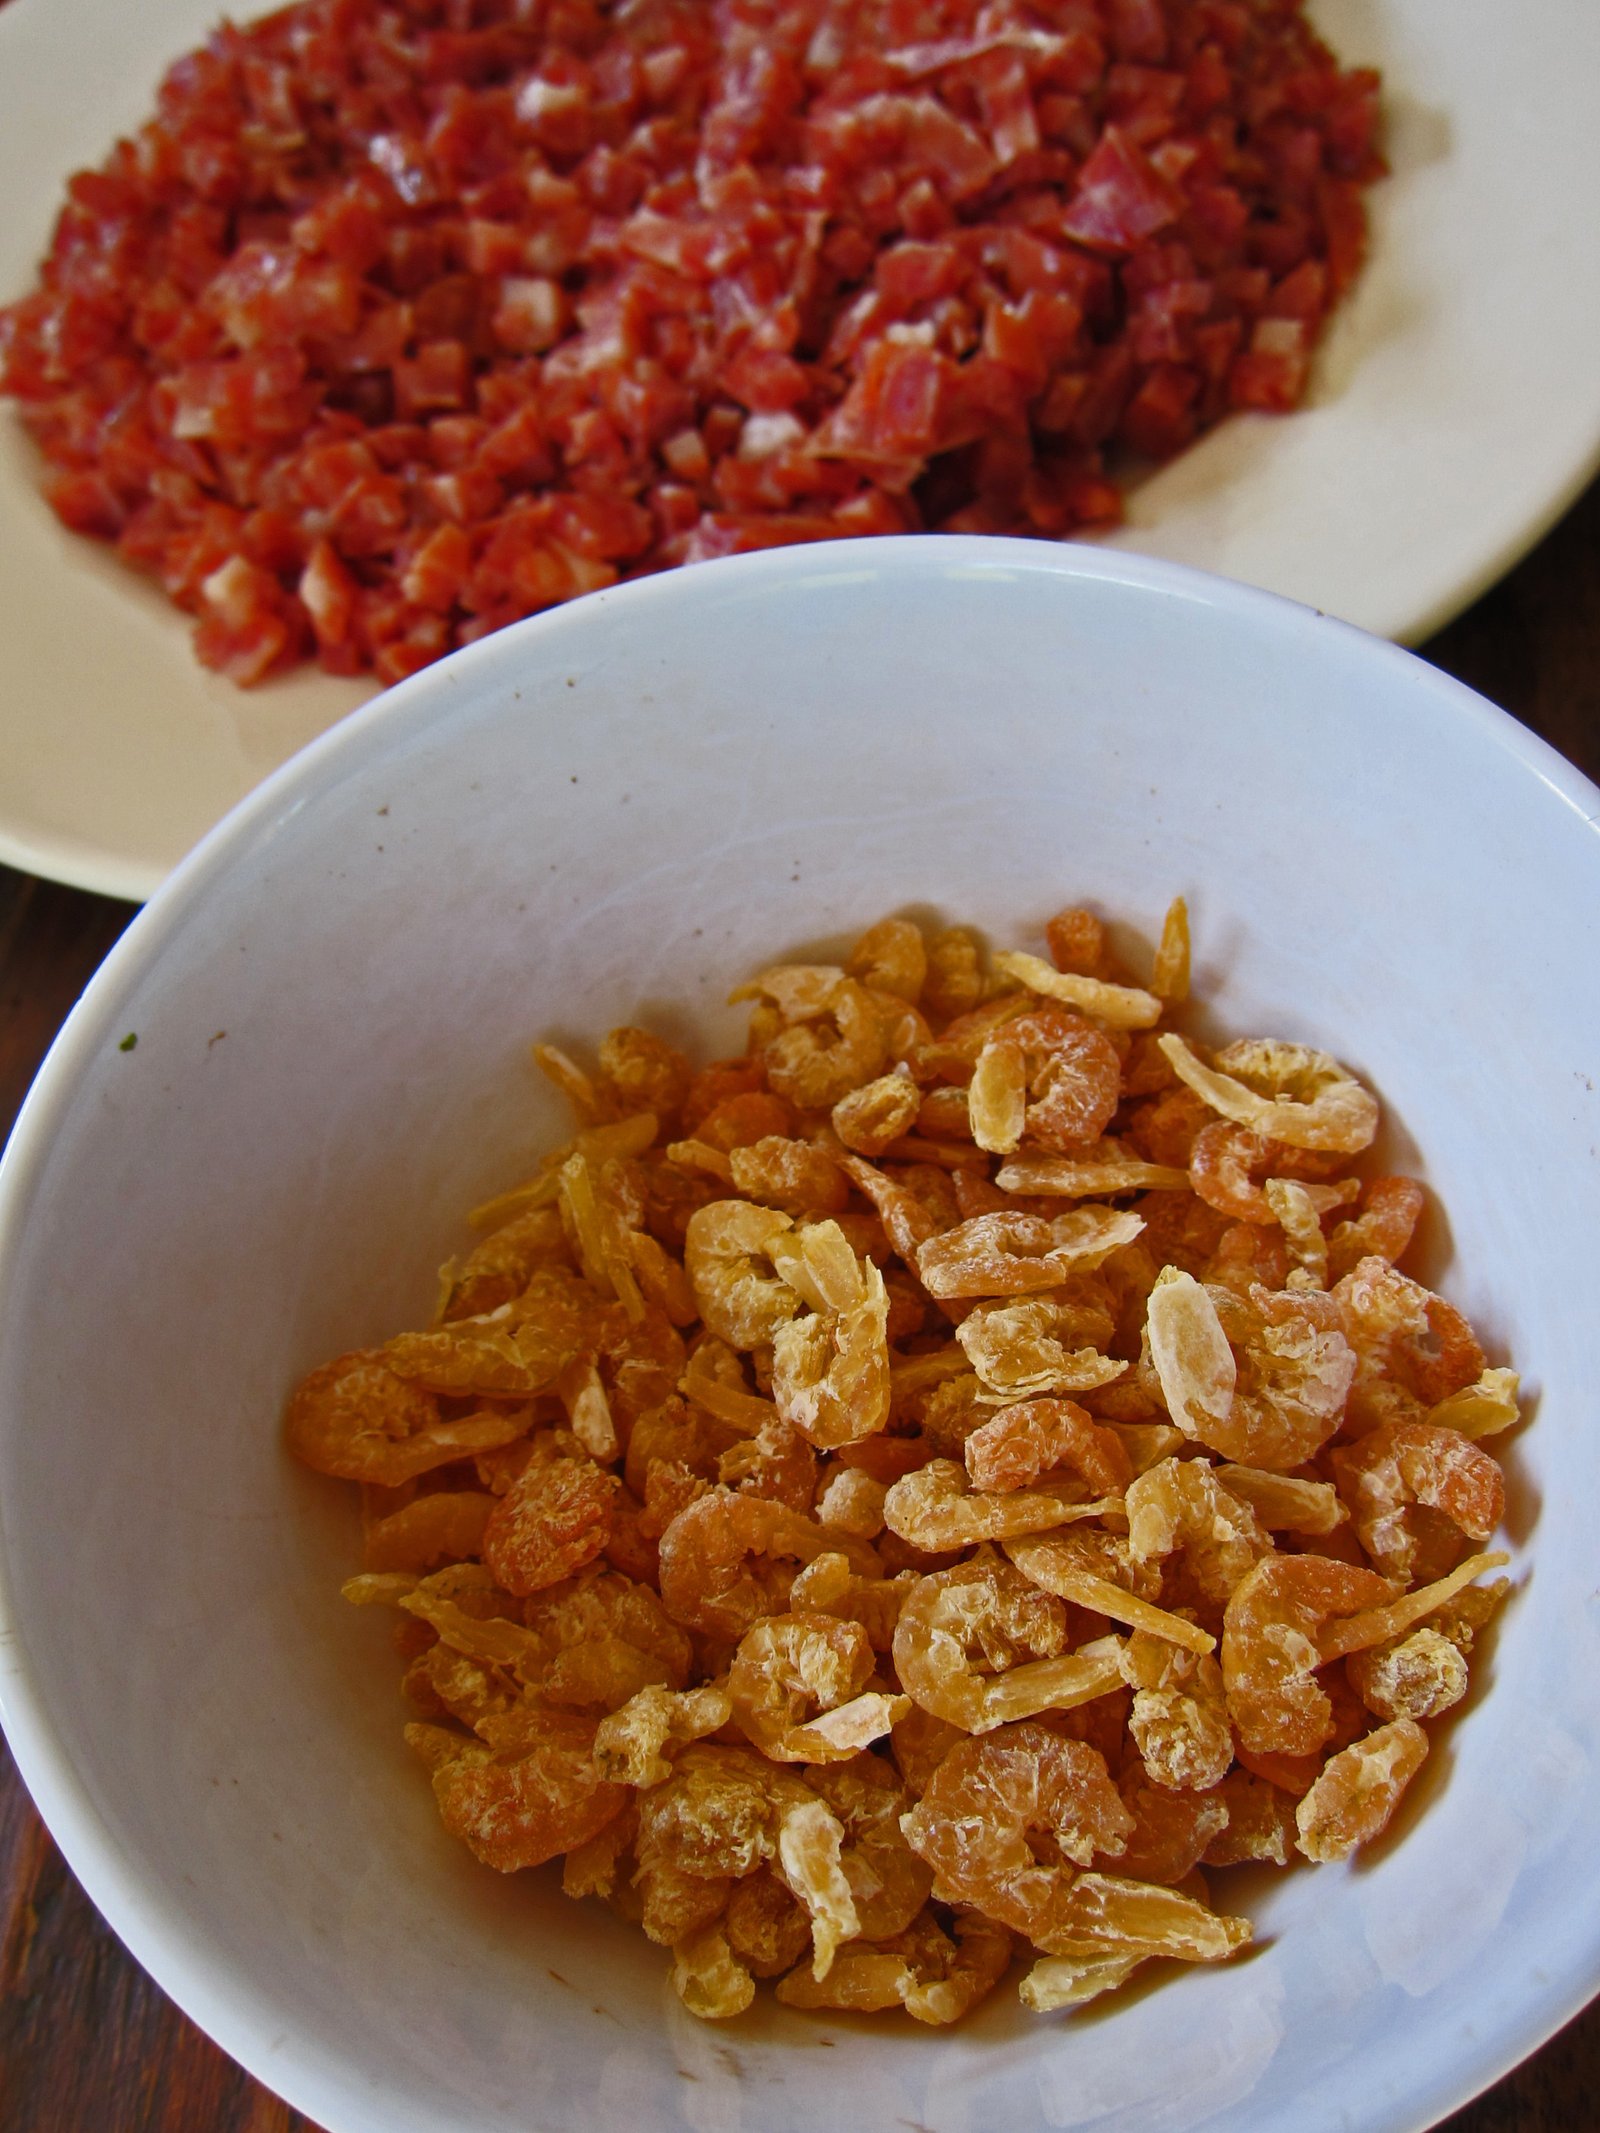
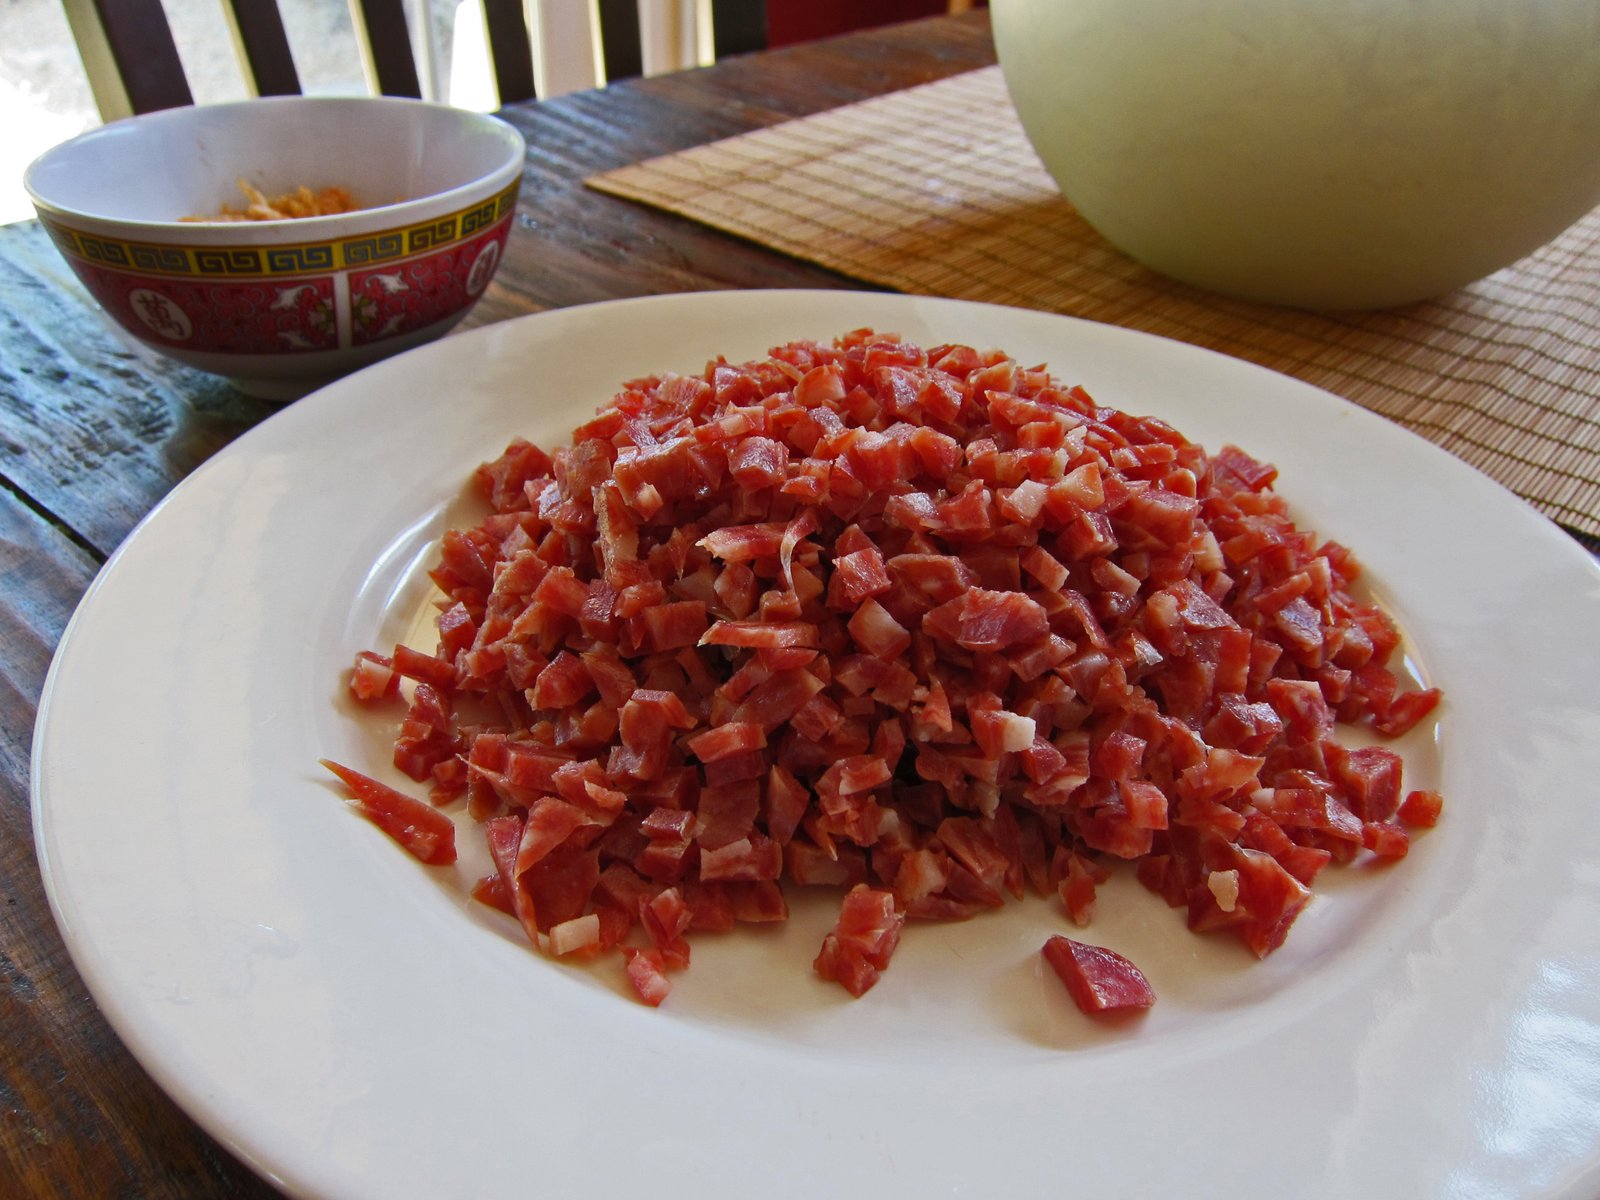
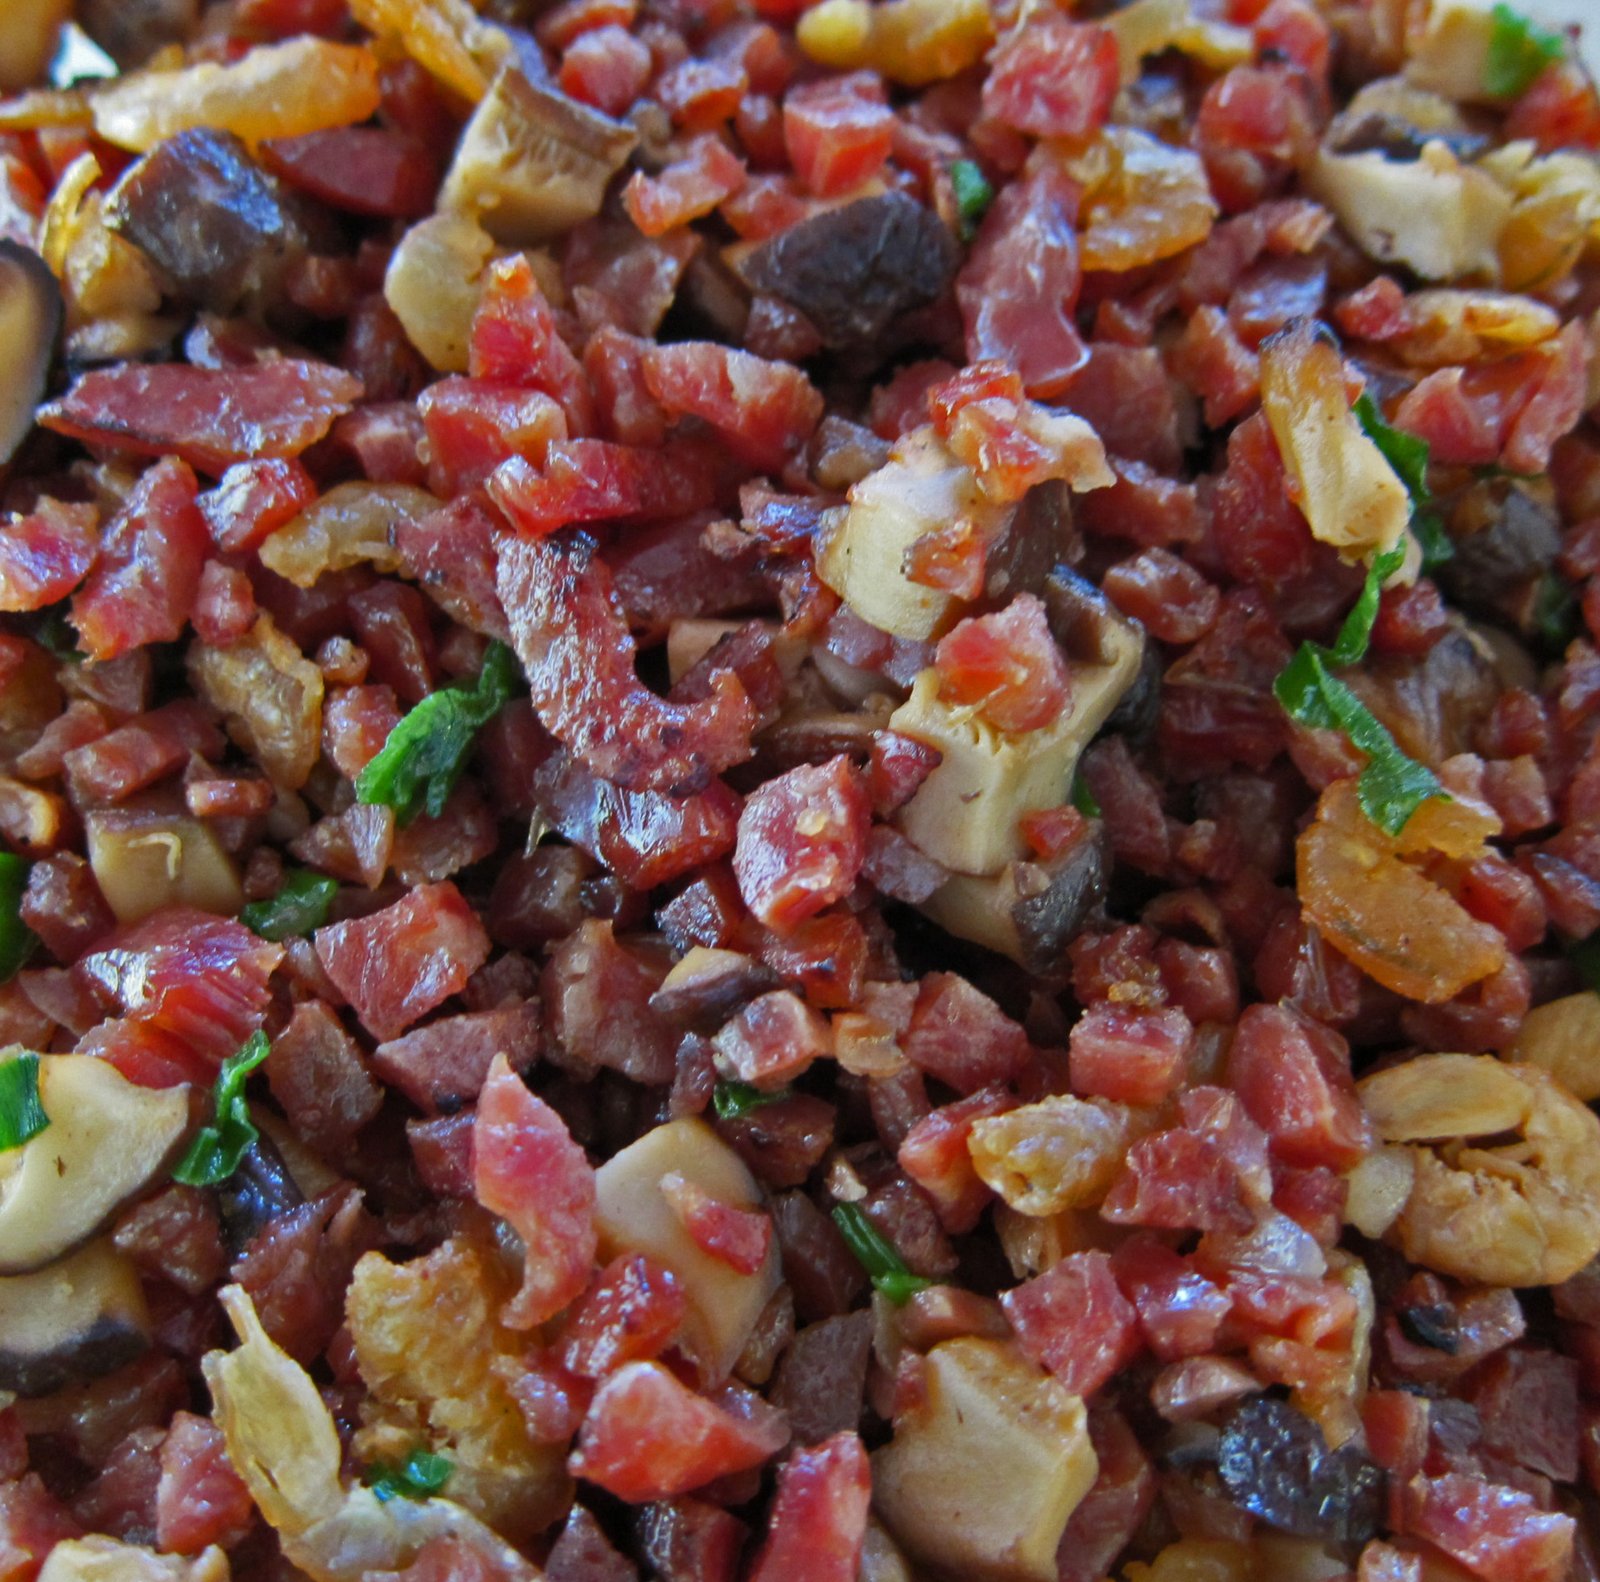
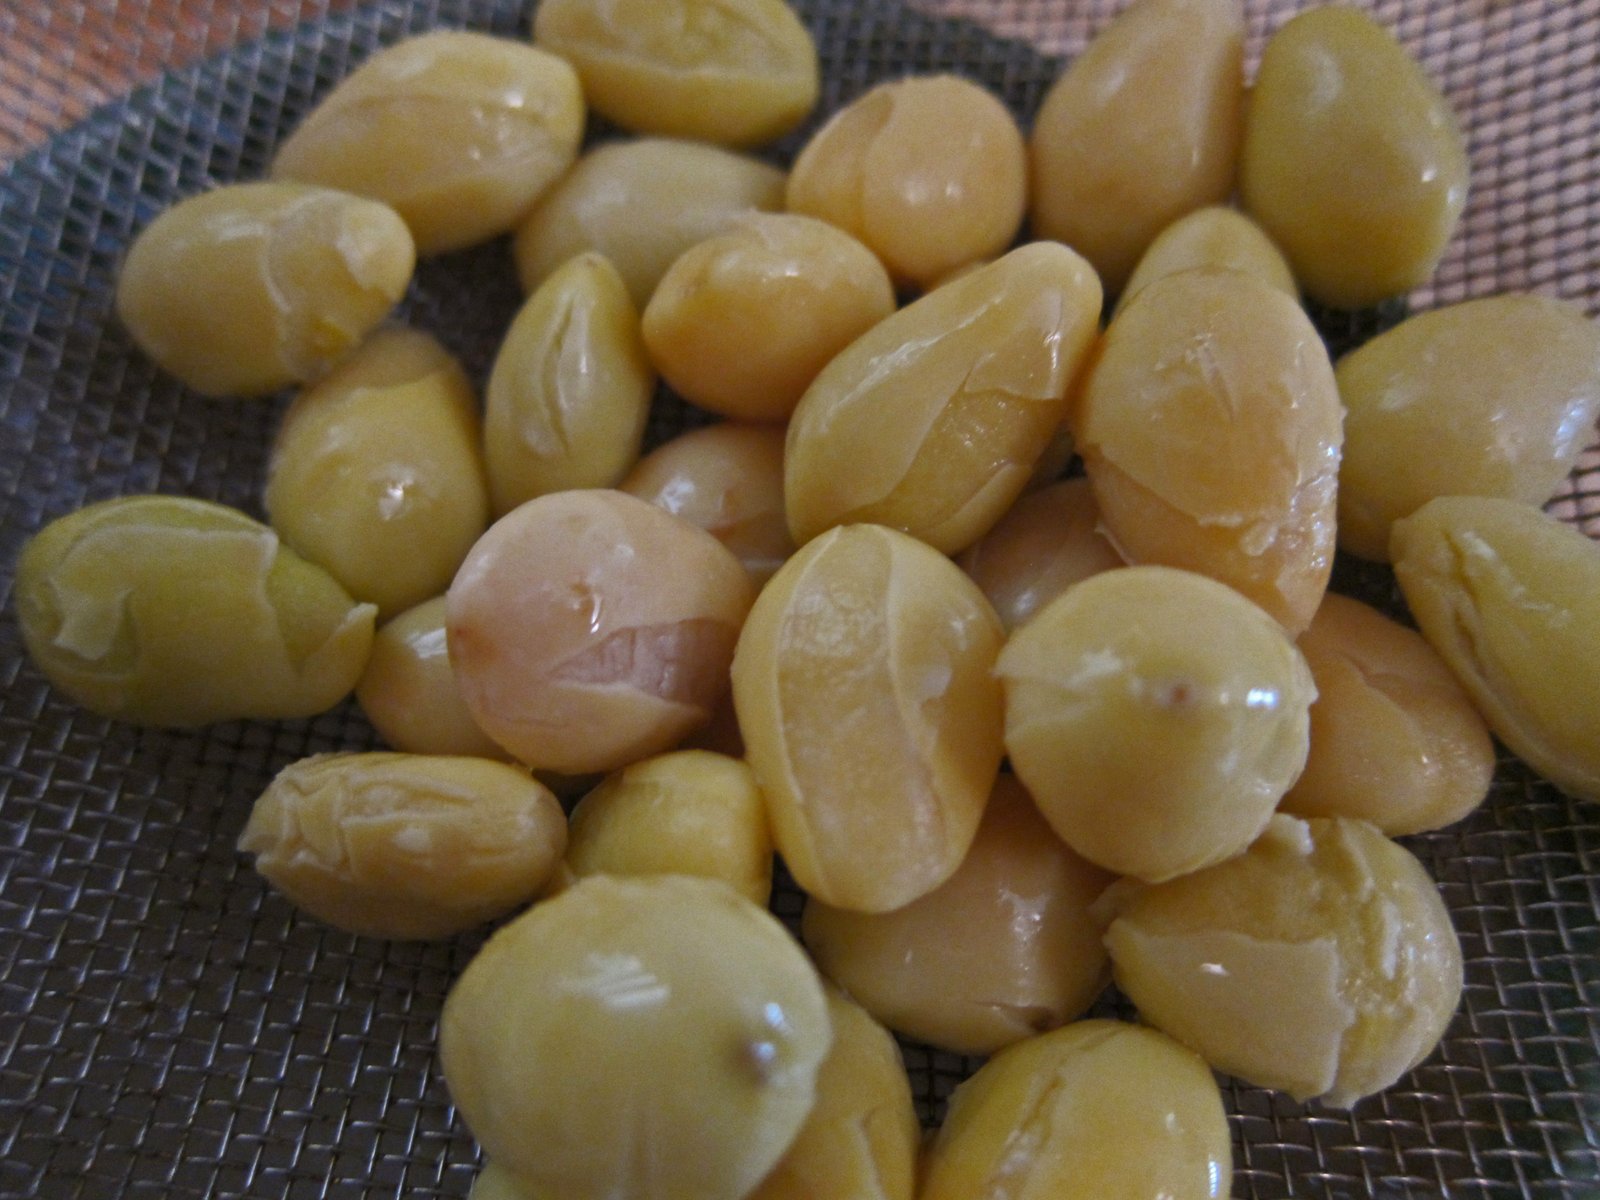
Another item we had with bittermelon were ginko nuts. I won't go into the supposed hStirFriedBittermelon09ealth benefits of ginko nuts in this post, as they range from asthma and skin ailments to gonorrhea….. And like the lily bulbs, fresh ginko nuts are hard to come by. And when available (Nijiya and Mitsuwa has them once in a while), they are quite expensive. So we decided to go with the canned stuff…. which also needs a quick rinse, since the smell can be pretty off-putting. We also thought the addition of sweet onion would add another nice layer of flavor, along with some "Yang" to balance the "Yin".

A quick, and I mean quick stir-fry over 55,000 BTU's produced this:

StirFriedBittermelon10
Which is what I've been making, sometimes three times a week.

StirFriedBittermelon11
Along with that dish in the background (a recipe is forthcoming), this was one of the several dishes we had in China that we "brought back" with us. I guess I've changed my opinion of bittermelon!

I realize I forgot to list the health benefits of bittermelon, which is a pretty long list. Bittermelon is supposed to help digestion, constipation, promote liver health, and more recently some studies have indicated that bittermelon may be helpful in treating HIV. There are debates as to whether it is quinine that makes bittermelon bitter. Many cultures do use bittermelon both prophylactically, and to treat malaria.

StirFriedBittermelon12
I'm not sure about all that…. so can I just say that I(now) like eating the stuff?
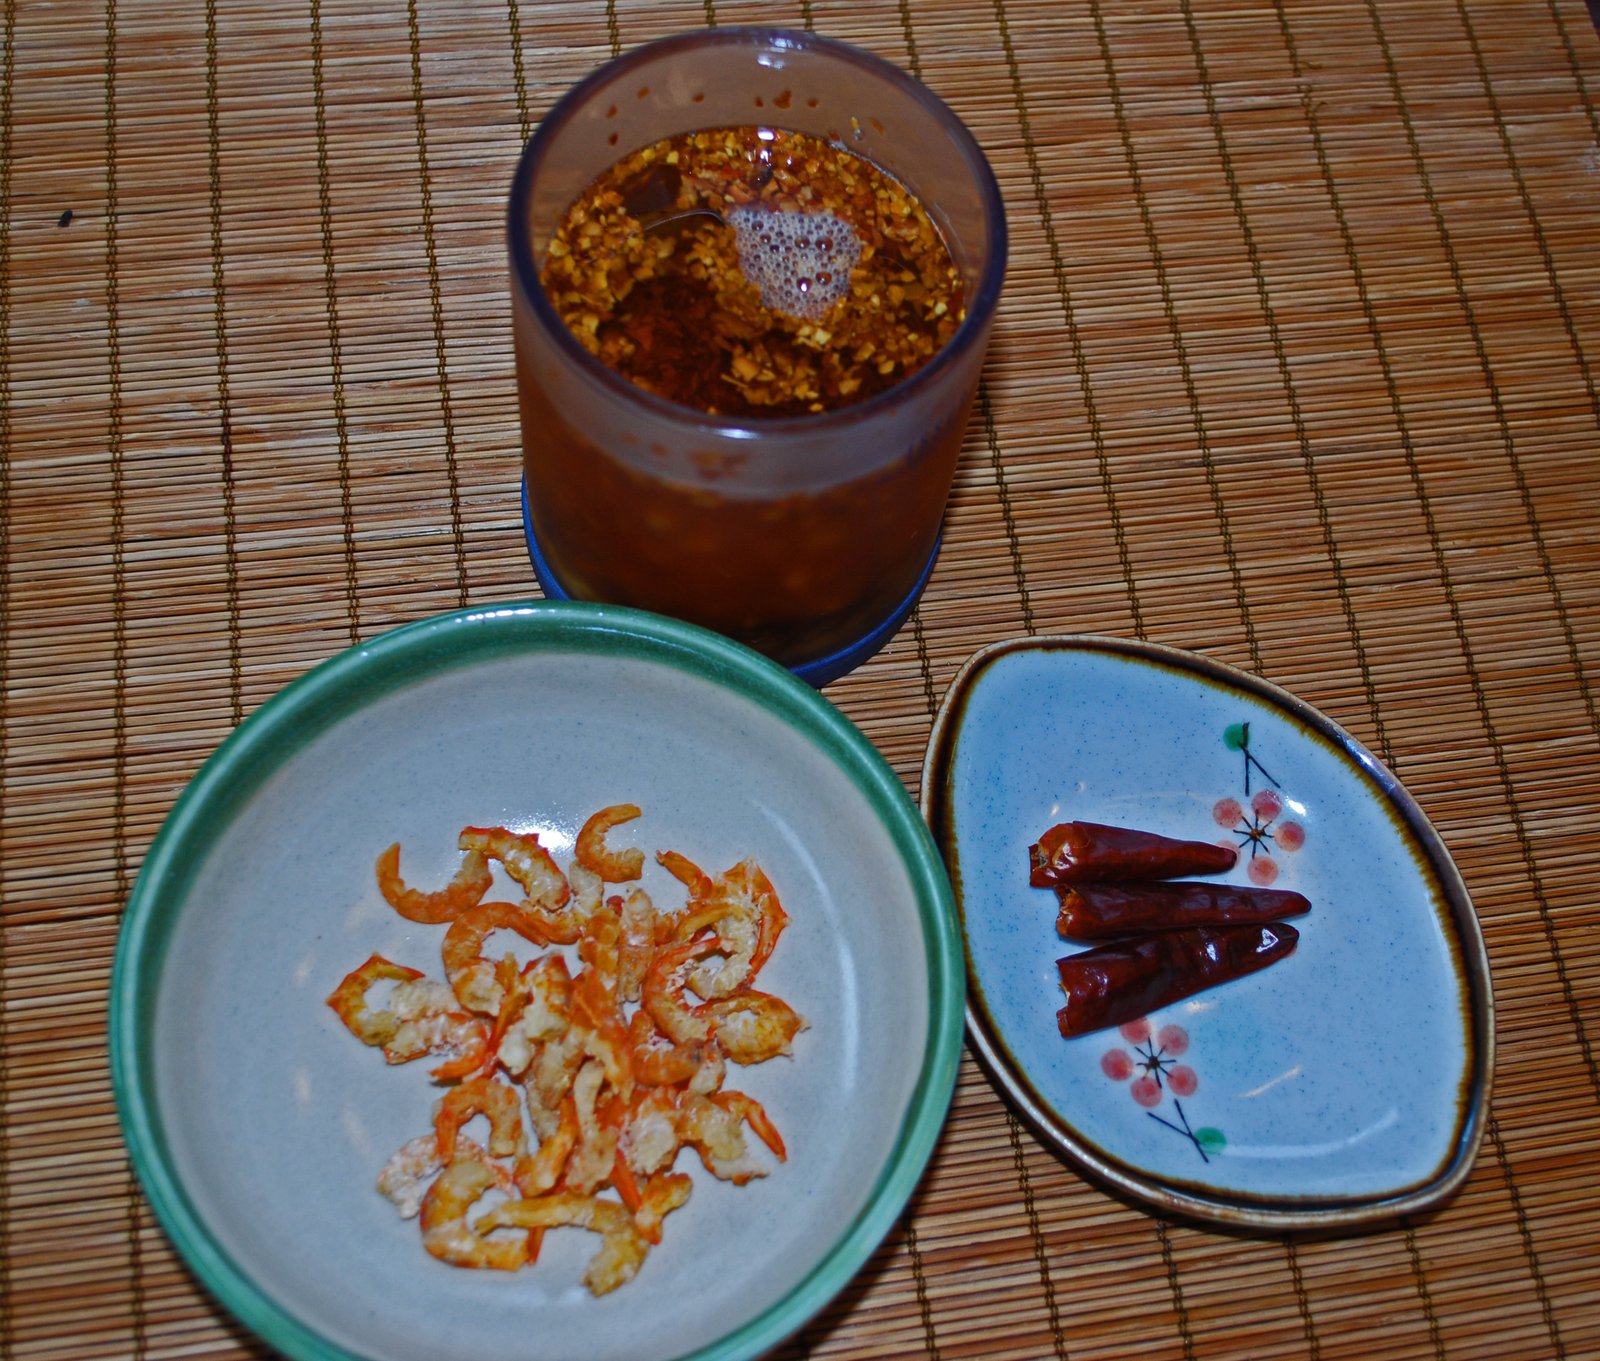
Nori Wrapped Chicken

A couple of days ago, on June 7th to be precise, Honolulu's two long-running, major newspapers, The Starbulletin and The Honolulu Advertiser merged and became one. Sadly, as with all of these types of "reorgs" and mergers there were casualties. And one of my favorite long running columnists Wanda Adams, who penned the "My Island Plate" column was one of them. After leaving Hawaii, the newspaper's weekly food and restaurant sections, and later blogs like Ono Kine Grindz (here's a link to Reid's older posts) were kind of my lifeline…. I was able to read about how food was changing "back home" as well as keep up on old favorites. So naturally when Wanda Adams' book, "The Island Plate: 150 Years of Recipes and Food Lore from The Honolulu Advertiser" came out, I made sure to get it. Doing a search, I can't find it available anywhere for sale except here right now. As I mentioned in the comments of another of my favorite author's, Rachel Laudan's blog post this past March announcing that The Island Plate II: More Recipes from The Honolulu Advertiser had come out, I was thrilled and made sure to order it. Both volumes have recipes of items that are near and dear to my heart. And though I may have my versions of the dishes being mentioned, like this one, it is still a wonderful read, giving you a "feel", history, and lore, of "da kine local food". And one more thing, it seems that Wanda Adams has entered the blogging world with Our Island Plate, so go check it out.

Meanwhile, I feel kinda sheepish starting this post with a paragraph like the one above, and making the following confession. For some reason, I've made this a couple times this year, but my photos really don't look all that appetizing.

NoriWrappedChicken01
To quote, "they looks like brown and black turds….." Sigh……

NoriWrappedChicken02Anyway, this is something you can't really find anywhere but in Hawaii. I know they used to serve it at Bob's Hawaiian Style Okazuya in Gardena (16814 S Vermont Avenue, Gardena, CA). That version made the Missus and I swell up pretty good, but was tasty. This version is basically my mochiko chicken dressed up with nori. Over the years, I've replaced the cornstarch with regular rice flour, it adds a bit more crunch, and adds to the sweetness. If making mochiko, I'll add baking soda, but I find it doesn't work as well with the nori wrapping.

Wrapping is easier than it seems…..most nori already have lines going horizontally across the sheets…. you just get those kitchen shears out and start cutting.

NoriWrappedChicken03
It can get messy, but isn't too hard. The hardest thing is keeping your hands clean and rather dry between pieces of chicken.

Nori Wrapped Chicken:

NoriWrappedChicken04
2 1/2 – 3 lbs chicken thighs cut into strips about the width of your thumb, and about 2" long.

Batter:
 Dry Ingredients
3/4 Cup rice flour
3/4 cup mochiko
1 cup granulated sugar
1/2 tsp salt

 Wet Ingredients:D6003272010 005
5 cloves garlic minced
1/3 cup green onion minced
2 eggs beaten
1/2 cup soy sauce (I use Aloha Shoyu for this)
ginger juice to taste
sambal olek (optional) to taste

1 Package Nori cut lengthwise into 1" strips
Canola Oil

– Combine dry ingredients
– Combine wet ingredients.
– Add wet to dry and mix well, you will use this as a marinade.
– Add chicken strips and mix well, until chicken is fully coated. (I use a ziplock bag for this)
– Marinate overnight.
– Bring canola oil to 350NoriWrappedChicken05
– On a large cutting board roll the chicken in nori. When done rolling, place the chicken crease side down. This will ensure that the nori doesn't come apart during frying.
– Fry in small batches. While chicken is frying, roll more chicken.
– When chicken is dark reddish brown, floating, and bubbling has diminished it should be fully cooked. Remove to a large plate or pan lined with paper towels. 

You can serve with a variety of dipping sauces if you want. My favorite is the old standby hot mustard and soy, you can do Kewpie Mayo topped with Shichimi Togarashi, Ponzu Sauce, or whatever. I'm sure yours will look much better than mine do!

And yes, I've made mochiko chicken wings…….

D6003272010 011

Watermelon Salad for Summer

Kirk is back with exciting tales about people, places, and food in China – Cathy is still eating and posting — and ed (from Yuma) just wants to share a salad with all of you.

This year, Tina has been growing herbs, which is a great thing because those fresh herbs come in very handy.  However, she recently was complaining about all the mint she'd grown.  In fact, when we harvested some of her crop (both regular and chocolate mint), the pile looked like this:IMG_3073
A pile this huge was well beyond the amount of mint that can be consumed easily in mint juleps (I don't even want to imagine).  So what to do? As fate would have it, right after she was laminting about her abundant harvest, I noticed that watermelons were on sale in town.  Problem solved.

One of my favorite dishes this time of year, as Yuma heats up, is watermelon salad. As usual, I began by juicing some limes — in this case, about seven or eight key limes total:IMG_3046
 I then sliced up half of a red onion that I had in my refrigerator:IMG_3049
I then combined the sliced onion with the lime juice in a sealable baggie and stored the mixture overnight in my refrigerator.

The next day, the onion slices had a nice sour tang, and they and the lime juice were both pretty and pink:

IMG_3059 
I then cut open a mini seedless watermelon:IMG_3063
After cutting the flesh off of the rinds and chopping it up, I had a bowl of sweet watermelon chunks:
 IMG_3068
Since I was preparing the salad over at Tina's place, I also had a good loyal friend in the kitchen, Tina's dog Lucy:

IMG_3070
Unable to speak English, Lucy communicates telepathically and was saying, "What you making?  How much does the dog get?  You know the dog is hungry, don't you?  And you just said the dog was a good dog.  The dog loves watching you make food.  Did I mention I was a good dog?  And a hungry dog?  And a hopeful dog?" Sometimes dogs have very little to do except watch and hope.

So, after giving Lucy a couple of watermelon chunks, I then coarsely chopped up that huge pile of mint leaves:  

IMG_3078 
I put the chopped mint, the onion slices, and about a cup (?) of crumbled feta cheese (basically what I had left in a package in the refrigerator) on top of the watermelon pieces:

IMG_3080
Next, I poured extra virgin olive oil and some of the leftover pink lime juice on top of the mixture and stirred everything up together.  I tasted it to see if more lime juice or olive oil was needed and adjusted the balance of ingredients. The salad ended up looking like this: 

IMG_3086
 Here's a close-up:IMG_3089
For me, this is a perfect hot weather salad.  The sweetness of the watermelon, which should be the star of the show, is balanced by the tart and crunchy onion slices.  The abundant mint adds a wonderful summertime flavor note.  The feta cheese provides a color contrast and a slight saltiness to the overall dish.  Watermelon salad makes an excellent lunch by itself, but it also complements a wide range of foods (hint: try with smoked paprika paella). I made at least 6 servings with this recipe.

This salad can also be made with strongly flavored pitted olives — such as Kalamatas — alongside or in place of the feta cheese.  I have also used chopped Italian parsley to augment the mint, but there was no need to do so with all  of Tina's mint. Fresh ground black pepper would not be out of place on the salad either.

In any case, try this, and I think you will like it. We do!

Watermelon Salad

1 baby seedless watermelon
juice from 6-8 key limes
half a small red onion, sliced
A pile of chopped mint
feta cheese (and/or) pitted olives
olive oil

Alice updated….. A revised Chicken Alice Fried Chicken recipe

I had actually started a post called "Goodbye Alice"…. I had finally used up the last bottle of Park's Brand Kimchee Sauce, and made my last batch of Chicken Alice Fried Chicken. If you're wondering who Chicken Alice is, and what's the big deal about her fried chicken, you can read the Honolulu Star Bulletin article from 2005 here. And if you'd like to read about how much I enjoyed Chicken Alice's Fried Chicken my original post is here. Well enough of that….. this is part of what I thought my last batch of Chicken Alice's chicken looked like:

RevisedAlice01 
There's a certain crispy-sticky texture that the batter has. Courtesy of this:

RevisedAlice02
And over the years, whenever I had visitors who asked me what I wanted…. I'd say Park's Brand Kim Chee Sauce…. boy did I get some really interesting responses……. of all the things I'd want from home, it was a second rate Kim Chee base. Needing refrigeration, I knew it was a hassle getting this for me, so I decided to stop asking…… and so I thought I'd made my last batch.

Until, on a recent visit to Marukai Gardena, I spied this:

RevisedAlice03
I couldn't believe my eyes…… after making sure that I wasn't suffering from some sort of dementia, I bought three bottles. You see, I'd been less than pleased with my last couple of batches…. I still enjoyed the chicken, but it tasted a bit dated. Personally, I think people enjoy bolder flavors nowadays, and this recipe was starting to be a bit….. well, "Chicken Alice a la King"…. a recipe from another generation. Now that I had a decent stock on hand, I decided to experiment a bit. Recently. I've been updating my mochiko, and other chicken recipes replacing flour with rice flour, which creates a lighter, sweeter, a slightly more crisp batter. So my first shot was replacing the flour in the recipe with rice flour:

RevisedAlice04 
Based on the amount of water in the recipe, I should have known better…… the batter was too thin, and didn't adhere well to the chicken. I think I could have done some neato-Korean voodoo-Kyochon-double frying, and perhaps have gotten a better results, but I love the crunchy batter. In the end, the changes were minor. I added sugar, because I enjoy a tad more sweetness. I upped the garlic to one entire bulb. I added a teaspoon of Korean Red Chili powder for more heat, and the biggest change, to lighten up, and give me some good crispness, I added baking powder. Nothing like a bit more leavening to get things crisp and light.

RevisedAlice06
Compare it to the first photo, and you'll notice a much more crunchy batter. One real seriousRevisedAlice07 item…… adding sugar means that these babies will burn if not tended right. I did end up double frying. The Missus, who is suffering from PPTSS (Post Poultry Tramatic Stress Syndrome, as detailed in this post), ended up taking most of the chicken to work. And I heard it went over well. 

Chicken Alice Fried Chicken revised
5 pounds chicken wings
Vegetable oil for deep frying 

Batter:
1/2 cup Parks brand kim chee sauce
1 bulb galic minced
1/4 cup sugar
2 tablespoons salt
2-1/2 cups flour
2 1/2 cups water
1 tsp Baking Powder
1 tsp Korean Red Pepper powder (optional)

Combine kim chee sauce, garlic, salt, sugar, baking powder, and flour. Add water gradually, enough RevisedAlice05 to make a thick batter, about the consistency of pancake batter.

Add chicken pieces to batter, mix well and marinate in refrigerator overnight.

Heat oil to 350 degrees.Deep-fry chicken pieces until chicken rises to surface and is light brown. Remove and cool for five minutes return to oil and fry until coating is deep brown, and chicken pieces float.It's important to keep the oil at this temperature in order to assure the perfect crisp coating.

RevisedAlice08

Chiu Chow Squash Pancakes

When the Missus saw this recipe in Mastering the Art of Chinese Cookingby Eileen Yin-Fei Lo She wanted it made immediately. It seems, the Missus doesn't just love Okonomiyaki, but all types of pancakes.

SquashPancake01
 The Missus had eaten something like this before, but balked at the addition of peanuts, so I omitted them. In order to get a nutty flavor, I added sesame oil instead. So if you want to make the recipe as written in the book, you can add 2 tablespoons raw peanuts that you dry roast. The Missus thought zucchini would be pretty bland, so we bought what She called "water squash". I removed the seeds and just used the solid portions. It did add a nice mild sweetness. I also realized that this might be a tad bland so I added a bit of salt. I would also recommend that you follow the recipe's instructions and use peanut oil. Because of the rather delicate flavor, it will make a difference. Also, 1 1/2 cup of squash isn't much bulk, so I doubled the recipe, which made four decent size pancakes.

So without further ado…..

SquashPancake02
Chiu Chow Squash Pancakes

1 1/2 Cups Squash or zucchini sliced into 1/4" stripsSquashPancake03 
3 Tb sliced scallion
1 large egg lightly beaten
1 1/2 Tb premium soy sauce
1 1/2 tsp Shaoxing (drinking quality please)
4 1/2 Tb All purpose flour
1/2 tsp sugar
1/2 tsp sesame oil
dash of white pepper and salt
3+ Tb peanut oil.

– In a bowl combine dry ingredients
– In another bowl lightly beat egg and add soy sauce, sesame oil, and ShaoxingSquashPancake04 
– Add sift dry ingredients into wet and combine into a batter.
– Add scallions and squash and mix until a batter forms.
– For about 30-40 seconds, heat a pan or wok over high heat.
– Add 3 Tb peanut oil, make sure the pan is fully coated.
– Using a large spoon or ladle, scoop up half the batter and pour into the pan.
– Using the spoon or ladle, gently spread the batter until a fairly thin textured circle is formed.
– Jiggle the pan and wok to ensure that the pancake is not sticking. Lower temperature to medium.
– When you can see the edges of the pancake is brown, flip the pancake over.
– Add more oil if necessary.
– When the pancake is browned, remove to a paper-towel lined plate.

SquashPancake05

Chinese Style Spicy Eggplant

DryCookedEggplant01

To tell you the truth, I don't really know what to call this dish. It is truly an "ABCD" – American Born Chinese Dish….. It takes a bit from a bunch of different dishes I've eaten. I'd love to call it "Gan Shao Qie Zi"(干燒茄子), dry braised eggplant, but this really isn't that either. The dish was born from necessity. The Missus loves eggplant, but at the time…. almost twelve years ago, all we had was a lousy electric stove. Also, since eggplant is a real "oil sponge" we really didn't want to use very much oil, especially without high heat.

DryCookedEggplant02 I'm sure most of you have created your own hybrid dishes born of necessity. This one is ours. Basically, the eggplant starts in a smoking wok, but once color is achieved, the heat is turned down to medium. DryCookedEggplant03

The eggplant is flavored during cooking with some of our favorite ingredients. Items are added as the various liquids are absorbed by the eggplant.

Once the eggplant has been cooked as desired an additional sauce is mixed with the eggplant.

DryCookedEggplant05
It's one of the dishes that we've kept since our apartment days…… It may seem like a lot of steps, but like most things I make, it's pretty easy.

DryCookedEggplant04 And though I'm still not quite convinced this is worth a post, I'm tired of looking at the photos. Maybe you all can share the recipes born of necessity that you've kept from your college dorm or apartment days. I'm sure you've come up with some pretty innovative stuff and I'd love to read about it!

DryCookedEggplant07
Chinese Style Spicy Eggplant:

1 1/2 – 2 lbs Chinese Eggplant cubed
3-4 Dried ChiliesDryCookedEggplant08
3-4 Tb dried shrimp
5 cloves of garlic minced
1 Tb granulated sugar
2-3 Tb soy sauce
2-3 Tb Chinkiang Black Vinegar
2-3 Tb Shaoxing – drinking quality
Water if necessary
Salt and White Pepper to taste
3-4 Tb Canola Oil

Sauce:
2-3 Tb Chinkiang Black VinegarDryCookedEggplant09
2 Tb Soy Sauce
1 Tb Oyster Sauce
1 Tb Hoisin sauce
1-2 tsp Chili Paste
1 tsp sesame oil

Chili oil
Cilantro

– Mix sauce ingredients.
– Heat a wok until smoking
– Add canola oil and scald dry chilies
– Add eggplant and dried shrimp and stir fry.

DryCookedEggplant06

– When the eggplant starts to color add Shaoxing and turn heat to medium.
– Add black vinegar, garlic, and sugar, and mix. Cover for 2 minutes to soften eggplant.
– Uncover and stir fry over medium heat until liquid is absorbed, and eggplant starts to turn "dry".
– Add soy sauce and keep stir frying.
– If eggplant has not softened add water 2 tablespoons at a time, mix, cover, and repeat, until eggplant is fully cooked through.
– Taste the eggplant, it should have some flavor even without the sauce.
– Using your Chinese spatula, manipulate the eggplant until the desired texture is achieved.
– Once the eggplant has reached your desired texture, add the sauce, mix quickly, and remove from heat.
– Add chili oil to taste, and garnish with cilantro.

DryCookedEggplant10

Midweek Meanderings

I was surprised that a few folks wanted to know what we did with "Daikon-zilla".

MoreTCake01
 Other than a bit for oroshi, we decided to make Turnip Cakes, which well, isn't made from turnips…perhaps it once was, but nowadays, radish is used. Funny thing, over the years my post and recipe for turnip cakes has been pretty popular.

I realized after shredding the daikon, that this was going to make a whooooole lotta turnip cakes. Meet mount daikon:

MoreTCake02 
  After simmering the daikon, and waiting for it to cool……

MoreTCake03
MoreTCake04 
MoreTCake06

I went to owkr on the other ingredients. I decided to use twice the amount of dried shrimp and lup cheong this itme around. I also added dried shiitake mushroom that had been soaked for about twenty minutes or so.

MoreTCake05
This time, instead of soaking the shrimp in water, I started the stir fry with the sausage and shrimp in about 2 tablespoons of oil, and added a a couple of tablespoons of the mushroom soaking liquid before adding the mushrooms. Scallions go last. I stir-fried the whole thing until the liquid evaporated….

MoreTCake07
MoreTCake08
I ad the cilantro directly into the batter before steaming. Man, this made four pans of turnip cake……

MoreTCake09
MoreTCake10
We gave some of it away…. but we'll be eating this for a while.

Of course the Missus needed something for lunch…… so I made some Karei Karaage.

KareiKaraage01
So easy it doesn't deserve a recipe…. potato starch, sea salt, shichimi togarashi……

Oil at 350……

KareiKaraage02
Fry away……

KareiKaraage03
Turn once…..

KareiKaraage04 
When the bubbling starts to slow down…..

KareiKaraage05
It's ready, freddy……

KareiKaraage06
I cut slits in the fish….. this allows the bones to cook, making them crunchy and edible. Afterall, one must get their calcium, right?

KareiKaraage07
So what did I eat? (yes, the Missus ate both of these) I had some of the lup cheong, shrimp, and mushroom mix, and made an omelet…. man was that good!

So what did you eat this past weekend?

Gamja Jorim – Korean Spicy Soy Sauce Potatoes

The Missus has been requesting these for a while, so today I thought I'd take a shot at making them.

GamjaJorim01
GamjaJorim02

You may not recognize the name, but once you look at them you'll realize that these are the sweet-savory-sometimes spicy potatoes that are delivered to your table as panchan.

This wasn't much of a problem as I had all the ingredients at home….. except for the potatoes. I wanted it a bit spicier than I usually get them so I added red pepper powder and kochujang. Another easy recipe, but quite good.

GamjaJorim03A couple of notes; the "mulyeot" I use is malt syrup, not colored corn syrup, which is cheaper, but at least to my palate doesn't taste the same. The Kochujang I use usually has glutinous rice powder and soybean in it. There are versions that use other ingredients.

GamjaJorim04
Gamja Jorim:

2 lb russet potatoes, peeled and cut into 1/2" – 3/4" cubes, rinsed to remove excess starch.
1 small onion sliced thinGamjaJorim05
6 cloves garlic sliced thin lengthwise
Red Pepper Powder to taste (optional)
2 Tb Canola Oil
Sesame Oil to taste

The sauce

1/4 Cup light soy sauce
1/4 Cup water
3 Tb Mulyeot (Malt Syrup)
3 Tb granulated sugar
1 Tb Kochujang
3 cloves garlic finely minced

– Mix the ingredients for the sauce, and set aside.
– Heat a saucepan over medium heat. Add the oil.
– Add the onions and garlic(and red pepper powder if desired), saute until translucent.
– Add the potatoes and saute.
– When the potatoes start to brown, add the sauce and bring to a boil.
– Turn down the heat to a low simmer, and cover.Stir every 2 minutes or so until the potatoes are cooked through.
– You may add more liquid if necessary.
– When the potatoes are cooked through, remove from heat and add sesame oil to taste, and stir to incorporate.
– Cover and let sit until cool.
– Serve at room temperature or cooler.

GamjaJorim06
It sure was nice to have a sunny day…… and San Diego always looks much better after a good rain has scrubbed the skies. While the Missus wanted to sleep in, I thought I'd take a drive, and ended up at Presidio Park. The Missus and I used to go there regularly when we lived in the Mission Valley area,  often packing a nice bento or sandwich lunch. Since we've moved, we haven't been back very often. But on days like today, it sure is a beautiful, and tranquil place.

02282010 012
Across from the park area was the location of Fort Stockton, and the monument to the Mormon Battalion.

02282010 015
02282010 018
02282010 019 
Here's the view on one side…..

02282010 017 

And even though the Missus decided on sleeping in, I was by no means alone……

02282010 009 
02282010 001

It made for a nice little diversion…..

I hope everyone had a great weekend!

Maguro many ways – Maguro Tartar, Maguro Carpaccio with Salsa Cruda, Maguro-Natto Don, and Maguro Yamakake

D6002152010 001
For this past Valentines Day, we picked up a nice 1 pound piece of Maguro in LA. A nice splurge for us. I was going to come home and do the usual thing……

The Missus however, had other ideas, and wanted something new. I was told that there would be no more this:

12312008 038
And don't even think about making that:

DSCF1818
I guess I'd been going "to the well" much too often, and I don't blame the Missus of being tired of poke and crusted maguro….. So what to do?

While staring at my Maguro, some ideas entered my mind. We'd stretch the block into four dishes, starting with some fancier dishes for lunch, followed by some more traditional preparations for dinner. This would even solve the "tuna dilemma"…… just about everytime we'd buy Maguro, there would be a nice portion that is pristine, dark and deep red. But there's always a bit of the tough and fibrous parts as well. By planning out the meal a bit, I could utilize the maguro more efficiently.

So for lunch, I made a Maguro Tartar, using my basic shoyu poke recipe, but utilizing a finer cut for my fish.

D6002152010 002
I mixed about 3 ounces of finely diced maguro with good quality shoyu, a few drops of ginger juice, 1/2 clove of garlic grated, 3 tablespoons of red onion brunoise, and sea salt. I placed the mixture in a clean Coral tuna can, and topped it with 1/2 small avocado diced, followed by 1/2 roma tomato, which was seeded, and diced.

D6002152010 004The can was inverted over a plate, and the whole thing was "coaxed out". I garnished the dish with ground chili, scallions, and wasabi tobiko.

For my other dish, I decided to do a tuna carpaccio, topped with greens and a salsa cruda.

D6002152010 010
I made two plates, so I used about another 3 ounces of maguro, a total of four slices which I placed between plastic wrap and pounded paper thin.

D6002152010 009The salsa cruda consisted of red onion brunoise, capers which were rinsed, than coarsely chopped, cucumber brunoise, kalamata olives brunoise, 1/2 serrano chili minced, and tomato brunoise. This was mixed with some good quality extra virgin olive oil and a squeeze of lemon juice for some acid. Sea salt and some lemon zest completed the salsa cruda. The paper thin slices of tuna were placed gently on the plate, topped with the salsa cruda, and finished off with mixed greens tossed with extra virgin olive oil and lemon juice. Served with some toasted baguette, this filled out our fairly light lunch.

D6002202010 001For dinner we wanted something more substantial, and the Missus decided She wanted Maguro-Natto Don, a tuna and natto rice bowl. The Missus and I often order this from Izakaya Sakura.

This was pretty easy, and I think you can figure out what is what here.

D6002202010 003
D6002202010 013
D6002202010 015

I did flavor the maguro with some soy sauce, sea salt, and ginger juice. The natto rested on some shiso leaves. I heated the natto slightly and added a touch of soy sauce, and topped it with a chiffonade of shiso leaves and shredded nori. Dabs of both prepared wasabi and hot mustard were provided for extra zip.

D6002202010 012
D6002202010 018

My dinner consisted of themaguro yamakake and rice. I used the lower grade portion of the maguro, which I mixed with soy sauce and scallions. I topped the whole thing with a good amount of grated yamaimo, which made it nice and "snotty". A topping of shredded nori and a dab of hot mustard finished things off. This was gooey-snotty heaven, and the yamaimo even tasted a bit sweet.

D6002202010 019 Grated yamaimo (tororo) is fairly substantial, and combined with the maguro and rice, was a filling, and satisfying end to the block of tuna.

So 1 pound of tuna, four dishes, two meals, and undoubtedly an increased mercury level………