Goya Tsukemomo (Pickled Bitter Melon – with some daikon too)

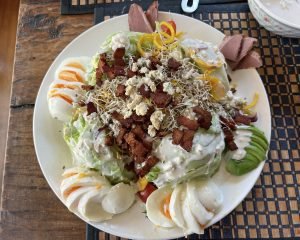
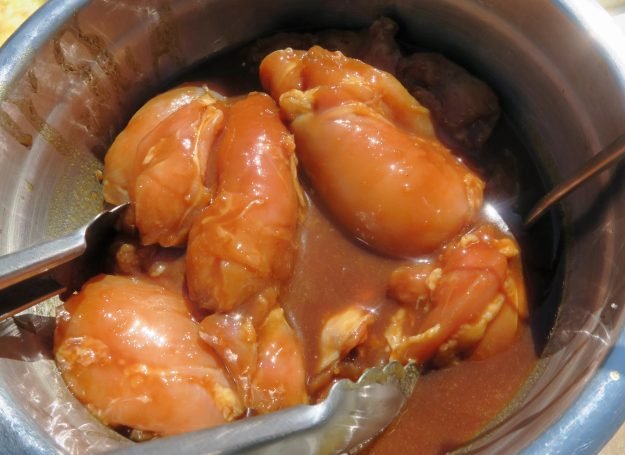
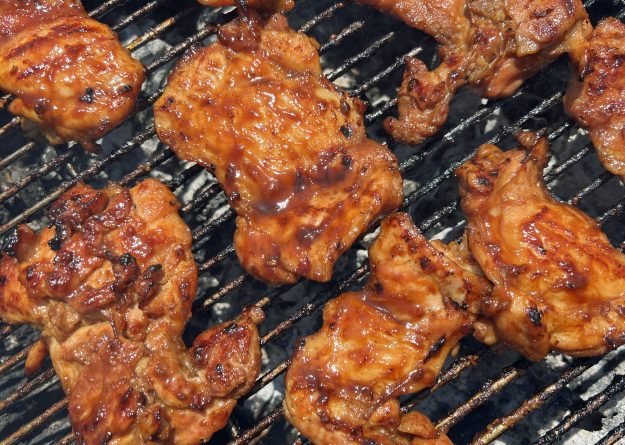
As you get older, do you find yourself eating more and more like your parents/grandparents? It came to me as I made us lunch the other day…..and no…sigh, the Missus cannot just eat Niku Doufu…She needs all those side dishes.

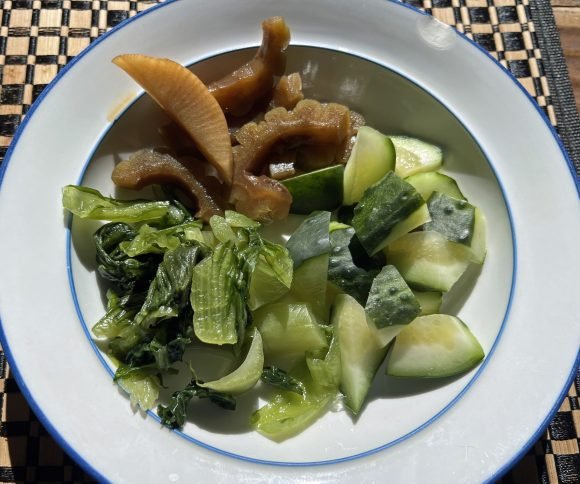
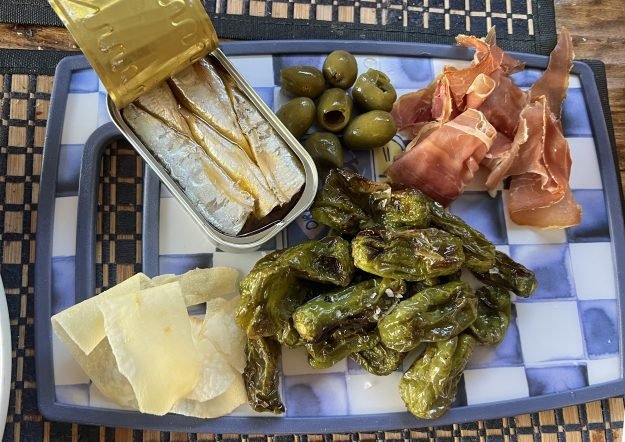
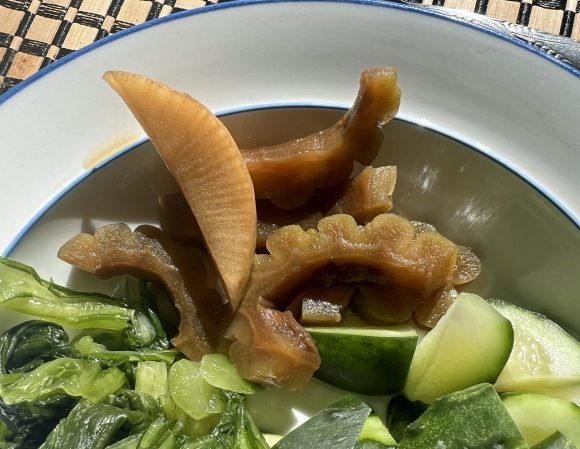
And while the takana (mustard greens) and kyuri (cucumber) asazuke are from the market. The one other item was not.

My grandparents loved bitter melon, at the age I was exposed to it….well, I hated it. When we lived in Kaimuki, our neighbors, the wife was Okinawan loved goya, and would give us goya and my mom, and later me; would make goya champuru…basically bitter melon and eggs. Being raised on a low income, it was a treat to have some Spam in it. They also gave us pickled bitter melon as well. Eventually, as I got older, I enjoyed it more, but still never really developed a taste for it until I was in my 30’s. Still, it wasn’t something I craved. And then we had our last trip “home”. My friends recommended a restaurant located on the second floor of McCully Shopping Center named Bozu. Yes, I know…waaaay behind on those posts!

Anyway, one of the dishes we ordered was the Pickled Bitter Melon.

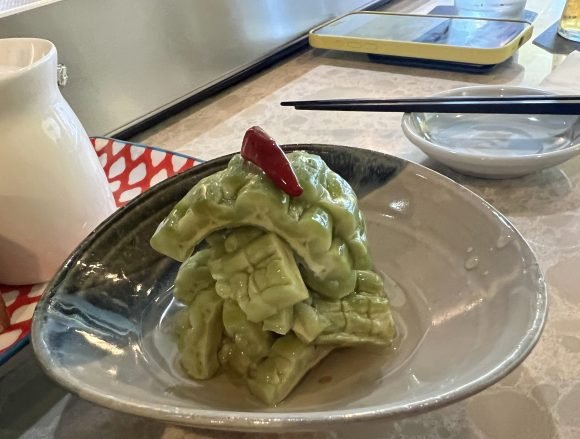
And the Missus was smitten! We ended up have three orders of this!

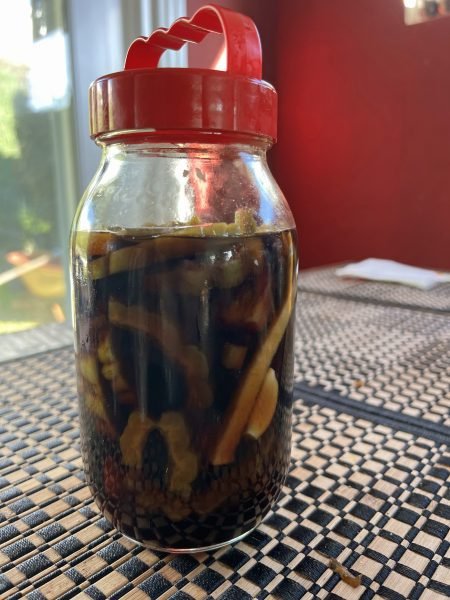
Anyway, recently I’d been doing a bunch of pickling…mainly of stuff from the garden and I decided to try my hand at making Goya Tsukemono. I looked online and thru several of my cookbooks and after several tries found one that interested me in Machiki Tateno’s Japanese Pickled Vegetables. In the end, I used the recipe as an outline ingredient wise totally changing proportion and quantity. Not wanting to waste excess pickling liquid I fill the excess space with slices of daikon, which does well in this pickling solution as well as a few cloves of garlic.

Anyway, it’s a current favorite of the Missus. And now it seems to be getting a bit of play since it’s considered an important ingredient of “Blue Zone” diets. I dunno about that….we just think this tastes mighty good!

A couple of notes – I use the daikon and garlic to fill space after adding the bitter melon. I’ve cut down on the amount of dark brown sugar since the Missus enjoys more salty/bitter to sweet.

Goya Tsukemono (With daikon and garlic too)
1 – 7-8 oz Bitter Melon
Boiling Water
Slices of daikon (optional)
5-6 Cloves peeled garlic (optional)

2 dried chilies
1/2 Cup Rice Wine Vinegar
1/2 Cup Light Soy Sauce – I used Aloha Shoyu
1/3 Cup Dark Brown Sugar
2 Slices of Ginger

  • Heat a pot of water to a boil
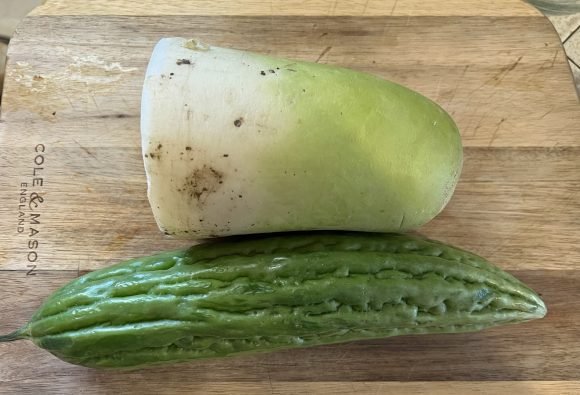
  • Slice bitter melon in half lengthwise, scoop out the seeds and scrape off as much white fibers and matter as possible. Slice into 1/3 inch slices cross wise.
  • Use boiling water to sterilize pickle jar and also pour over bitter melon and drain.
  • Add pickling ingredients to a small pot and bring to a boil.
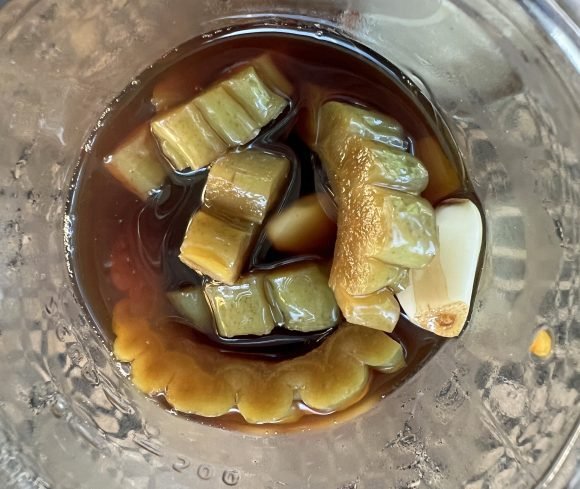
  • Add bitter melon slices to pickle jar. Fill excess with slices of daikon and garlic.
  • Add boiling pickling liquid to jar, let cool until warm. Then cover and refrigerate.
  • Wait 2-3 days before serving

If you try this recipe; let me know how it turns out!

Side Dish Sunday – Keru (Kale) Kurogomae

Recently, the Missus has been wanting all those “comfort” type dishes. Like Niku Dofu.

Of course, it can’t be “JUST” xxxx dish. There has to be some “side dishes” as well. Which ends up looking like this.

And yes, the Okra Kurogamae are still in the game so to speak. But recently, the Missus who has been on a gardening thing got some kale seeds from the library and they’ve been growing like crazy. It’s surprisngly tender…thing is; we’re not quite sure what type of kale it is…maybe Brazilian or perhaps Portuguese Kale?

Not sure; but it’s quite tender. So, at one point I wondered how it would do using at Kurogomae type sauce and served like a fukusai? It’s a bit of a pain, but after a couple of tries, I got the ratio down.

Of course, you need to squeeze out all that liquid from the kale.

Though 5-6 ounces of kale will make only that serving you see above. And so; this ain’t no cheapie dish…but the Missus really enjoys it…for now… You can do this with spinach as well.

The main difference between this and the okra version is it does well with some acidic and pungent notes. Anyway, here goes….

Keru Kurogomae
5-6 ounces Tender Kale or Spinach
1 Tb Kosher Salt
8 Cups water
Ice water

Sauce
4-5 Tb Black Sesame Powder
2 Tsp Sugar
2-3 Tsp Soy Sauce
2 Tsp Apple Cider or Rice Vinegar
1 Tb Sesame Oil
1-2 Tb Avocado or other neutral oil (optional)
1 clove garlic grated
Fresh Ground Black Pepper to taste

  • Rinse Greens
  • Add Kosher Salt to Water and bring to boil
  • Add greens and blanch quickly
  • Drain and place greens into ice water
    – Mix together sesame powder and sugar – combine well.
  • Add soy sauce, vinegar, and sesame oil.
    – Check consistency. Add neutral flavored oil as needed to create an acceptable texture.
  • Add garlic
  • Taste and add fresh ground black pepper as desired.
  • Drain greens well and squeeze out as much liquid as possible.
  • Chop kale into three pieces, then squeeze out excess liquid.
  • Separate kale leaves and mix into sauce. Coat well.
  • Refrigerate at least an hour before serving. And mix again before plating.
  • Top with sesame seeds (optional)

Funny thing. Just as this is kind of a mash-up; so is another dish that I’ve been making as well, using my base recipe for Niku Dofu and another traditional “old school” recipe I grew up eating. I’ll get that one done soon!

Easy Blue Cheese Dressing – aka what I make when the Missus says She wants “a wedgie”!!!!

During our road trips to Mammoth and Tahoe (yes, we took several), the Missus started enjoying Wedge salads. Which was news to me since She had always scoffed at the use of iceberg lettuce…but I guess time changes everything, right?

So, a couple of months ago, out of the blue (cheese), the Missus tells me She wants “a wedgie”! Say what?!? I think something definitely got lost in translation there. Shades of Sam Woo the “Killer Whale”! What’s even worse is that I knew what She was asking for…and no, it wasn’t a “wedgie” ok? She obviously wanted a wedge salad. So, over the course of about six weeks, I made over a dozen of those things. Now of course, She’s moved on, but I thought I’d better write this recipe down in case She wants a wedgie ahem, a wedge salad again one of these days.

Anyway, this is what it started looking like.

You remember the Missus’s preferences regarding Her veggies from my Tahini-Lemon Dressing post, right?

And then of course, this is what the salad looked like at the end of two weeks…….micro greens and sliced smoked duck breast…..and even more crumbled blue cheese topping the salad.

And then of course, She needed some “extras” to make it a “complete” meal.

A couple of notes; you’ll notice that the Missus wants lardons on Her salad; so I filter out the rendered bacon fat and add that to the dressing. Also, Maldon Smoked Salt does make a difference as well. As for the blue cheese; I try to go with something on the more pungent side of the scale. The mayo, sour cream, and buttermilk are all whole fat and organic.

Blue Cheese Dressing – makes approximately 1-1/3 cup of dressing

3 ounces Blue Cheese – and more to top the salad
1/3 cup Mayonnaise
1/3 cup Sour Cream
1/3 cup Buttermilk
2 Tb rendered bacon fat
1 Tb fresh squeezed lemon juice
1 Tb Red Wine Vinegar
1 tsp grated garlic
Fresh ground black pepper, granulated garlic (optional), and Maldon Smoked Salt to taste

  • In a mixing bowl, crumble and mash blue cheese with buttermilk until it resembles curds
  • Add Sour Cream and Mayonnaise and mix well
  • Add lemon juice, vinegar, and grated garlic and mix
  • Taste and add black pepper, smoked salt, and granulaed garlic (if desired)
  • Refrigerate for at least an hour before using

Local Kine Char Siu Chicken

Several folks have been asking me if I still cook and stuffs….and yes I do; though it’s mostly about technique and doing stuff on the fly these days. Though I do have several recipes/”formulas” and I guess it’s past the time I should do posts on these.

Anyway, here’s an actual recipe that I created during Covid after working thru it several times. It’s become a favorite of the Missus’s coworkers (thus the trip to June Lake – which I did again this year to cook for them), our neighbor who is from the Islands, and several other folks. When I grill it at home, most of it is given away.

It’s a riff on classic flavors of my youth….like local kine teriyaki-char siu. It is kind of a pain in the butt to make; which is why I put off doing this for so long….I’m not sure folks would like to make this.

First off; the basic recipe is for about a pound-and-a-half of boneless/skinless chicken thighs. Second, I tenderize each piece of chicken with a mallet. Third, I portion out and divide the sauce…for marinating, basting, and on the side….cause people like to use it for all kines of stuffs.

The Missus likes it in salads….and also on grilled tofu, which I coat with olive oil and duck fat; then season with salt-pepper-soy sauce-five spice.

Most folks get something like this from me.

Anyway….dis’ not one tightwad recipe.

Also, it uses bottled hoisin sauce. Though it’s important to look at the ingredient list. For example.

Two Hoisin Sauces….made by the same company….turn the bottles around and check the ingredients.

I know, both get so much modified stuffs….but the one on the left uses Fermented Soybean Paste, which provides a deeper-richer flavor.

Anyway…..too much talkin’…..

Local Kine Char Siu Chicken – I usually make a double recipe of the sauce:

3/4 Cup Hoisin Sauce
1/4 Cup Soy Sauce – yes, I still use Aloha Shoyu
1/4 Cup Dark Brown Sugar
1/4 Cup Agave Syrup
3 Tb Ketchup
3 Tb Shaoxing Wine
2-3 Cloves Garlic – minced or grated
1 Tsp Ginger Juice
1/2 – 1 Tsp Five Spice
1 1/2 Pounds Boneless-Skinless Chicken Thighs

  • Trim excess fat and connective tissue off chicken thighs
  • Tenderize with a mallet until uniform in thickness.
  • In a bowl, mix together Soy Sauce, Dark Brown Sugar, Ketchup, Shaoxing. Combine.
  • Add Hoisin Sauce and half the Agave Syrup mix well.
  • Add Garlic, Five Spice, and Ginger Juice – combine.
  • Taste with the tip of a chopstick – add the rest of Agave Syrup if necessary. Add more Five Spice and adjust other ingredients to taste (i.e. more garlic).
  • Once sauce is combined divide into two half portions.
  • Use one half of the sauce to coat and marinate the chicken.
    Make sure to coat well.
  • Divide the other half of the sauce into two equal portions.
  • Marinate at least 6 hours or overnight.
  • Grill the chicken. I use hardwood charcoal for a layer of flavor. I also use oak wood chips in a foil packet for an additional layer of flavor.
  • Use half of the reserved sauce for final basting.
  • The other half of the reserved sauce is placed into containers for dipping, pouring, or whatever the person wants

I know, kind of a lot of work but folks seem to like it!

Odds and Ends – Cumin Chinese Cauliflower (Caulilini), Pliny the Elder at Bay Hill Tavern, and Other “Stuffs”

Just a couple of quick things for today…..

I don't know if you've noticed. Many times, when we're having Chinese food whether at a restaurant or for takeout, we don't order vegetables. The reason for this is that the Missus has a hard time spending maybe over $15 for stir fried veggies. On most occasions we'll have leftovers and then I'll go ahead and stir fry veggies at home. I still have a Big Kahuna, my second one since 2005, this one goes to 65,000 BTU and is great for wok stir fries. 

Or, as in the case of the item below, I'll go ahead and roast something in the air fryer…..sometimes I'll do both at the same time as doing the stir fry can take less than 2 minutes!

Anyway, the latest item was something I just kinda made up. The Missus really likes Caulilini, which is known here as Chinese Cauliflower. It's the type of cauliflower She grew up eating in China. Also known as Baby Cauliflower, it features thin green stems, is a bit sweeter, the florets are more loosely arranged. The Missus grew up eating cauliflower stir fried with tomato. I thought I'd try something interesting, knowing that She enjoys the flavor of cumin in dishes like BO Zi Ran Yang Rou (Cumin Lamb). I thought the P-Cresol-ish cumin would go nicely with cauliflower and it did.

Cumin Cauliflower 01

Because the quantity of cauliflower varies, I'll just give you a photo of the ingredients (minus the cauliflower).

Cumin Cauliflower 02

There's a certain sequence that I've been using for making this.

Air Fryer Cumin Cauliflower
1 – After rinsing, prepping, and draining the cauliflower pour a few tablespoons of avocado, or any other neutral oil into a mixing bowl. Add cauliflower and combine.
2 – Add Sichuan Peppercorn oil to coat and White Pepper
3 – Add Cumin, Chinese Five Spice, and Granulated Garlic – I used to use fresh shopped garlic but it burned too easy. Mix well.
4 – Taste to make sure the cumin flavor comes thru clearly
5 – Add about a tablespoon of soy sauce and 2 tablespoons of chili crisp, I found that Lau Gan Ma works the best.
6 – Stir and mix well to coat.
7 – Taste and adjust seasonings and add smoked salt.
8 – Roast in 450° Air Fryer for 12-14 minutes.

The time the Missus said She wanted me to grill some Shishamo:

So, I went to grill some veggies and also some of my Local Kine Chashu Chicken for the Missus when She asked me to grill some Shishamo for Her. I thought this kind of strange, since we'd sometimes do it on the Konro, but She wanted it grilled….

So, I prepped some.

Shishamo JJ 01

When I finished, I found out who it was actually for. Guess who got Shishamo?

Shishamo JJ 02b

I actually posted about it on Instagram and some folks found it funny…..

Pliny the Elder at Bay Hill Tavern:

Earlier in the week, the Missus wanted some tacos from the Tacos La Chorreada Truck. So JJ and I walked on over, placed my order and decided to head on over to Bay Hill Tavern for a cerveza until my tacos were ready.

I was given the "specials" menu to look over and was pleasantly surprised.

IMG_9656

Man, they had Pliny the Elder on tap! When was the last time I had that?

IMG_9655

My goodness….it was so good. I'm hoping they still have it the next time I visit. If you plan on dropping by specifically for a PtE, perhaps you may want to call first as I'm sure they'll soon run out – 619-326-8828.

Bay Hill Tavern
3010 Clairemont Drive
San Diego, CA 92117
Current Hours:
Mon – Thurs 11am – 9pm
Friday            11am – 10pm
Saturday        10am – 10pm
Sunday          10am – 9pm

And finally……

My latest "ear worm":

I'm sure this might be before your time, but someone mentioned the late Wili Moku to me recently. He was the DJ I always listened to on KKUA in the 80's (before they became Public Radio – hey you rememba the Home Grown album?)

But for some reason, Da' Mokkettes song Palolo Valley Girls, a parody (of a parody) of Frank & Moon Unit Zappa's "Valley Girl" started playing in my head. Arrgh…..I just can't clear it out!

So, just to share the wealth.

"Shoot la dat, no act, no act……" "Make a all the way!"

Hope you're having a wonderful week!

Tahini-Lemon Dressing

"I just want a simple salad…." Ah yes, the phrase that will send shivers down my spine. Although, I guess the end product does look like a simple salad.

Tahini Dressing 01

It does look quite simple, right?

But, if you stage all the ingredients, it looks like this.

Tahini Dressing 02

And then of course the there's the preferences….."I want beets, but no red beets…they taste like dirt". "No orange carrots….it's so mundane…." And the biggest problem with the salad above? "I don't want grated beets or carrots, it makes them mushy….you need to do that spiral slicing thing." So, we got a spiral slicer.

Today's salad turned out looking like this.

Tahini Dressing 03

With the beets and carrots looking like this.

Tahini Dressing 04

And instead of croutons, I reheated some left over falafel from Ibis Market in the Air Fryer.

As for the dressing….well, that's evolved as well. The Missus wanted something similar to what we get at the Turquoise Room in Winslow, a Tahini based dressing. So, I initially started with the standard vinaigrette ratio on acid to EVOO, but it turns out the Missus enjoys a thinner, lighter dressing, with a fresher acidity from fresh squeezed lemon juice, with just a touch of sweetness. Vinegar was eliminated, so I can't call it a vinaigrette anymore. The Missus enjoys savory-nutty-sourness from Tahini, so I slowly increased the amount and came up with this base recipe.

Sorry, my photo of the dressing ain't very pretty.

Tahini Dressing 05

It's the Missus's current favorite dressing and I'm sure I'll be making this quite a bit as the weather warms up. Think of it as a base and adjust as necessary.

Tahini – Lemon Dressing
– Makes approximately 3/4 cup
1/4 Cup Tahini
1/4 Cup Extra Virgin Olive Oil
3 Tb Fresh Squeezed Lemon Juice
2 Tsp Maple or Agave Syrup
1 Clove Garlic grated or finely minced
Zest of 1/2 Lemon
Sea Salt and Black Pepper to Taste

– Whisk Tahini, EVOO, Lemon Juice, and Maple or Agave Syrup together until smooth.
– Add Garlic and Lemon Zest
– Taste and adjust sweet-sour profile to your taste
– Add salt and pepper to taste

Super easy yeah?

Tahini Dressing 06

Have a great weekend everyone!

Juewei Revisited and 20 Minute Zhou/Jook/Congee

Juewei has become a semi-regular stop for us since they opened last November. What we've found is that they make the smoked chicken we enjoy on weekends, so we'll drop by and pick one up ($17.99) with some side dishes.

Juewei Rev 01

Juewei Rev 02

Along with usually some quail eggs and yuba….in fact, the woman who runs the place just starts packing the yuba when I walk in the door!

Juewei Rev 04

And recently, we saw that they added a spicy braised beef….I dunno the name because the Missus orders it in Mandarin.

Juewei Rev 05

And of course the chicken.

Juewei Rev 03

Now, you may ask if we just eat everything as is…..well, sometimes. The yuba is a great side dish as is the beef. Though that chicken can be up to four meals. Here's what we do.

We make baos with the meatier parts of the chicken and also with the beef. I have a microwave tortilla warmer pouch that I found does a good job of warming up the baos! I also will crisp up some of the skin in the air fryer for textural contrast.

For some reason, this winter – early spring we've been eating a lot of Zhou…which is what the Missus calls it. I have always called the dish using the Cantonese name; jook. The Missus had found the quite popular 20 minute congee recipes posted on Instagram and TikTok where you freeze the rinsed rice for 8 hours. After working thru the recipe a few times, I found an approach that we prefer. The porridge seems to come out a bit creamier and it only takes a couple of hours to freeze.

I rinse one-third cup of rice. I tend to prefer Koshihikari rice….yes, it's a bit more expensive, but to me, based on the starch content worth using. Plus, we tend to use higher quality rice when cooking at home anyway. I then place the rice in a small metal mixing bowl and cover with one cup of water and freeze.

Juewei Rev 06

When I'm ready to make the porridge, I take out a donabe; a Japanese clay pot which I have. I place the metal mixing bowl on the stove and heat briefly to melt the edges of the ice. I then place the donabe on the stove, move the rice-ice and melted water into the donabe and add three more cups of water, heat, and bring to a simmer.

Juewei Rev 07

I then get my kitchen shears and slice the chicken carcass in half. I can make two portions of the porridge. I trim excess meat off the bones; usually from the thighs and drumstick…the breast and some of the thigh meat has already been used to make the baos we had previously. I chop the meat up into pieces. I separate the bones and place that in the porridge. While the Missus grew up eating plain boiled Zhou in QingDao, my mom used to make jook using turkey bones after Thanksgiving. Turkey Jook is very popular "back home". Kathy from Onolicious Hawaii has a page and recipe on Turkey Jook here

Because of flavor of the smoked chicken is quite strong, the flavor transfer is done fairly quickly. I then add in the meat, usually some green onions, white pepper.

Juewei Rev 08

The rice gets creamy in about 20 minutes, 30 minutes max.

The Missus likes some minced bitter greens along with the quail eggs in Hers. I like to add a little shoyu, yuba (of course), takana (pickled mustard greens), and kimchi garlic shoots, if I have them.

Juewei Rev 00

If there's any chicken skin left; I'll crisp up in the air fryer and top off the porridge with that.

Juewei has indeed become a regular stop for us because it provides us with additional options and ingredients for comfort food meals.

Juewei Food
4690 Convoy St. #103
San Diego, CA 92111
Current Hours:
Sun – Thurs 11am – 11pm
Fri – Sat        11am – Midnight

Okra Kurogomae

Hope you don't mind a quick and easy recipe for this Thursday!

A few months back, I noticed a new side dish at Nijiya; okra gomae. Knowing how much the Missus loves what the Japanese call "neba-neba"…that slimy-slippery stuff like natto…and okra. The Missus instantly enjoyed it. So, for the next couple of weeks, I'd get some when available.

Okra Kurogomae 01

But, you know how it goes….after getting this few times, the Missus started noticing how She would prefer this dish be made. More sesame flavor….not as sweet, etc. So, I was commissioned to create a version to Her taste.

I did mention not wanting to toast and grind sesame seeds. The Missus quickly came up with a solution to that. We had an unopened container of Black Sesame; the stuff you'd top desserts with in the cabinet.

Okra Kurogomae 03

Okay, we were off to the races. And this is what I've made a half dozen times since.

Okra Kurogomae 02a

Not the prettiest dish in the world, huh?

Anyway, there were a couple of things I've noticed when trying to make this. First, younger, thinner okra works best. Second, the "sauce" can be a bit too thick, so I thin out the sauce with a neutral oil, like avocado oil as necessary. To get the right texture, I blanch the okra for a minute in boiling salt water, then stop the cooking by placing the okra into ice water. Doing this also brings out the nice green color of the okra and also makes it more "neba-neba".

I call it Kurogomae because I'm using the black sesame for this. Anyway, this recipe is to the Missus's taste, less sweet, more sesame flavor. It's easy to adjust.

Okra Kurogomae:

1/2 lb Okra – Younger/thinner preferred
1 Tb Kosher Salt
8 Cups water
Ice water

Sauce
3 Tb Black Sesame Powder or 4 Tb Toasted Black Sesame Seeds Ground
2 Tsp Sugar
2 Tsp Soy Sauce
1 Tb Sesame Oil
1-2 Tb Avocado or other neutral oil (optional) Okra Kurogomae 04

– Rinse off okra
– Add kosher salt to water and bring to a boil
– Add okra. Blanch for 1 minute
– Drain and put okra into ice water to stop cooking
– Once okra has cooled remove form ice water and dry

– Mix together sesame powder (or ground sesame), sugar, soy sauce, and sesame oil.
– Check consistency. Add neutral flavored oil as needed to create an acceptable texture. Okra Kurogomae 05
– Taste and adjust.

– Slice okra into bite sized pieces
– Mix sauce and okra together and chill for a half hour
– Give the okra a mix before serving. Yes, it's going to be neba-neba, but that's one of the reasons you like this, right?

Okra Kurogomae 07

It makes a nice side dish.

Okra Kurogomae 06

Just had some today with some Meat Jun I made.

Okra Kurogomae 00

Why the Missus can’t eat Chicken Katsu at Restaurants

In the comments section of a recent post, "FOY" DerekR asked me what I've been cooking recently. I know that during Covid, I used to do many more cooking type posts. And to be honest, much of what I make these days are tried and true recipes that I've posted over the years. And to be perfectly honest, lot of what I cook just use techniques that I've picked up over the years.

For instance, these days you'll be hard pressed getting the Missus to order chicken katsu when dining out. It's got to be highly recommended for Her to try it. And the reason is totally my fault. You see, a few years ago, I mentioned having worked in a Drive In back home. We made chicken katsu a certain way….which wasn't super good. But, we also knew how to make it for us. And when we did, we never needed to use salt; the breading never peeled off, and the chicken breast was very tender.

And it was simply done by doing a quick brine and rinse on the chicken before breading. We also tenderized the chicken breast. I also added seasonings to the egg wash (shoyu) and ground black pepper to the panko.

It used come out very evenly fried. Though my version may not be as pretty since I pan fry it, sorta like schnitzel, not wanting to waste oil…I use Avocado Oil so it ain't cheap.

C Katsu 01

The combination of the brine, I also add a bit of granulated garlic, the shoyu in the egg wash, and the ground black pepper in the panko just adds layers of flavors.

C Katsu 02

C Katsu 04a

You can see the shoyu in the egg wash above and the freshly ground black pepper in the panko below.

C Katsu 05

Now because of how I make this; I only usually make two breasts at a time; it ain't cheap since I have to make the brine everytime I make katsu, but the Missus said it's worth it.

The Brine:

4 cups cold water
1/4 cup Kosher Salt
1/4 tsp Granulated Garlic (optional)

Combine ingredients, whisk until salt is dissolved
Brine tenderized breasts for 8-15 minutes (I usually brine while getting flour-panko-egg wash ready)
Rinse chicken and dry well with paper towels; remember food safety is paramount – avoid cross contamination, I use disposable gloves, make sure to clean up well.

Make sure chicken is dry before doing the flour-egg wash-panko

For the egg wash; I usually use 1 egg and 1/2 teaspoon Kikkoman Shoyu.

It's funny how some simple steps I learned so long ago have reappeared!

C Katsu 06

So, there you go……

If you do try brining your chicken before making katsu; let me know how it turns out.

Chard with Pesto, Pancetta, and Tomatoes

Man, it been a while since I did a recipe post. I have been doing a great deal of cooking, though most of it has been free-form, without recipes. This one started out that way, but I've made it many times, so I finally went ahead and measured things.

It started out with incorporating the stems and ribs of chard in recipes using standard items from our pantry. In the end, I came up with this recipe that utilizes the stems of the chard, what I call "quad tomatoes", that is tomato paste, sundried tomatoes (and oil), and cherry tomatoes. And things start with pancetta. Initially, my inspiration came from a Kale with Pesto dish from Tribute Pizza and like my Balsamic Brussels, I used bacon as the base. But after a couple of go arounds, we found that we preferred pancetta, and chard, which is more tender than kale.

It ain't the prettiest dish.

Pesto Chard 01

But the Missus likes it with black lentils topping roasted cauliflower. I like it with bread as an appetizer, or mixed into a warm salad or even topping pasta/mashed cauliflower.

Along with the diced chard stems, I use onions, garlic, and cherry tomatoes.

Pesto Chard 02

Pesto Chard 03

I also use double concentrated tomato paste, both sun dried tomatoes and the olive oil from the tomatoes, and garlic paste to adjust seasoning.

Pesto Chard 06

Another key point is that I don't add salt until after I mix in the pesto and taste. I squeeze out the olive oil from the sun dried tomatoes to help make that tablespoon. Please check the label on the pesto you use; make sure it has pine nuts, olive oil, and at least Pecorino Romano cheese on the ingredient list. Of course it should have Basil….I've seen so called "pesto" using spinach! Or just make your own!

Chard with Pesto, Pancetta, and Tomatoes

2-3 oz Pancetta sliced into lardons
1 bunch Chard leaves stems and large ribs removed.
1 cup Minced Chard stems
1/2 (about 1 cup) Onion diced
1 Tb Sun Dried Tomatoes in Olive Oil minced
1 Tb Olive Oil from Sun Dried Tomatoes
3-4 Cloves Garlic minced
1 Tsp Oregano
2Tb + 2Tb Extra Virgin Olive Oil
3Tb (More if needed) Double Concentrated Tomato Paste
Garlic Paste (if needed)
1 cup Cherry Tomatoes halved
2 Tb Crisp White Wine
1-2 Tb Balsamic Vinegar
3-4 Tb (More if needed) Pesto
Salt and Pepper to taste

Add 2 Tb Extra Virgin Olive Oil to a pan along with Pancetta and cook over medium heat to render out the fat. Pesto Chard 05
Remove Pancetta to paper towel lined bowl once cooked.
Turn heat up to high and add 2Tb EVOO (to the rendered pancetta fat), chard stems, diced onion, sun dried tomatoes, oil from sun dried tomatoes, oregano, and garlic to pan and saute.
Once onions turn translucent and ingredients start to soften add cherry tomatoes and stir.
Add white wine to deglaze, then add Balsamic vinegar and saute.
When the tomatoes start to break down stir to move all ingredients to the edges of pan.
Add chard to pan. I also then add an additional 2Tb EVOO on top of the chard.

Pesto Chard 07

Fold chard into other ingredients. When chard starts to soften I stir and mix well.
When the chard mixture has reached the desired texture, I lower the heat and mix in the pesto.
When pesto is mixed in, I turn off the heat, taste, and add fresh ground black pepper, salt, and more pesto if desired, and mix well.
I usually then remove to a large storage container for use. Top with crisp Pancetta when serving.

I also use the same technique using merguez, harissa, cumin, and coriander for a similar dish which went well with couscous.

IMG_8587

As I mentioned in previous posts, this is more about technique than a precise recipe. If you try it out, let me know how it goes!

Pesto Chard 08

Have a great week!