Chicken Cacciatore-ish. Cathy’s one pot meal.

mmm-yoso!!!, the blog that you are reading, is about food that Kirk, ed(from Yuma) and Cathy, as we, as a few other friends, eat.  Sometimes we go out to eat,sometimes we stay in.  Today, it is Cathy's turn to blog. This is an "in" meal.

Hi. Well, this has been some year for me so far. I have been busy with quite a few projects and also have done some cooking, using items on sale this week.  This is another meal for two for $5.Cacciatore 001 
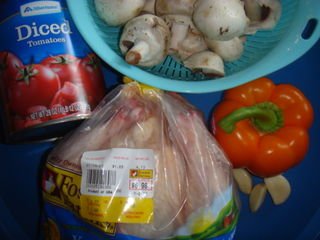
Actually, you'll pay more for all the ingredients, but this should serve at least four (do you really eat 1/2 chicken all by yourself?), so the portion price is less than $2.50.

The word "cacciatore' means 'hunter' in Italian. This stew, made with tomatoes and mushrooms is traditional in that way. I've added and changed a few things…

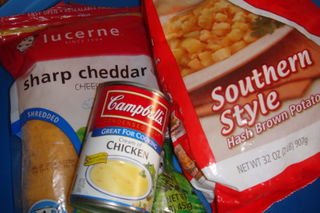
Whole chickens are on sale at Vons for 77¢/lb. As long as you know how to use a knife to cut the chicken into pieces, you will save money over buying a cut up chicken.  You'll also need a large can of diced or chopped or stewed tomatoes ( I always stock up when on sale), a bell pepper (the orange ones were on sale for $1.99/lb whereas the green ones were 89¢ each…the small ones really do not weigh 1/2 lb you know), some garlic and three small handfuls of fresh mushrooms (less than one pound).

Cacciatore 002 Of course, you will also need flour, salt, pepper and I use Herbes de Provence as my choice of flavoring…

 Cacciatore 003

Heat 2 Tbs olive oil in a deep skillet (remember: hot pan, cold oil, food won't stick).  Put in the pieces of chicken which you have dredged in the flour/salt/pepper mix.  Let it brown.  You *never* turn it back and forth.  Put it in, let it brown on one side, then turn it over to brown on the other side. (also. don't bother cooking the back piece or neck and gizzards…freeze those pieces and you can use them to make a chicken stock later). 

Take the chicken out of the pan, leave the oil in and add the chopped bell pepper and chopped fresh garlic cloves. Cacciatore 004

Let the peppers and garlic get soft. 

Put the chicken back in.

Top with the canned tomatoes.

Cacciatore 005

I then add the Herbes de Provence and some liquid- stock, broth or a few cups of wine… 

Cacciatore 006 

Cover and let this cook(simmer) for about 30 minutes.

Cacciatore 009 

Meanwhile, quarter the mushrooms (don't slice them…when they cook, they will get mushy).  Put in the pan, with the lid and simmer about 10 minutes more.

Serve on top of cooked pasta (remember- cook in salted water and drain; don't rinse), or just with some good, crusty bread.Cacciatore

Cathy's Cacciatore

1 whole chicken, cut.  Reserve back to use for stock.

Dredge in flour/salt/pepper

Brown in 2 Tbs hot oil in deep pan. Remove from pan.

Brown garlic and bell pepper in the pan.  Put chicken back into pan.

Pour one large can tomatoes and 2 cups liquid (broth, stock, wine) over all in pan. Add some Herbes de Provence.  Cover and let simmer for 30 minutes.

Uncover, add about 2 cups quartered fresh mushrooms. Cover and simmer for 10 more minutes.  Serve over pasta.


Red Cooked Pork Hock & Red Cooked Oxtails

RedCookedP01 

Sometimes even I give in to impulse buying. I saw Pork Hocks (the lower portion of Mr Piggie's front leg) on sale for 79 cents a pound at 99 Ranch Market. I couldn't resist….. I bought three, which came out to a shade over $3.25!

Meet the piggies…..

RedCookedP02 

So what to do with these? I decided to do straight forward Red Cooked Pork Hocks. For us, anything Red Cooked means a 3-phased meal plan. First we eat the meat, second, after straining, comes the boiled eggs, and third phase would be some chicken(first browned than) stewed gently in the remaining liquid with some tuberous vegetable. In theory, you could keep the braising liquid(aspic) going forever, by adding water and other liquids, seasonings, straining and skimming, and refrigeration. I've read accounts of braising liquids and soup being perpetuated in this endless cycle. I once mentioned this to a friend, who was so grossed out over this idea, that she stopped eating with me. I'd better not tell her about sourdough starter since she's a bread lover!

Red Cooking is usually associated with Shanghainese Cuisine, though the Missus recalls it being used in Her household growing up. It is a pretty easy cooking technique, and pretty much lives up to the "sweet, salty, and red cooked" monnicker often used with regards to Shanghai cuisine. There are basically 2 types of red cooking, the first is a short cooking approach, which uses a sugar-based caramelization technique of melting sugar in oil to start things out. This is used with cuts such as pork belly, and takes from 40 minutes to an hour. Since I was using a much tougher cut of meat, I used the slow braising technique, which starts with a "browning step", in the case of the pork hocks, an "oil blanching", with the Oxtails, a pan searing.

So here goes….. I know many familes have their own "secret" recipe. Here's my not-so-secret, but real easy recipe. I let the pork hocks and oxtails rest overnight before eating.

RedCookedP07 

Red Cooked Pork Hocks
3-4 Pork Hocks, rinsed, patted dry with paper towels.
2/3 Cup + 2 Tb Soy sauce
1/3 Cup Dark Soy Sauce
1/2 Cup Dark Brown Sugar + up to 1/4 Cup reserve
2/3 Cup + 1Tb Shao Xing Wine
5 cloves garlic roughly chopped
1-2 1/2" knobs of ginger smashed
3 Star Anise broken in half
4 Scallions – white part only, roughly chopped
1 piece dried tangerine peel broken in half
1 2-3" cinnamon stick
4-5 Cups Water.
2 Tb Canola Oil
3 Cups Canola Oil for frying

1 – Rub Shoulder with 2Tb Soy sauce and 1Tb Shao Xing, and let rest for 15 minutes.RedCookedP03
2 – Heat oil in a wok until a temperature of 375 degrees. Place pork hock into oil, and fry, ladling oil over the exposed side of the pork hock for about 1-2 minutes. Turn and repeat.
3 – Remove pork hock from the oil and place on a plate lined with paper towels.
4 – Repeat for all the other pork hocks.
5 – In another pan or wok heat 2Tb, and add the garlic and scallions and saute until fragrant.
6 – Add 2/3 Cup Shao Xing wine, and bring to a boil.
7 – Add Soy Sauces, ginger, 1/2 cup dark brown sugar, star anise, tangerine peel, and cinnamon, and bring to a simmer.RedCookedP04
8 – Add 3 cups of water, and place pork hocks in liquid. Add water to cover up to two-thirds of the pork hock.
9 – Bring to a low simmer.Turn pork hocks every hour. After 3 hours taste the liquid, and adjust sugar or water as necessary. I doubt that you'd need more soy sauce.
10 – Cook for another hour, or more as necessary. (These hocks took me 5 hours) The pork should be tender, and close to, but not falling off the bone.RedCookedP05 Or as the Missus says, "ewww, it's starting to look like an Old Man's neck."
11 – Let the hocks cool in the liquid. Once the liquid is cool, remove the hocks and place in a container and refrigerate.
12 – Strain braising liquid, and refrigerate overnight.
13 – Heat liquid (now an aspic), and place pork hocks into pot.

RedCookedP06
14 – Remove the pork hocks when heated, cut meat off the bone and chop into pieces. Use the braising liquid as the sauce and pour over meat and rice. Of course you can always go "Flintstone" and grab the whole bone and gnaw away……
15 – Place 6-8 shelled boiled eggs into braising liquid…..and so forth…..

Adjusting for Oxtails:

You can us the same basic technique as my Chinese style Braised Oxtails. Basically searing off the Oxtails seasoned with salt and pepper first.

RedCookedOxT01 

Adjust cooking times as necessary.

RedCookedOxT02 

I think I like these even more…..

RedCookedOxT04 

Remember to wait a day (if you can), it'll be worth it!

Chicken and Dumplings- Cathy’s inexpensive way

mmm-yoso is the food blog.  Cathy is writing about a meal she makes for less than $5 for two.  Again.

Happy New Year everyone, and thank you for the good wishes.  I hope 2009 is good for all of us. 

 Here I am again, on a Friday, posting about a meal you can make for two for $5, using ingredients on sale this week…or in the future.  It is a simple version of chicken and dumplings which I like better than the one on a box of "biscuit mix". ChickenDumplings 001  (If you have cravings, which I understand completely, this is a very easy way to satisfy those cravings).

The main ingredients (which do not have to be name brand) are 32 ounces of Chicken STOCK (it has  been made with vegetables and has more flavor than broth; most boxed stocks are on sale this week for $2 for 32 ounces), two cans of cream of chicken soup (the generic is just as flavorful as name brand and so go by price), a can of FLAKY biscuits-jumbo or small- and some leftover cooked chicken.   Chicken legs and thighs are on sale for 99¢/lb, or you can cook a chicken, depending on the price (I could only find whole chicken for $1.59/lb this week…) if you need a calculator to figure this one out, call me or send an email…

Yes. Canned biscuits.  When I grew up, mom called them "Ballard Biscuits" and when I lived in the South, people called them "Dumpling Biscuits".  For what it is worth, The Mister made a horrible face and was prepared to not like this recipe when he heard how I made it (with the canned biscuits), but He really liked the taste the first time and every time since.

ChickenDumplings 002 

Also, flour, salt and pepper.  I always use white pepper.  It has heat, but tastes kind of nutmeg-esque to me.  Also, you don't see pepper flakes on everything.

ChickenDumplings 003   

Pour the stock and the soup into a pot and bring to a boil.  (one hint:  I do not put all the stock in at first, use it to "rinse" out the soup can, instead of trying to scrape out bits of soup- you are not adding water to this).

Heat to boiling, then you will bring it to a very low simmer, while in the meantime,

ChickenDumplings 005 

you have opened the can of biscuits, divided the flaky layers into thirds, and coated each 1/3 of a biscuit in the flour/salt/pepper mix.

You are then going to tear each layer of  floured flaky goodness into thirds again (making each biscuit into nine pieces).

ChickenDumplings 006

You then drop your 1/3 of a 1/3 biscuit, piece by piece, individually, into the pot of (now simmering) broth/cream soup mix.

YOU *NEVER* STIR THIS OR YOU WILL END UP WITH DUMPLING FLAVORED SOUP

 ChickenDumplings 007

Press the 'dumplings' down into the liquid.

Let this simmer for at least 15 minutes. More like 20… It can go longer.  Remember, dumplings are soft, not crispy…  They are cooked.

ChickenDumplings 008 

See?


ChickenDumplings 009

Meanwhile, press in the leftover chicken.  So it can warm up.

Serve.  It probably does not need any additional seasoning. ChickenDumplings 010 

Cathy's Chicken and Dumplings

1 box (32 ounces) chicken STOCK, 2 cans cream of chicken soup. Mix and heat to boiling.  Put to low simmer.

One can refrigerated flaky biscuits, flour, salt and pepper. Divide the flaked layers of one biscuit into three, dip in flour, salt, pepper mix.

Divide those floured flakes layers into three pieces each and drop individually into simmering broth/soup mix.  NEVER STIR-push the pieces down into the liquid.  Let stay at very low boil for 15-20 minutes.

Add shredded/chopped leftover chicken (about 2 cups) , again pressing into pot until heated through.  Serve.

Southern Plate's Southern Chicken and Dumplings recipe can be found here.  

Fancy-ish French Toast and bacon-Yet another $5 Friday meal

mmm-yoso!!! is the blog.  About food.  Written by Kirk, ed(from Yuma), Cathy and a few others.  Cathy is writing today so everyone else can recover from Christmas festivities.

Hi.  I'm back to writing about a meal for two for $5 or less, using ingredients on sale this week.  This time, since many people are having quite a few days in a row off from work, and the ingredients used are on sale this week, I thought I'd show what we did for breakfast today.

Pannettone French Toast 003

It is the day after Christmas and many 'Christmas-y'  items are at least half off.  This year, many items were half off before Christmas.  I bought six Panettones ( usually described as Festive Italian Bread-really it is a bread made with at least raisins and orange and lemon peels and zests) at Fresh and Easy and also some bacon and eggs. 

The bread is baked in paper shells which peel off easily.  Panettone looks like a giant muffin, but do not use or eat it like it is cake.  It is abread, made with yeast.

Pannettone French Toast

 I noticed almost every market has Farmer John brand  bacon on sale for $3 a pound this week. Pannettone French Toast 004

So, cook the bacon first. Leave the grease in the pan.

Soak some slices of Panettone in an egg-milk mix.Pannettone French Toast 002 

Then fry the slices (I cut each circle of bread in half)  in the bacon greased pan. Pannettone French Toast 006 

Flip over to cook the other side. Pannettone French Toast 001 

A 'proper' French toast should have a crispy exterior and soft, creamy interior.  That is why frying the soaked bread in the bacon grease helps.

Pannettone French Toast 005 

I served the French Toast with the bacon and some tangerine segments, fresh from the yard.  Tangerines are also on sale this week.

I hope everyone is have a wonderful Holiday Season and thank all of you for your good wishes and hope all of us have a wonderful year ahead!!!

Cathy's French Toast

Sliced dry bread, 2-3 eggs, milk. Frypan with bacon grease and/or butter to cook.

If using plain bread, can add orange juice or vanilla extract to egg/milk mix.

Soak long enough that the center of the bread is soft. You should only flip the bread once one side is cooked and when the second side is cooked, it should be finished-don't keep flipping it.

Happy anniversary, sweetie

Seafood Casserole(or, Poor Man’s Mayo-Free Mock Panko Dynamite)- very easy and tasty

mmm-yoso!!! is the blog about food.  Here is yet another episode, written by Cathy.

Special Thanks to The Office Goat for giving me a more accurate title after trying the recipe.  I need a Thesaurus for Christmas…

Hi.  I apparently forgot to get all of you to sign my Vacation Request so I could skip a couple of $5 Fridays.  Sorry.  I try to show how to make a meal for two for $5 using ingredients on sale that week.  That is the concept behind this series anyhow.  

This recipe is so simple and wonderful.  If you aren't lactose intolerant. Once you taste it, this is like crack.  You will want it again and again and more each time.  It is rich, decadent and wonderful.  The Mister said I should not have put up such a mundane title or label for this recipe. If you have read this far, continue.  I promise you will love this simple recipe.

 I usually can find uncooked seafood on sale or marked down, and of course for the photograph today, couldn't.  Fresh and Easy marks down items that are dated to go bad in the next day or so, and the seafood has a small sticker which will change color if the contents have gone bad.  If you have a small casserole dish, buy about half as much seafood to fill it.  Raw  fish, scallops or shrimp or some cooked lobster, crab or that crab-like product.

DSC02422

For my casserole dish, 10 ounces is more than enough seafood.  You also need one 'tube'/packet of crackers (see how good I am- multi grain Saltines)(Ritz crackers are particularly good, by the way), a stick of butter and some half and half, salt and pepper.

DSC02423 Crush the crackers, pour in the stick of melted butter and mix. 

A small layer of buttered crackers can go on the bottom(you can spray with a non-stick coating first if you would like). 

Then all the seafood on top of that.  

DSC02424'


DSC02425
 

DSC02426

Top with the rest of the butter/cracker mix, add salt and pepper.

DSC02427 
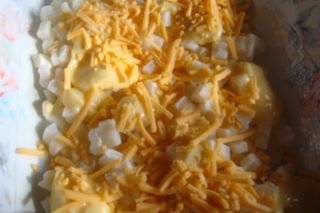
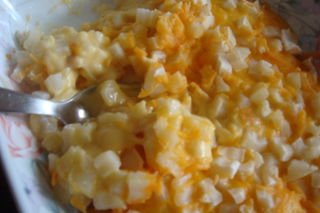
Pour half and half to soak in the crackers, but not too much.

Bake @ 350° if raw, 325° if cooked seafood is used for 30 minutes or so, until top is browned.  
DSC02428   DSC02430

 The scallops are cooked and buttery and the crackers are both crispy and creamy…once you taste this, you'll crave it and sometimes might just bake crackers and butter with some half and half…

Have a nice weekend.

Cathy's Seafood Casserole

8-10 ounces raw seafood (fish, shrimp, scallops) or cooked crab, lobster or surimi.

One packet plain crackers (Saltines, Ritz)

One stick butter

Half and half, salt and pepper.

Crush crackers and mix with one stick melted butter. Layer on bottom, layer with seafood, layer rest of crackers. Salt and pepper top layer of cracker butter mix.  Pour half and half to soak.  Bake uncooked seafood @350° for 30 min (already cooked seafood can go at 325°)  until top is browned.  Let cool before burning the top of your mouth.


The Big Kahuna Files: Shrimp Chow Fun & Stir Fried Morning Glory

This one is for FOY "Liver" in hopes that he did, or will soon get his Big Kahuna Burner!

Every so often, when I check referring sites, searches, and other stats, I will without fail, always notice that someone has been using one search engine or another using the phrase "high BTU burner" or "Big Kahuna". And it always seems that I'll get at least one comment on any post where I've used my Big Kahuna (why does that just sound wrong). Even though Amazon seems to have replaced the Big Kahuna with another Eastman Outdoors product called the Outdoor Gourmet New Revolution Burner, it looks like Eastman Outdoors still sells the Big Kahuna. With that in 06102008 006 mind, I've created a category called thBig Kahuna Files. My high-heat cooking experience has been limited to various stir-fry and noodle dishes, and I usual don't bother to post. Those posts would contain an ingredient list of only oil, dried shrimp, garlic, salt, and "insert green leafy vegetable of choice". I just let her rip…….and high heat will do her thing.

But for a change, here are a couple of other items I've cooked with the Kahuna recently:

Shrimp Chow Fun:

ShrimpChowFun01 

This came out waaaay better than expected, even with the lousy noodles I picked up at 99 RanchShrimpChowFun04Market. The shrimp were also too large, I had 12-16U, and smaller shrimp would have suited me better. One more thing, I also tried out Lee Kum Kee brand Seafood XO Sauce, which should be renamed, "rancid, second rate chili oil…." Better to go with sesame oil, or even better, make your own XO sauce…. but that's another post.

Some key points – at least for me:

 - Don't crowd the wok, more is not necessarily better.

 - Have your mis "en place". Have everything, including seasonings within easy reach.

– Control of the heat is important.

– Don't disregard your "nose" it'll tell you so much.

The Recipe – though I don't think you'll need one! Let's just call this a "pseudo-recipe"….

1/2 lb Chow Fun NoodlesShrimpChowFun02
4 Tb Canola Oil
1/3 Pound Shrimp

For Shrimp:
2 Tb Shao Xing wine
1 Tb Light Soy Sauce
Salt

1/2 Onion Sliced
1 Cup Bean Sprouts (I didn't bother to pick through them)
Up to 1 cup vegetable of your choice sliced. (i.e. celery, green bell pepper, etc)
2 Stalks Scallions, green parts only, sliced in 1" lengths.

2 Tb Dark Soy SauceShrimpChowFun03
3-4 Tb Light Soy Sauce
White Pepper
Sesame Oil to Taste

1 – Shell and devein shrimp, marinate with wine, soy sauce, and salt for 10-15 minutes.
2 – Remove shrimp from marinade and use 2 Tb oil to cook over high heat for a few minutes. Remove from wok.
3 – Replace oil and add vegetable (in this case all I used was 1/4 of a red bell pepper) and onion to wok.
4 – Stir fry for 1 minute, or until vegetable starts to barely soften.
5 – Move the veggies to the side of the wok using your spatula. If the bottom of the wok is too dry, add another Tb of oil.
6 – Add noodles separating them as you place in the center of the wok. A clump is a no-no.ShrimpChowFun05
7 – Let the noodles sit for a few seconds. You'll notice that they'll start to caramelize and blister. Using a pair of long chopsticks, mix noodles, add dark soy and 3 Tb Light Soy and mix. Don't do the "pour around the rim of the wok" thing, unless you want to add a burnt soy flavor to your noodles.
8 – Lower heat to medium and add bean sprouts and shrimp while using chopsticks to combine ingredients.
9 – I add the scallions last, as I like them crisp, with a bit of a "bite". Keep on stirring.(Keep them chopsticks going….)
10 – Lower heat, taste, add white pepper to taste, and more light soy sauce if necessary.
11 – Remove from heat and add sesame oil to taste.

All of this will take just a few minutes…….

Stir Fried Morning Glory:

It just seemed like we couldn't get enough of this during our trip. The Morning Glory in SEA is much more tender than what we have here in the states. The prep is simple, and I guess this is another pseudo-recipe. The results are wonderful:

StirFriedMorningGlory01 

In this case, I didn't use any sugar, and just a few drops of fish sauce, mainly for the fragrance.

1/2 bunch Morning Glory (aka Ong Choy, Pak Boong, Kang Kung, Kang Kong, etc, etc, etc…)
3 – 12(!!!) Thai Bird Chilies.(The 12 is out of respect for Joy from Tamarind, who told me, 12 chilies is Lao heat)
2 Tb Canola Oil.StirFriedMorningGlory02
4-5 Cloves of Garlic sliced
1/2 tsp sugar (optional)
1 Tb Oyster sauce
Fish Sauce (optional)
2-3 Tb Light Soy Sauce

1 – Slice rinsed and dried morning glory into 1 1/2" lengths
2 – Remove green stem from chilies, and slice garlic. Alternately, you could bruise the chilies and garlic in a mortar – this will make them significantly hotter.
3 – Mix together Oyster Sauce, sugar(if using) and 2 Tb of the Soy Sauce.
4 – Heat wok over high heat. Add oil, then chilies and garlic. Stir quickly.
5 – When the garlic starts to soften (sometimes in a few seconds). Add morning glory and stir fry.
6 – When morning glory starts to wilt, lower the heat to low, and add oyster sauce mixture.
7 – Taste and add Fish Sauce(if using) and additional soy sauce if necessary.

They'll be no more excuses for soggy Ong Choy…….

06012008 006 

You know, I haven't been very delicate with my Big Kahuna….. it sits on the back porch, at the mercy of the elements. I should probably treat it better. But it has held together rather well. During their last visit, I cooked a few simple stir-fries using the Kahuna for the In-Laws. They proceeded to tell the Missus that She "shouldn't bother learning how to cook anymore since I've taken my cooking to a whole 'nother level."

Oh the joy of 65,000 BTU's……

Nasubi no Nimono (Simmered Eggplant)

Okay, here's an easy one. The Missus requested the "eggplant dish" from Okan, without the miso. It suddenly occurred to me that I hadn't made this before. Having had some previous experience with simmering eggplant, I know they tend to disintergrate and get mushy quickly. So I turned to Shizuo Tsuji's classic book, Japanese Cooking: A Simple art. Even though this recipe is not from the book, I consider it a must for any Cooking Library. In the book, eggplants are scored lengthwise and fried in a pan before subjecting it to the simmering liquid.

NasuNoNimono02 

NasuNoNimono04 This worked out better than expected. Scoring also helped the eggplant absorb the dashi. The Missus thought they were fantastic. The only problem now, is after making this, along with Gobo Salad  and Kabocha Nimono, the Missus no longer sees a need in visiting Okan! I'll have to figure something out…..

Nasu no Nimono (simmmered eggplant):NasuNoNimono01

6-8 Japanese Eggplant
2 Tb Canola Oil
2 Cups Dashi
1/4 Cup Soy Sauce – This time I used Kikkoman whole bean
1/4 Cup mirin
2 Tb Sugar

1 – Chop off the stems of the eggplant, than cut fine slits about 1/4 inch apart along the length of NasuNoNimono03 the eggplant.
2 – Heat a saucepan over medium heat, add oil, turning saucepan to make sure it is evenly coated.
3 – Add eggplant and fry until the skins wilt. Remove the eggplant from pan when done.
4 – Heat dashi, soy sauce, and mirin in a pan over medium heat. Add egglpant nad bring to a boil, than lower heat to a mild simmer.
5 – Cover and simmer for 15 minutes. After 15 minutes and taste broth. Adjust flavors and finish simmering for another 5 minutes.
6 – Remove from heat, cool, and place in the refrigerator overnight.
7 – Slice the eggplant into 2-3 large slices before serving, pour a few tablespoons of the broth overNasuNoNimono05 the eggplant as well.Serve warm or cool.

Man that broth is good……

Saturday Stuffs: Seafood Island coming soon, and our “Thanksgiving leftover” dish.

Coming Soon – Seafood Island:

Many thanks to the half dozen folks who emailed me about this, including FOY, Tanya and CandiceW. I passed by yesterday, and there is still a bunch of construction going on.

11272008 001 

Looks like a very nice restaurant, in a bit of a strange location. You can check out the website here. The menu is humongous, enough to give you "Vietnamese menu overload." The cuisine is described as "authentic" Vietnamese, Chinese, and Korean (??!??) cuisine. Regardless, it sure does look like a seafood lover's dream.

I have one question though. And this kinda bothers me a bit, check out the "testimonials" written on the contact page. This place isn't even open yet, how can you have testimonials? I'm kinda slow, so help me out with this one.….

Seafood Island
7580 Miramar Road
San Diego, CA 92126

Our Thanksgiving leftover dish - Oden:

I like to think we're pretty good at minimizing food waste. The Missus and I love leftovers, and try not to waste. Unfortunately, there's always the case of making a dish, and having stuff left over. And sometimes we do end up throwing things out.  We're trying to be a bit better, and not waste. One of the dishes that is heaven sent when it comes to having leftovers from making various Japanese dishes is Oden. I had thought we'd be eating pretty simple this Thanksgiving……. until the Missus decided She wanted, "something good for a change". One of the "somethings" was Gomoku Gohan a mixed rice dish. And in addition to the leftover dashi, I had a bunch of other stuff left-over from the variety of ingredients the Missus wanted in Her rice.

11282008 008 

Having a variety of fishcake in the freezer, purchased during sales are heaven sent.

11282008 001

11282008 015 There are several standard Oden items the Missus doen't like in Her Oden; Kamaboko and Chikuwa, two types of fishcake…which ironically, are two of my favorite things! The item the Missus requires in Her Oden are hard boiled eggs and Konnyaku.

If you're not up to making your own shiro, there are many types of Tsuyu (instant soup base) available, and you just have to add water. If you use them, make sure you're not sensitive to MSG.

So here my Thanksgiving leftovers version of Oden:

11282008 012  

Hope you're having a great weekend!

Easy (Thanksgiving) Dinner side dishes

mmm-yoso!!! is the food blog, written by Kirk and a few friends.  Today Cathy is talking about cooking.

Hi. I hope everyone is getting ready to have a day or two off from work next week and planning on a little feast with family and friends.  It is Friday, when I try to show an inexpensive meal for two, however I figure I'll just show some easy(two or three ingredient) and tasty side dishes that you can prepare for home or to take to someone's home as your contribution to the meal. Side dishes 001 

Yep, you're seeing it correctly.  Sweet potatoes, yams, whichever you prefer- on sale this week and next.  Get about as many as will fit in the casserole dish you are using

Then there is that can…of frosting. Coconut pecan frosting.  It has all the ingredients you'll need.  Really

Side dishes 002 

Chop the tubers into about the same size pieces. DON'T peel.

As always, put root vegetables into cold water and then turn on the heat.

Boil, put a fork in to see if tender. 

Cool.  Don't rinse.

Side dishes 006  
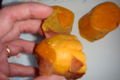
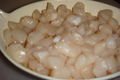
See how easily the peels come off…

Side dishes 007

Side dishes 004 

Put the cooked and peeled potatoes/yams in the casserole dish, top with the frosting and into the oven it goes! (I just toss things in the oven while the turkey is cooking)

Take it out when the frosting is kind of melted.  It is already cooked and can be served and eaten hot, warm or cooled (like, um at a tailgate…)

Side dishes 021 

Next two ingredient side dish: Bacon and Brussels sprouts. Also on sale this week.

There are no measurements you know.  You can make this for yourself for lunch, with two slices of bacon and five sprouts or the pound of bacon and  a casserole dish of sprouts.

Side dishes 022

Chop and cook the bacon until crispy.  *Leave* the grease in the pan and remove the bacon.

Side dishes 024 

Peel any bad outside leaves from the sprouts, chop the stems off the  bottom, cut the sprouts in half.  Place centers down into hot bacon grease first.

The steam from the grease will help cook.  Remove when tender and bright green color.Side dishes 033

Mix bacon with Brussels sprouts.

Serve.

Side dishes 011 

OK.  Next ingredients.  Fresh cranberries (12 ounce bags are how they are sold.

Side dishes 016  

You also will need one cup of sugar.

One cup of water.

Side dishes 017 

Put the sugar and water in a pan.  Heat until boiling.Side dishes 018 

You can see the sugar has melted and what is now formed is called "Simple Syrup"

Side dishes 019 

Add the cranberries. Bring back to a boil.

Side dishes 020 

Then lower the heat and simmer for about ten minutes.  The cranberries will pop.

Side dishes 028

Let cool to room temperature.  Then you can refrigerate.  The cranberry skins have helped form a pectin gel and it is done.  Fresh and simple.

Side dishes 010 

Really lazy dessert.  You all know I don't crave sweets, right?

Side dishes 013 

These pie crusts come like this. 

Side dishes 014 

Unroll, cut out ( I used one of my thick walled  coffee glasses)Side dishes 015

  This is pie crust, so is not at all sweet, but will come out flaky. I sprinkled some sugar on top before baking.

Side dishes 026 

Put in the oven and take out when the bottom is light brown, like those two upside down in this photo.  You can see the cookies puffed up and are basically flaky layers.  If they are not sweet enough for you, grab some of that cranberry sauce and dollop on top….

Side dishes 009 

Finally, my mom's "Hot dish".

Frozen potatoes, cream of chicken soup and cheese.

Side dishes 012 

Let the potatoes thaw.  Put a layer onto the bottom of a casserole dish, half the can of soup, some grated cheese. Do this again with another layer.  Top with a layer of potatoes and cheese and maybe some pats of butter.

Put into the hot oven.  The potatoes are cooked so this is another  more or less heat through item.

Side dishes 025 

This is a good side dish, or if you add leftover chicken, a good casserole.

I hope you've enjoyed this episode of a $5 Friday and that maybe you'll try these simple tasty sides for one of your meals.

Have a good weekend (and week, if you are taking a little vacation)!

Chinese Style Braised Oxtails

Sometimes shopping can be dangerous….no I'm not referring to the aggressive older Asian women, who "shopping cart check", push past, or just plain run you over like a hard nosed version of Lorenzo Neal. I'm talking about when something calls to you.…..I'm sure it has happened to you.  On a recent shopping excursion to Zion Market, I was flagged down by some Oxtails.

11172008 004   

"Hey stranger, going my way???"

Which I ended up purchasing. I had thought of making a nice Oxtail Soup….but this was vetoed by the Missus who said it was just too darn hot for soup. So what to make? In the end, I decided to throw together a Chinese influenced braised Oxtail dish. Taking ideas from various Chinese braising recipes, most notably Red Cooking.

11172008 011   

It came out rather well, served with fragrant Jasmine Rice, and Pea Shoots quickly stir fried with garlic and salt using the Big Kahuna. Overall, it was very easy, pretty much just cooks itself over the course of 3-4 hours. Not as sweet as usual red cooked dishes, no use of dark soy either(I was out of Dark Soy), and of course the chilies take it in a totally different direction. Letting rest overnight is a key step.

Chinese Style Braised Oxtails

4-5 Lbs Oxtails11172008 006
2/3 Cup Shao Xing Wine
2/3 Soy Sauce
3 Cups Water
4 Tb Dark Brown Sugar
1 Star Anise
1 2" piece of ginger crushed
4 Scallions – White part only chopped
5 cloves Garlic Roughly Chopped
2 Tb Soy Bean Paste
2 Pieces Dried Orange Peel
3 Tb Canola Oil
Salt and Black Pepper
2-3 Dried Chilies (optional)

1 – Season Oxtails with Salt and Pepper11172008 007
2 – Heat oil in a Dutch Oven or Pot, and brown Oxtails.
3 – Once Oxtails are browned, remove from pot. Drain all but 2-3 Tb oil from pot.
4 – Add Dried Chilies(if you are using them). Once chilies are slighly blackened and fragrant, add garlic and scallion. Stir until soften and fragrant.
5 – Add Bean Paste and mix in briefly until fragrant.
6 – Add Soy Sauce, Shao Xing, Sugar, and Water. Mix until sugar dissolves. Bring liquid to a boil.
7 – Add star anise, ginger, and dried orange peel.
8 – Reduce heat to a low simmer and place Oxtails back into pot.
9 – Cover and simmer for 3-4 hours, turning Oxtails occaisionally.11172008 016
10 – When Oxtails are very tender, remove from heat.
11 – Let cool, than refrigerate overnight.
12 – The next day, remove oxtails from braising liquid, and skim off fat as desired.
13 – Heat liquid, and strain.
14 – Place Oxtails back into braising liquid and heat.

Some other options – use the braising liquid to braise Fresh Shiitake Mushrooms, or you can thicken or reduce into a thick sauce, or just pour the liquid over rice and veggies like we did. I'm sure you can come up with many different combinations.

 11172008 015

Enjoy some gelatinous-meaty fun!

By request; here's a really bad photo of the Bean Paste I used that I took in a rush this morning.

BeanSauce